-----IMPORTANT -----
----- DON'T FORGET STEPS -----
----- 9E, 9F, and 9G ----
It can be quite intimidating to release on Itch, so I'll run through the process here. Even though this thread is long, the process is actually quite straightforward.
What you will need.
- A - An Itch Account + Already Joined Jam
- B - Your game compiled to HTML in Adventuron (select Menu / Compile in Adventuron).
- C - A high resolution image (or upscaled image) to represent the game in the itch directory (a thumbnail). This will usually be the "loading" screen of the game (the image that appears at the start of the game).
Steps To Upload A New Adventuron Project

-----------------------------------------
Step 0 - Create a new project in itch.io
Go to the top right of the itch website (whilst logged in, and select "Upload New Project").
-----------------------------------------
-----------------------------------------
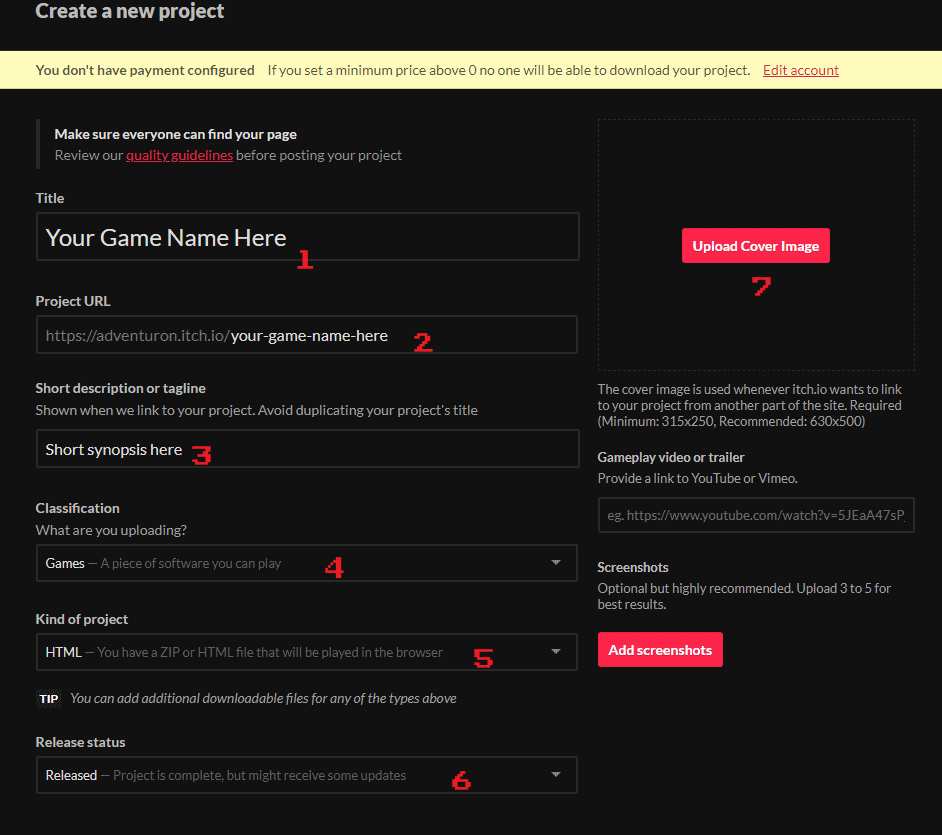
Step 1 - Enter Your Game Name
Enter the name of your game, spaces and a mixture of upper and lower case are acceptable.
Step 2 - Enter your game URL
This should all be in lower case, and seperate words by hyphens '-' character.
Step 3 - Enter a short synopsis of the game.
Step 4 - Select classification of "Game".
Step 5 - Select "HTML" as the kind of project.
Step 6 - Select the release status
"Released" if you are ready to release, other options are available too if the project is not fully ready. If you make the wrong choice here, it's easy to change this later.
Step 7 - Select a cover Image.
Click the "Upload Cover Image" button to bring up a file requester where you can select the cover image (more steps to follow).
-----------------------------------------
-----------------------------------------
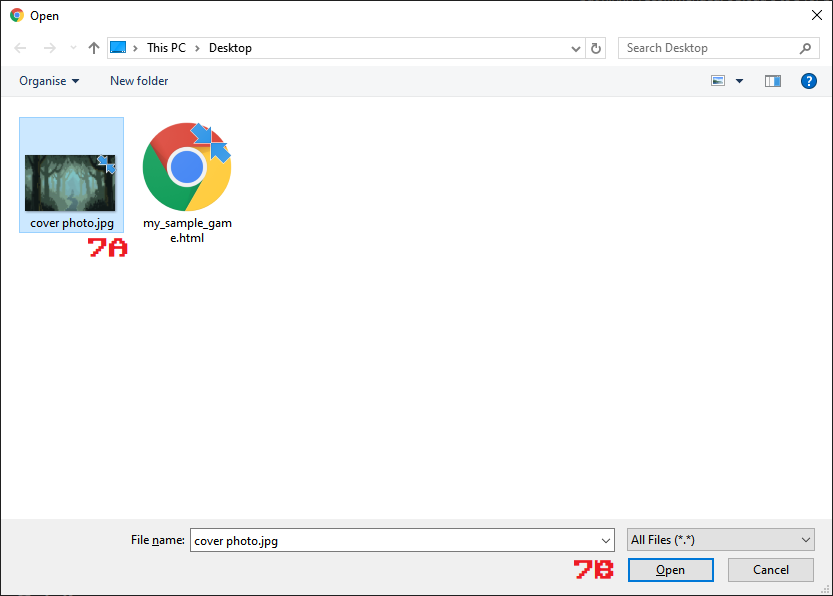
Step 7A - Navigate to the image file containing the cover image.
Step 7B - Click Open To Upload The Cover Photo
-----------------------------------------
-----------------------------------------
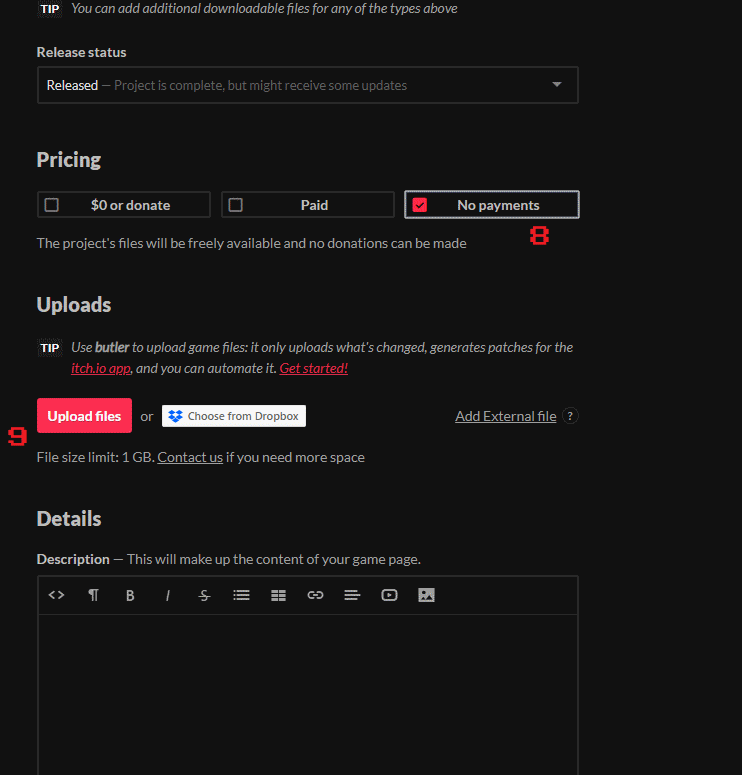
Step 8 - Select "No Payments".
Step 9 - Click "Upload files"
-----------------------------------------
-----------------------------------------
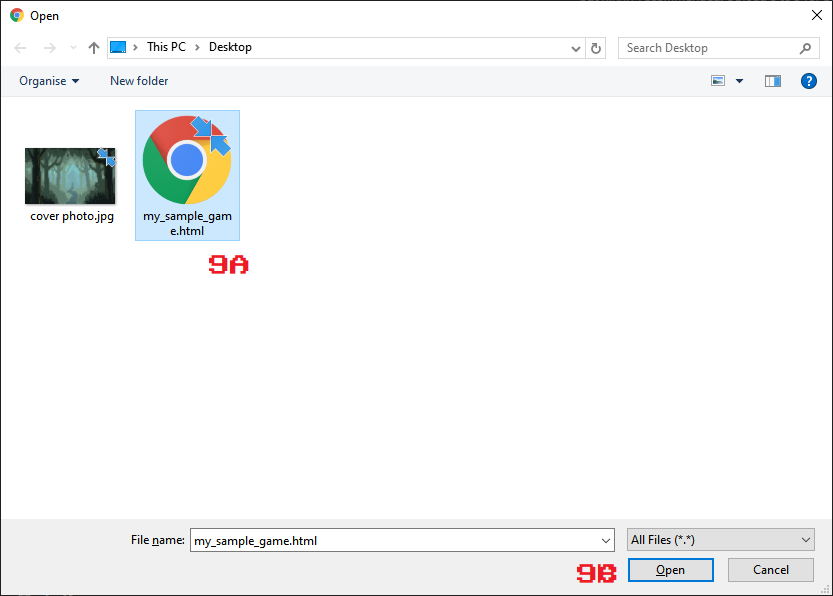
Step 9A - Navigate to the html file containing the compiled Adventuron game.
Step 9B - Click Open To Upload The Cover Photo
-----------------------------------------
-----------------------------------------
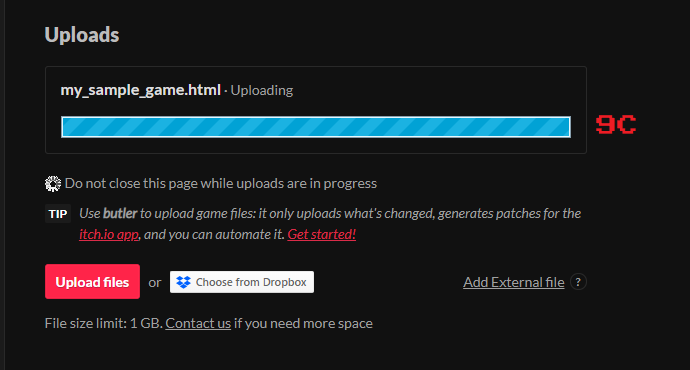
Step 9C - Wait for the Adventuron game to upload to the Itch server
-----------------------------------------
-----------------------------------------
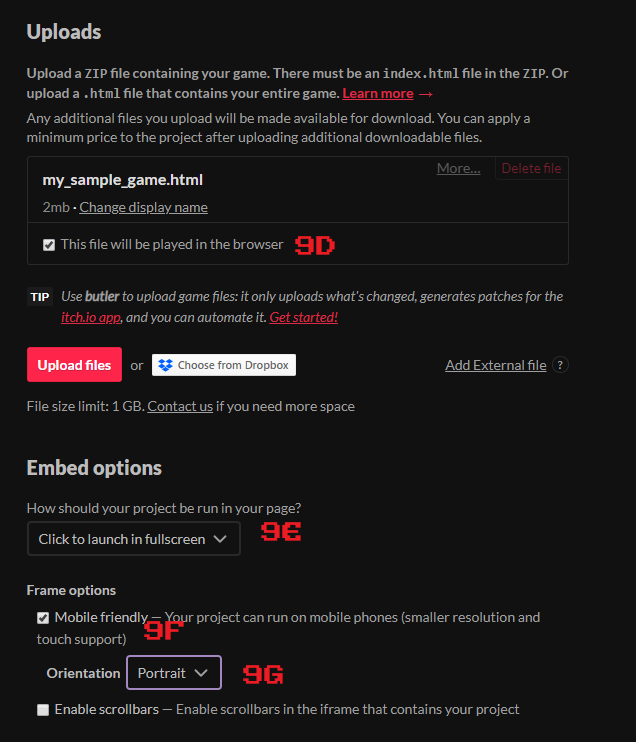
Step 9D - Select "This file will be played in the browser"
Step 9E - Select "Click to launch in fullscreen"
Step 9F - Check the "Mobile Friendly" checkbox.
Step 9G - Select "Portrait" as the mobile orientation (Adventuron is not optimized for landscape mode on smartphones).
-----------------------------------------

-----------------------------------------
Step 10 - Type in description of the game, this can be as descriptive or as brief as you like.
Step 11 - Select "Interactive Fiction" as the category
NOTE: Not all text adventures are interactive fiction, but this name is a legacy of Infocom being dominant in North America, and their particular brand of text adventure games being literary. Itch requires a category, and unfortunately, this is the most accurate "Text adventure" or "Parser based" should have its own category. Calling some text adventures "interactive fiction" is like referring to all movies as comedy movies. Sometimes a text adventure is just a puzzle box, and not a fiction.
Step 12 - Select "Portrait" as the mobile orientation (Adventuron is not optimized for landscape mode on smartphones).
-----------------------------------------
-----------------------------------------
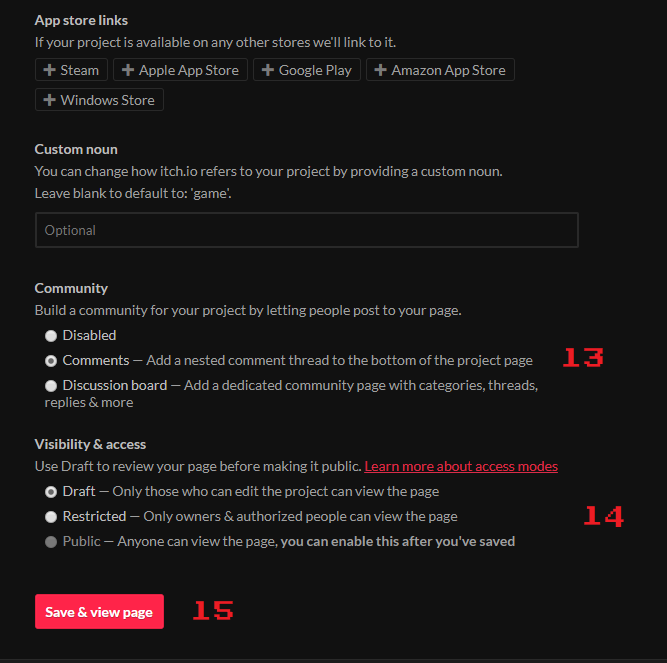
Step 13 - Choose if you want comments enabled on your entry (default is comments are enabled).
Step 14 - Select if you want the game to be public or not, certainly don't do this at first.
Step 15 - Save and view the page (do this a few times before making the game public to make sure the page is set up correctly).
Step 16 - Submitting the game to the jam comes is a final step - as I haven't done this myself yet, I will document this later.
-----------------------------------------
That's all for now. I hope this helps. Try not to make your game "public" until you are ready for others to see it. You are permitted to update your game as many times as you like before the jam submission period ends but best to wait before your game is playable before making is public. If you want playtester to try, it you can select "restricted" mode.
Be seeing you ....
Chris.


