The program still seems to have an issue with my USB mic but thanks to the ability to switch microphones I was able to get one to work through my aux port. Thank you very much :)
AshCruz
Creator of
Recent community posts
Yes these node groups can render objects with completely transparent backgrounds and the included compositing nodes make the cutouts as clean as posable so I would say this should fix you're problem. However, it could depend on your current setup. If you don't mind I'd be interested to see what your currently working with in order to give you a better evaluation and potential tips.
As a start you should have the Pixel Composit node back to it's original settings. The real setting you need to change is resolution of the "Dither-Bayers_ThreeTone" node in the shader. The value it should be "render resolution x" devided by "x scale" divided by ten: which in your case would equal 25.6. However that will be very low resolution to start. So you'll probably want to multiply that value, but when you do so make sure you multiply the resolution value in the pixel composite node by the same value.
for example
| multiplier | x1 | x2 | x3 |
| shader resolution | 25.6 | 51.2 | 76.8 |
| compositor resolution | 100 | 200 | 300 |
I really should have written better instructions because I completely forgot to mention this part anywhere. These node groups are all almost entirely math based, meaning that there is usually an equation you need to reference when tweaking the settings. Something I should probably do is add some more parameters to the node groups so that they can do all of this math for you. these will be things to think about for the next update I make.
I hope this was helpful and feel free to contact me with any more questions.
The thing with the Dither_8BitColor node is that it is creating noise because the colors on your model don't match any of the 64 colors in it's palette. the reason it is creating noise is because it is trying to mix the colors visually.
I looked at the twitter post you sent me and I think the best way to get that look is by using the Dither-Bayers_ThreeTone node with a color ramp or my color ramp math node like this.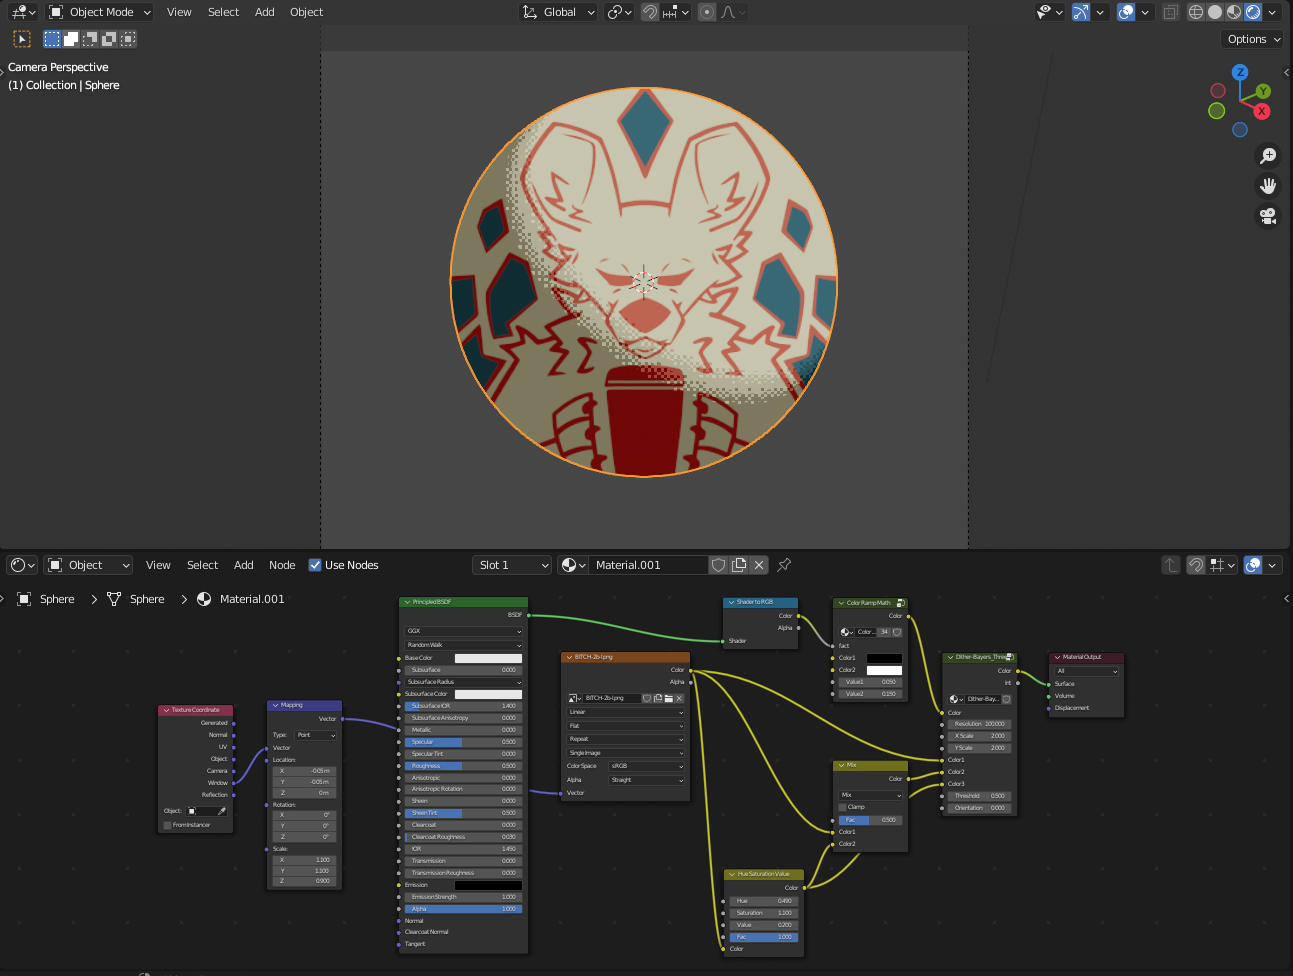
I would put the BSDF through the color ramp to make the shading more crisp and have the texture added after using the Dither-Bayers_ThreeTone node.
The settings I used in the above image I think best match the style of the twitter post you sent me but the look could be different by changing the values in the color ramp and Dither-Bayers_ThreeTone nodes.
I have two different methods that I like to use. The first method I like is to bring the texture through the color of a two tone or three tone dither. I either use different textures for the different levels of light, or I just make the one texture darker or lighter using the hue saturation value node.
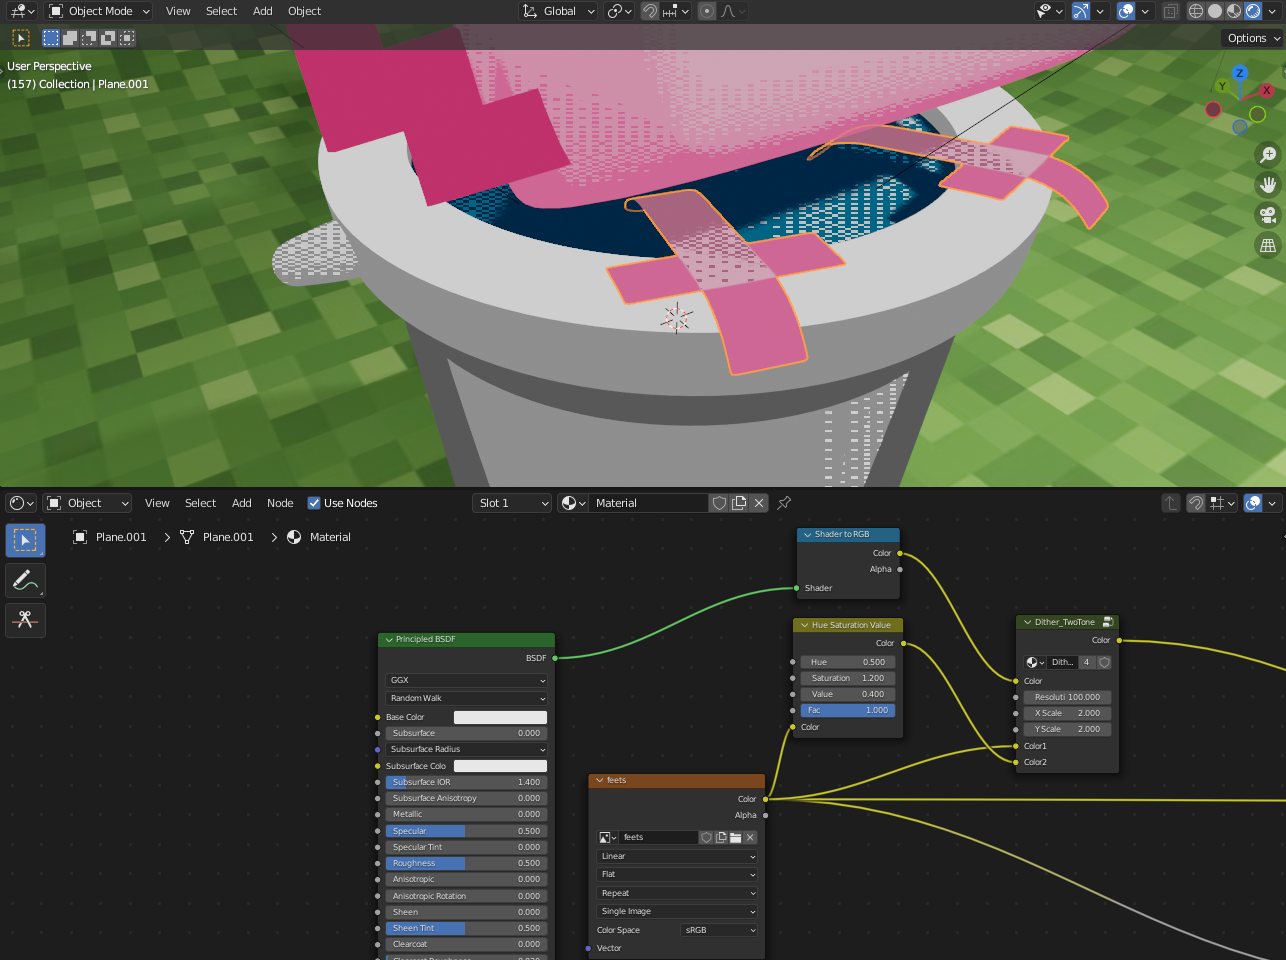
My second method involves setting up the BSDF shadier and the texture normally and just bringing it through one of the preset 1, 2, 3, 4, 6, or 8bit color color palette.
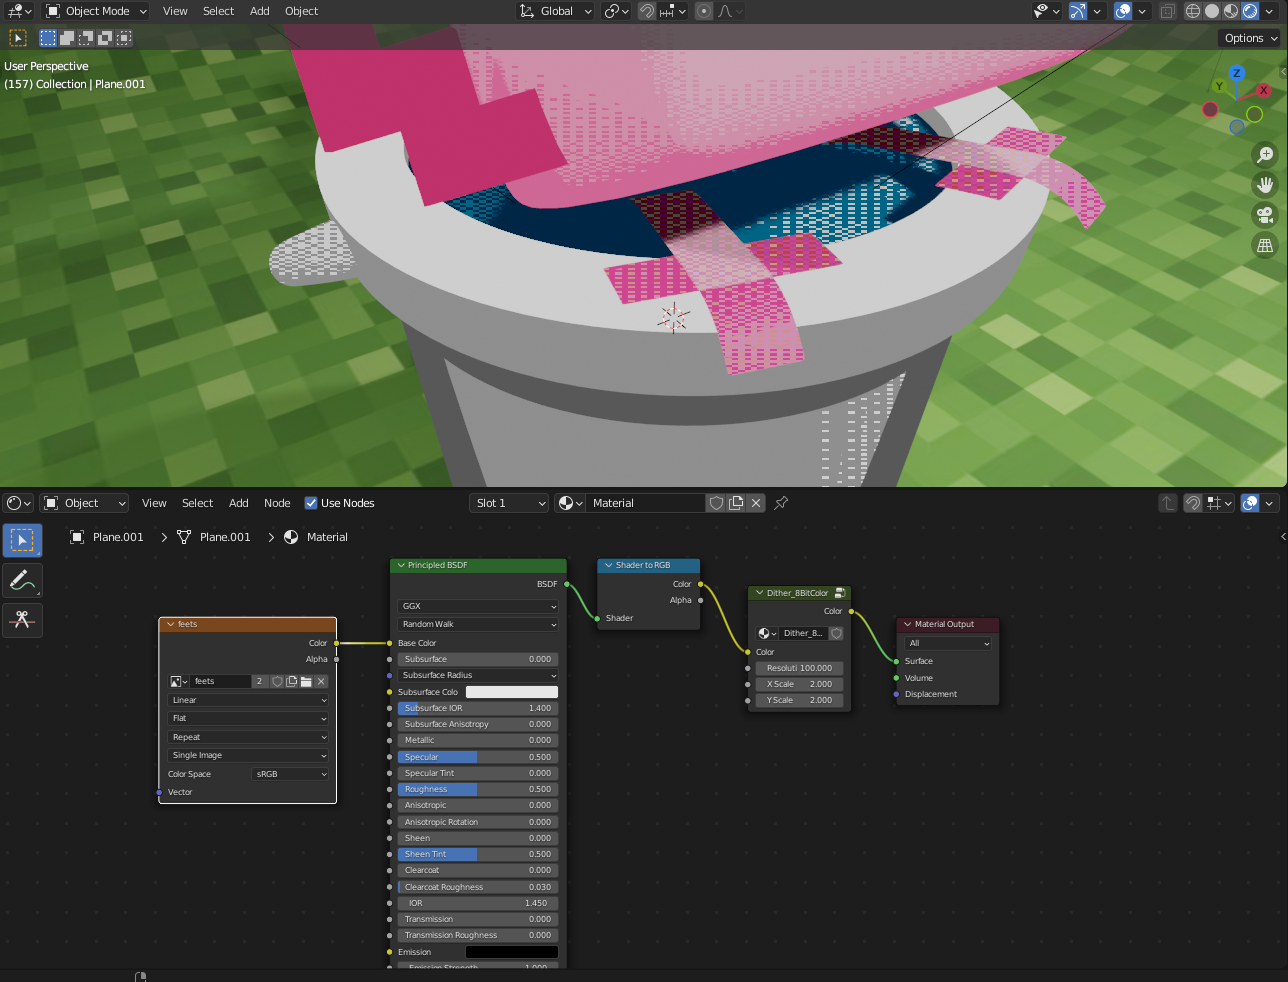
Which way you choose will depend on the style and look you want to go for. There are other ways too but I find that these two are the most useful for using an image texture with lighting.
- The colors are determined by equally placed RGB values.
- Some node groups calculate the colors from the materials/textures others use custom shading, which node groups you use depend on what look you're going for and what you're working with.
- Here is an example of the colors being determined by the meterial https://twitter.com/_Ash_Cruz/status/1398053623905456129?s=20&t=LERMLkAOtOnDC0lC...
- I am actually working on that right now. Today I uploaded my GameBoy camera scene which demonstrates that concept. I am constantly working on these shaders and that is actually the next thing I plan on updating. Currently there are node groups to fix the color pallets but they aren't perfect yet, I still need to implement the "rounding up" feature you mentioned. Without it, random pixels will be off pallet. Currently the only "rounding up" I have is in the GameBoy's color pallet.
- the pixel spading shows up as "best as posable" when in the viewport. Basically the dither displays over the mesh but it appears cut off on the edges of the models. On top of that the pixel aspect ratio can look skewed when not looking through the camra.
- This video is a example of what the viewport can look like
- The shader only works in Eevee.


