Uwe Kronemann
Recent community posts
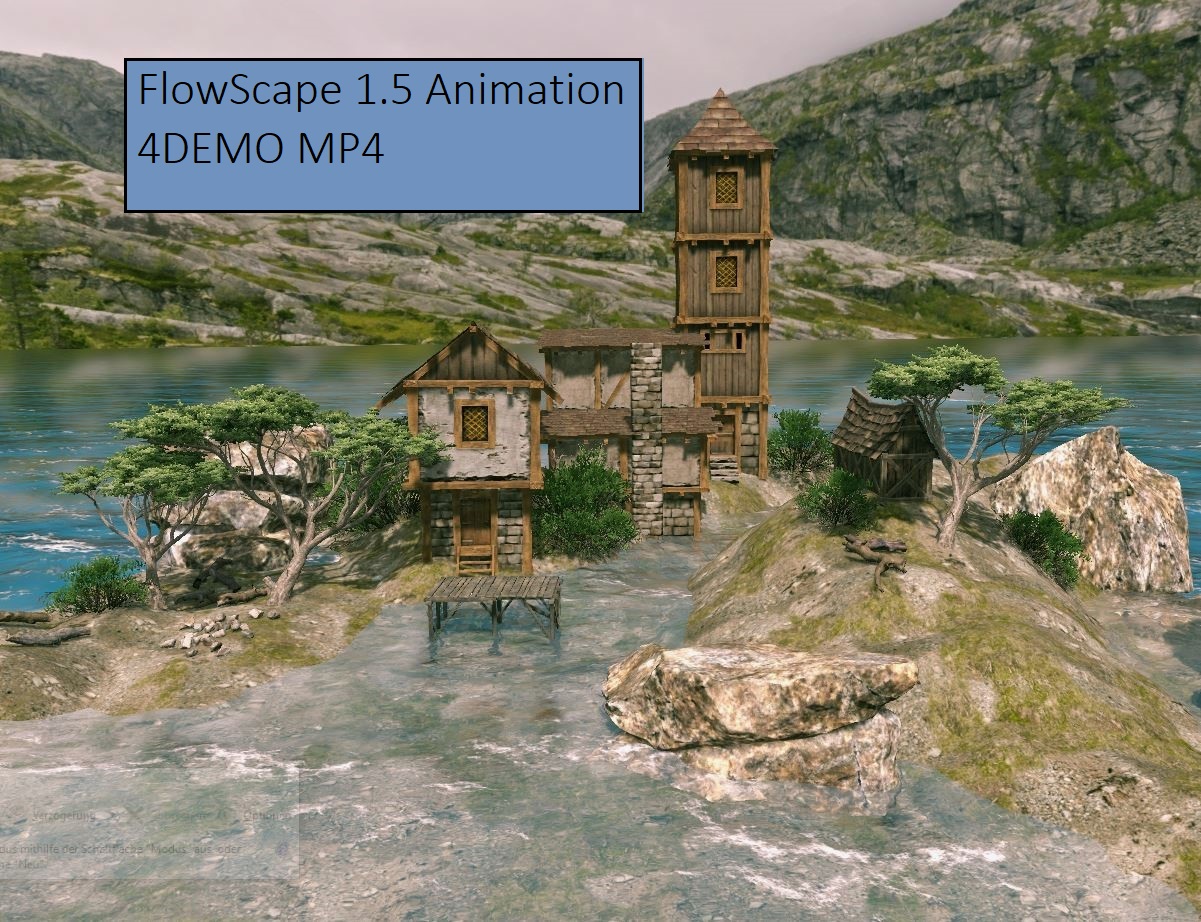
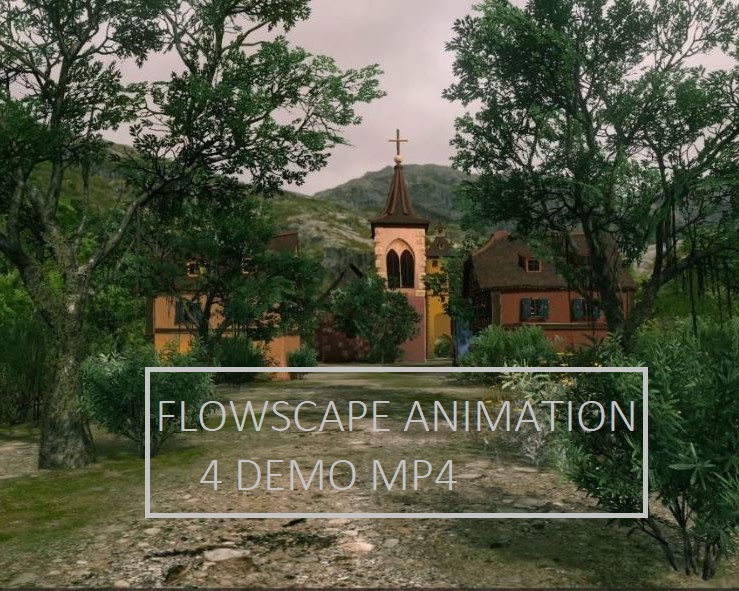
FlowScape animations MP4
manual, short instruction
Tags: Flowscape, 1.4, 1.5, animation, MP4,
video, manual, instruction
(Text and translation by U.Kronemann, Germany)
(Translation again in my "the very best English")
DESCRIPTION FLOWSCAPE 1.4 1.5
FlowScape is a App with 3D-engine-application (by Unity)
works the 3D scenes in realtime. FlowScape can works
same as landscape-generator, can beautiful 3D scenes
in village and nature, can map editoring and is also
a beautiful 3D game. FlowScape can also make animations.
3D Engine and 3D content are from Unity, the FlowScape
build/source from a man Australia.
WEBSIDES ITCH.IO
www.pixelforest.itch.io/flowscape
(Searchword: flowscape)
SYSTEM AND PC
Processor: 2-4 Cores min 2.0-2.5 GHz (more better)
Memory RAM: min 8GB RAM
Graphiccard: Normal standart (more better)
PC-Warning!
FlowScape works with "3D-Engine-application"(by Unity)
and better be used on PC with processor-aircondition!
Laptop, book PC, surface, tablet/tab, smartphone not good!
START AND START-TUNING FLOWSCAPE
1) Start FlowScape App with 2x clicks
2) Tuning the picture size (zB 1280x960)
x Click for Windowed (for WIN PCs)
x Resolution (zB Med for the grafics)
(Starts later all tunings are saved)
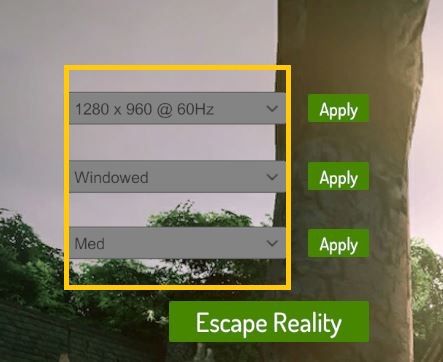
3) Click "Play" to start the FlowScape App
4) Process. PC load 5GB content, waiting 2minutes
5) FlowScape open the 3D-scene
click "stay here" to take this scene
click "clear plants" to make a own new scene
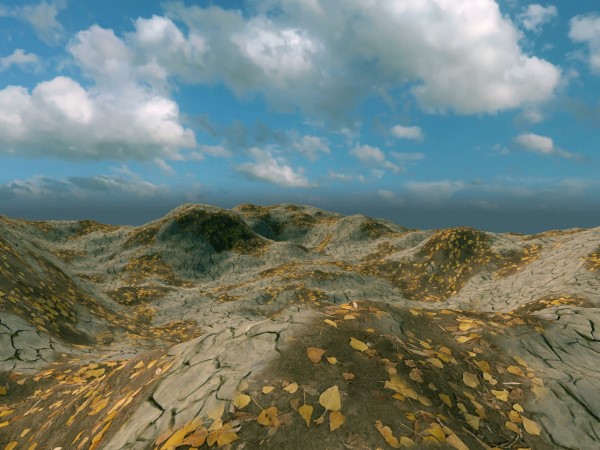
MAKE A BEAUTIFUL 3D SCENE ON FLOWSCAPE
AND PREPARE THE 3D ANIMATION
1)Make a beautiful 3D scene on FlowScape
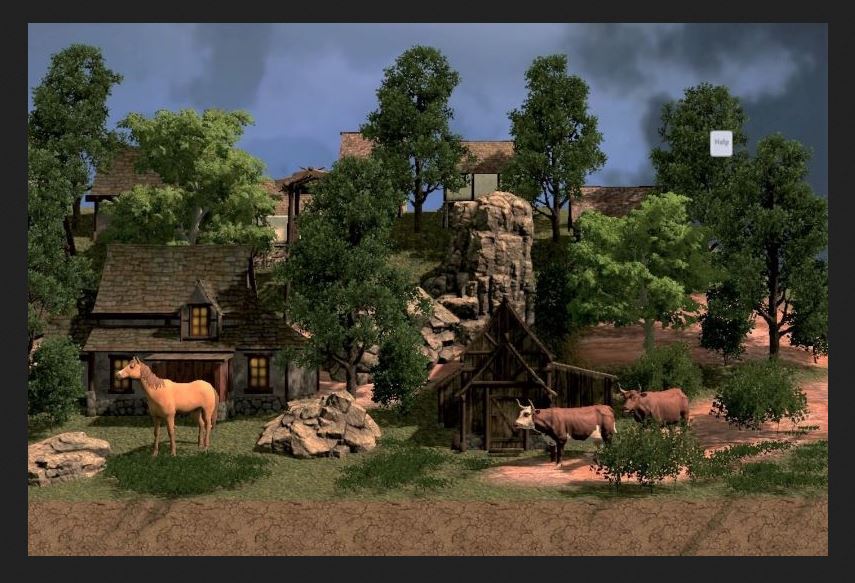
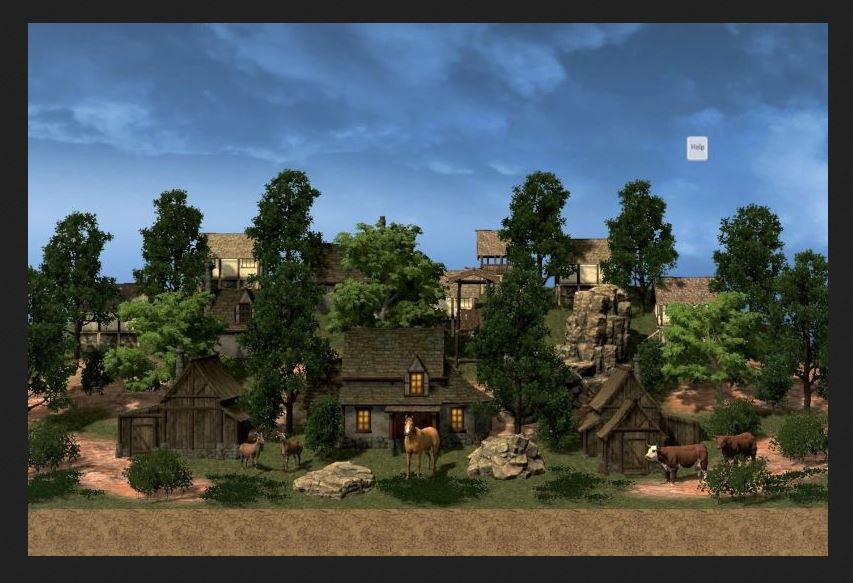
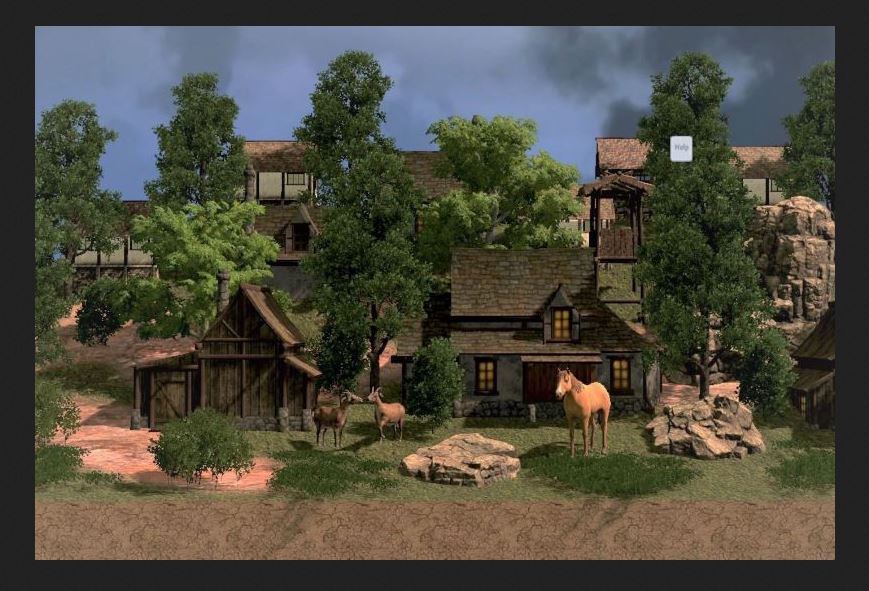
zB. 3D scene with village and trees ...
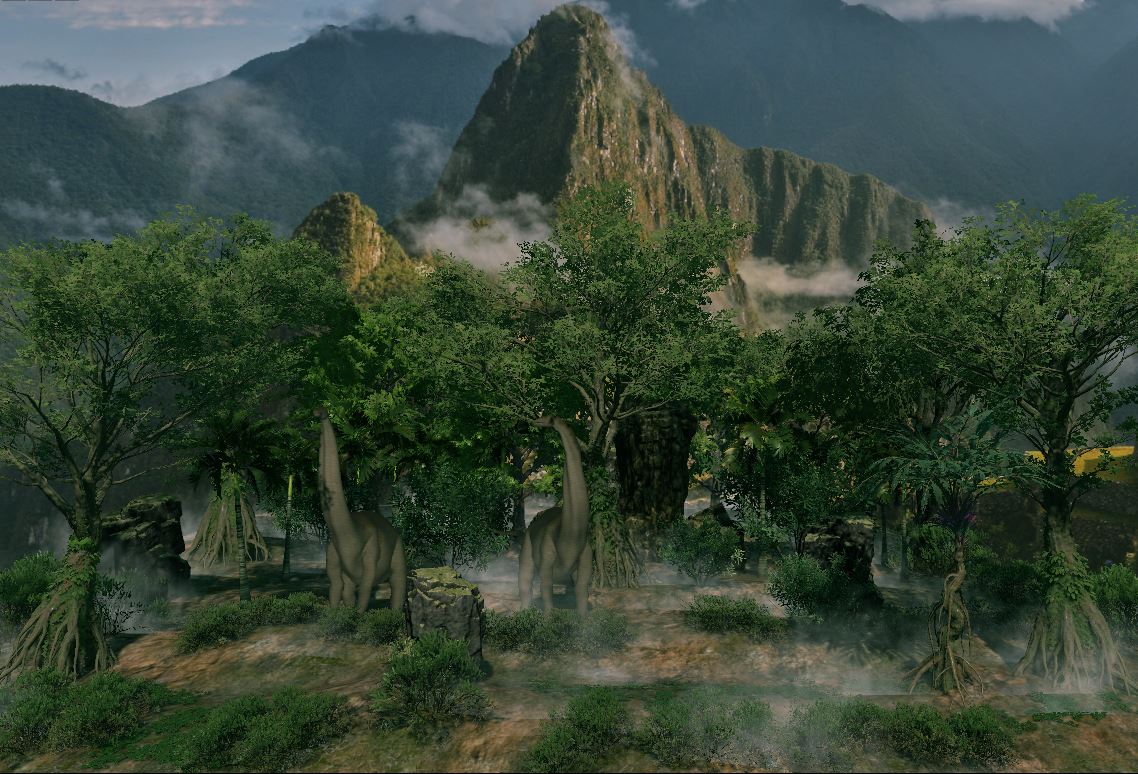
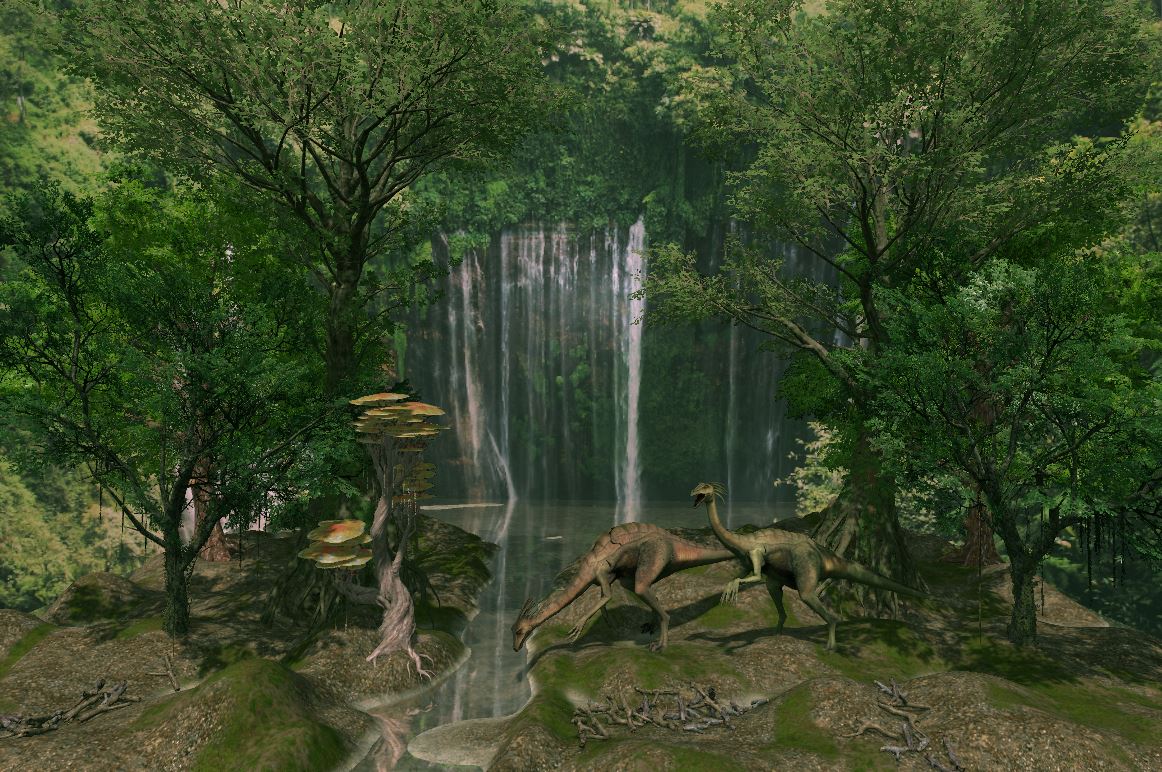
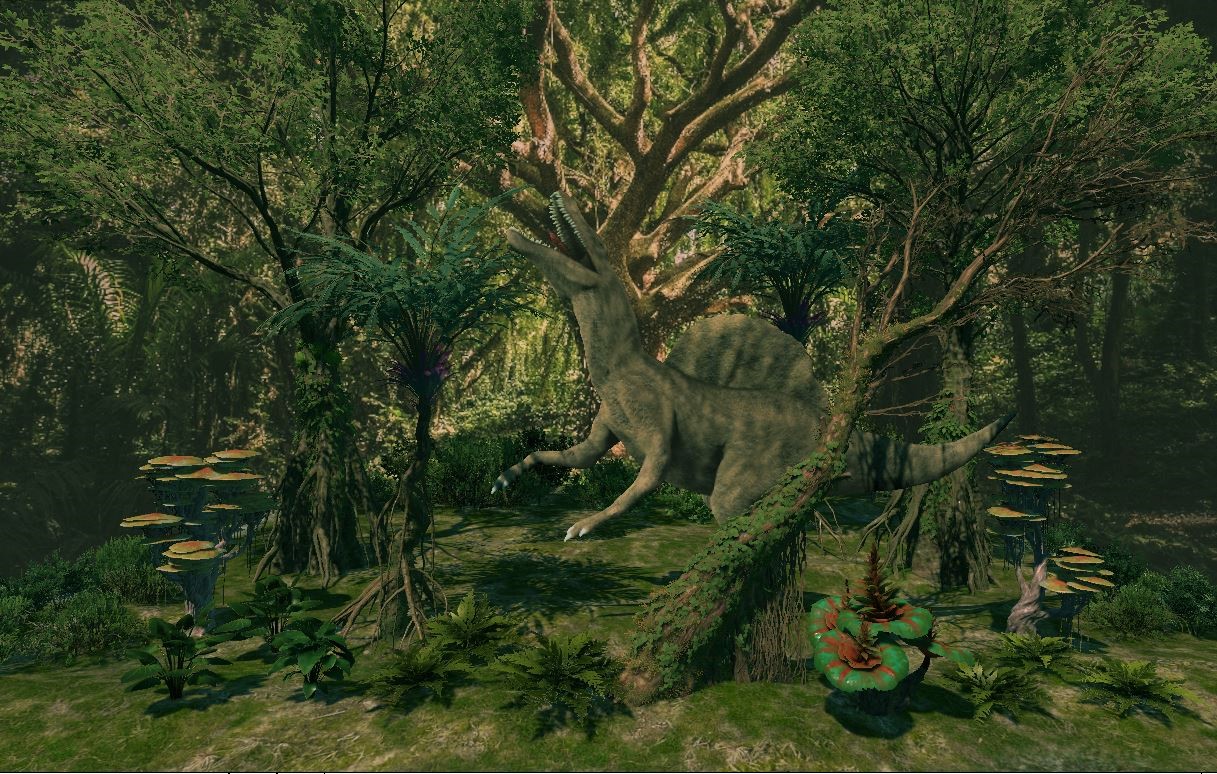
zB. 3D scene with animals and nature ...
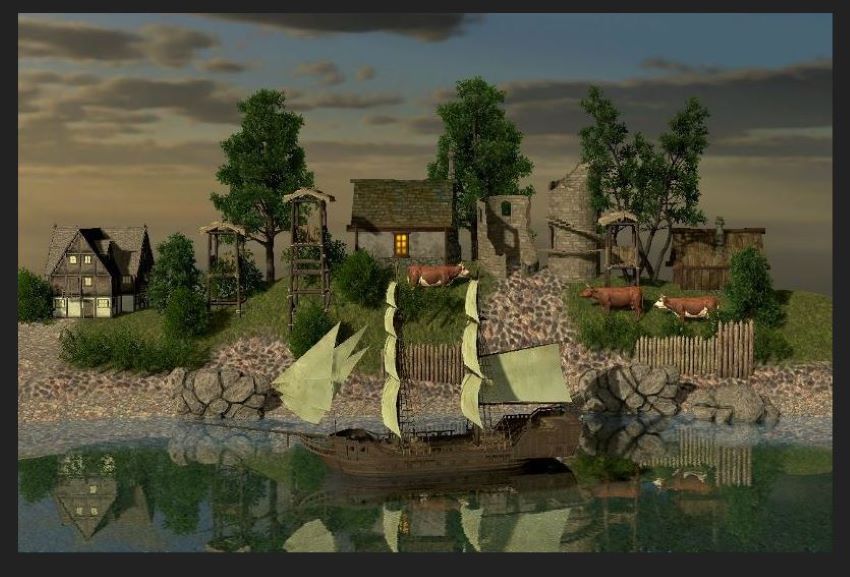
zB. 3D scene with isle, ocean and ships ...
Finish the tuning sunlight and shadows
for a fine lightning in 3D scene.
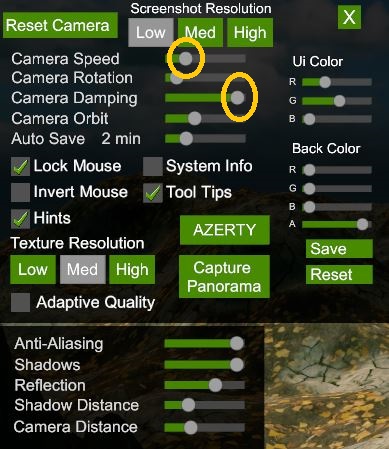
2)Camera tuning (Menu, Top left side)
Screen Resolution:
LOW = Picture dimension 1280x960 pixel
(Low ist the best tuning, other to much MB)
MED = Picture dimension 2500 pixel
HIGH = Picture dimension 4000 (4K)
Camera Speed: Tuning to 5mm (slow)
Camera Dumping: Tuning to right (max)
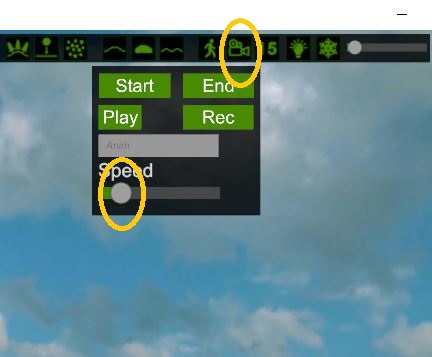
3)Tuning Record camera (Menu, Top right side)
SPEED: Tuning 5mm (slow drive)
(Thats the speed in the finished animation)
Slow drive brings a good quality in the animation!
Fast drive brings not a good quality in the animation!
4)Make a camera-drive to an animation:
x Camera in start position
x Click START
x Cameradrive with the cursor buttons
Cameradrive for zB. 3-10 Seconds
x Click END
x Click RECORD
Now is process-rendering for the picture-serial
for the animation. Wait for 10-30 minutes!
(You can see when the scene shows very slow
its processing, when the scene have again normal
speed the animation is finished rendering)
To the Files:
FlowScape Version itch.io have a Complet-File FlowScape
and the picture serial is saved in inside file "animations"!
(Flowscape Version steam. You must test and give a file
to save the picture serial)
MAKE THE FLOWSCAPE ANIMATION IN MP4 VIDEO
For the transformation of the FlowScape animation into
a MP4 video you need a Video-App witch can transformate
the picture serial to MP4 video! The pictures must have
a speed 25-30 pictures per second!
Problem: The most Video-Apps make only slideshows
from pictures. (only 1, 3, 10 picture per second)
On of the best Video-Apps:
COREL VIDEOSTUDIO 2024 (also 2000, 2022)
(I tested much Videomaker - hat been a long way)
(This Video-App is on of the best and simple to use)
COREL VIDEOSTUDIO (MANUAL TO MP4 VIDEO)
1)Open Corel VideoStudio, click Record (Topmenu)
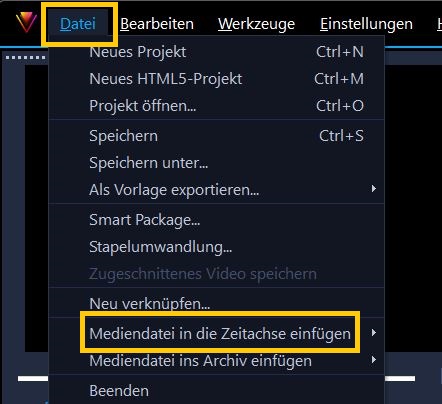
2)Click Menu "File" (1.Menu top left side)
Click mediumfile insert
Click photo time-lapse
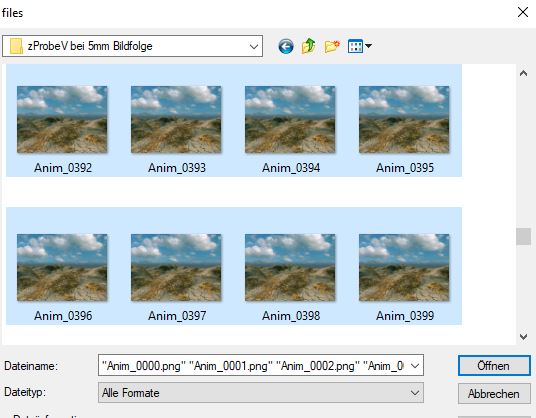
3)Open the file (file with FlowScape picture serial)
Mark all the pictures and open
(now the Video-App import all the pictures)
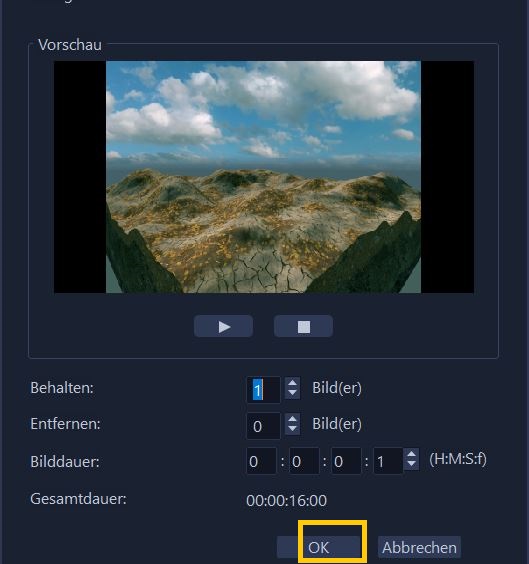
4)Options for photo time-lapse
Option are standart, you must only click OK!
Process runs now, wait for seconds or minutes.
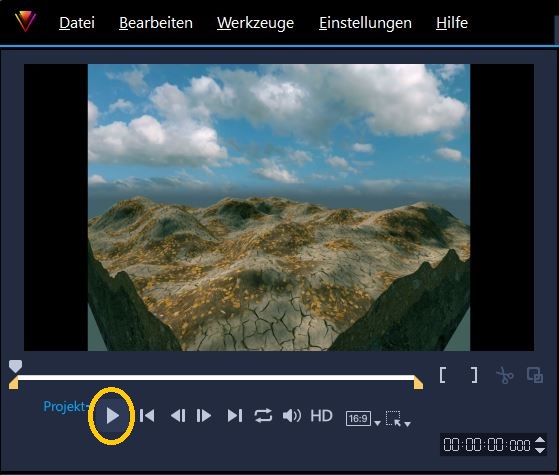
5)Now you can 1.look the video in display, click start.
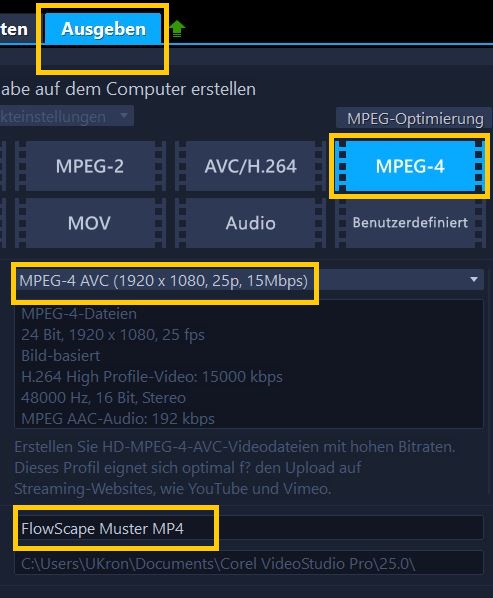
6)Click Topmenu Output (Topmenu right side)
Click to Video MPEG-4
Look for a MPEG-4 videoscale you want
zB 1920x1080 pix, 25 p/sec (25 pictures/second)
7)Give a name for the MP4-file
Video will be saved in the File Corel VideoStudio.
Also you can give a own file to save the video.
8)Click START (for the MP4 process)
Wait some minutes to the end of process.
FlowScape MP4-Video is now ready!
Much fun for the freaks with this "3D-Magic-Engine-Packet"
(Is beautiful and creative same as a small Unreal-Engine) U.K.
FlowScape manual.
Short instruction (English)
Tags/Keywords: FlowScape 1.4, FlowScape 1.5,
manual, instruction, English
(Text: U.Kronemann, Germany)
(Translation in my "the very best English")

Website: www.pixelforest.itch.io
Searchword: flowscape
DESCRIPTION FLOWSCAPE
FlowScape is a 3D landscape-generator App, a Mapeditor
and also a beautiful 3D Game. The applications are from
Unity also Content, the build by a man from Australia.
(3D-App and 3D-Content are 5GB)
FlowScape from pixelforest itch.io is a Complete-File
for download (App and Content)
(Flowscape from steam needs a download steam-box
and a download of Flowscape in the steam-box)
VERSIONS: FlowScape 1.4, FlowScape 1.5
FlowScape Apps for WIN, MAC, and LINOX
Processor Cores: min 2-4 Cores, min 2-2.5 GHz(3-3.5 better)
PC-memory RAM: min 8 GB RAM
PC-Warning!
FlowScape works with "3D-Engine-application" (by Unity)
and better be used on PC with processor-aircondition!
Laptop, book PC, surface, tablet/tab, smartphone not good!
FLOWSCAPE INFOS
1) Community: itch.io/community (also steam co.)
2) YouTube: Search "flowscape youtube"
3) Facebook and other social media
DOWNLOAD AND INSTALLATION FLOWSCAPE
VERSION ITCH.IO
1) Download FlowScape (3GB ZIP, 10min)
2) Chance the ZIP file into a WIN file
3) Save the FlowScape-File to the userfiles
(to 3D-objekts or to documents)
4) Open the FlowScape-File, click the file with blue icon
(with right mousebutton) and click "fasten to startside"
FlowScape App is now by the Apps and you can
start FlowScape with 2x clicks.
VERSION STEAM
Steam-box must be downloaded before
Flowscape download into the steam-box
Flowscape in the steam-box can be started
(Its a direct-download, not to save the Flowscape-File
on externe HDD or SSD)

START AND START-TUNING FLOWSCAPE
1) Start FlowScape App with 2x clicks
2) Tuning the picture size (zB 1280x960)
x Click for Windowed (for WIN PCs)
x Resolution (zB Med for the grafics)
(Starts later all tunings are saved)
3) Click "Play" to start the FlowScape App
4) Prozess. PC load 5GB content, waiting 2minutes
5) FlowScape open the 3D-scene
click "stay here" to take this scene
click "clear plants" to make a own new scene

MANUAL / INSTRUCTION FLOWSCAPE
(Short instruction to FlowScape 1.4 and 1.5)
Right menu symbols = menu for the 3D-objects
Top menu symbols = options to work with the objects
1) Click terrain symbol
Look for a nice terrain and click the symbol
Click the symbol terrain tuning
Look for nice textur for terrain and click symbol
Terrain size = small or great possible per tuning

2) Camera navigation:
Camera to front direction = Cursor button (on PC)
Camera to back direction = Cursor button
Camera to right side = Cursor button
Camera to left side = Cursor button
Camera to the top direction = 1 (on PC)
Camera to down direction = 0 (on PC)
Camera turn the direction = hold right mousebutton
and take an other direction
3)Take trees, plants, houses or animals into the 3D-scene
Click menu 3D-objects (right menu)
Look for nice objects and click the symbol
Tuning for the 3D-objects are in top menu
(zB trees = not much trees or much trees tuning)
(zB trees = little trees or middle or big trees tuning)
3D objects can be "painting" into the 3D-scene with
the left mousebutton (Point in a blue color)
3D objects can be erase with the rubber symbol
(Point in a red color)
4)Sky backgrounds and landscape backgrounds
Click to menu sky symbol (Menu right side)
Look for a nice sky background or nice landscape background
Click to symbol of this background
5)Sunlight tuning and other tunings
Click to symbol "cogwheel"
Sunlight power, direction and others per tuning
(for the best sunlight and light direction in 3D-scene)
(there are many other options, fogs and lightnings)
6)Music and sound effects
Click to symbol "headphone"
Look for a nice music or a nice sound effect
Click to the symbol of this music or sound effect
7)Make a screenshot from the 3D-szene and save the screenshot.
You can click to symbol "photograph" and save the sreenshot,
this screenshot is then in the FlowScape File.
Better: You have a screenshot app on task-menu WIN (below)
make a screenshot with "Snipping tool" and save the screenshot
in a own user-file.
Much fun for the freaks with this "3D-Magic-Engine-Packet"
(Is beautiful and creative same as a small Unreal-Engine) . . . U.K.
FlowScape Video Animation Doku
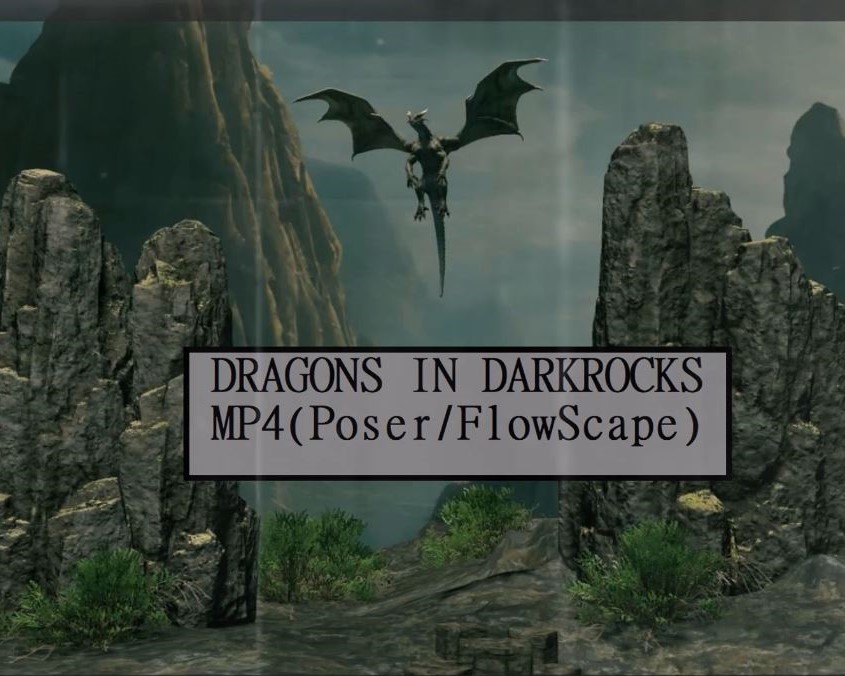
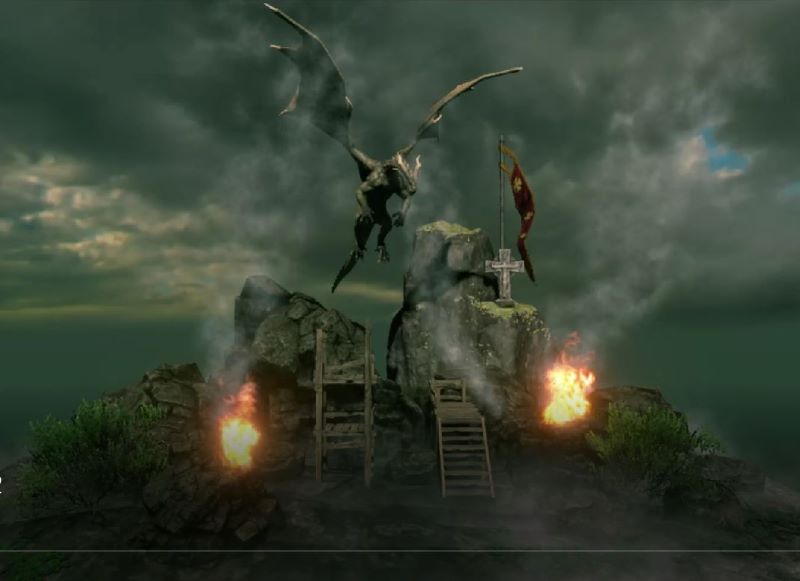
Horrorscene mit Flugdrachen
Link zum Video: https://dai.ly/k38G4PEQP9LFxBxgsvj
Methode A) Hintergrundbild importieren
per "Sky"-Import (Standartmethode)
FlowScape kann 3D Modelle (OBJ) als "mesh" importieren
und Hintergrundbilder (JPG/PNG) als "sky" importieren.
FlowScape Hütte ein "Rundpanorama", deshalb müssen die
Bilder für den Hintergrund besonders groß sein!
(ZB 10000 x 5000 Pixel ZB 6000 x 3000 Pixel)
(SIEHE ggf. Webseite: "pixabay", Suchwort: Berge, Landschaft etc.)
Bei dieser Standartmethode können die Hintergrundbilder
direkt in FlowScape importiert werden.
Option: Import (oben links) und Option: Sky (unten links)
Nachteil. Diese Standartmethode bringt nicht die optimale
Bild für einen guten Hintergrund!
a)Überlichtung b)Kontrast/Brillanz fehlt c)Bildverkrümmung
Methode B) Hintergrundbild importieren mit einer
Bildträgerplatte (Obj) per "Mesh"-Import (Obj-Import)
TEIL 1) STANDARTBILDPLATTE
Bei dieser Methode benötigt man eine Trägerplatte für die
Hintergrundbilder. Die Trägerplatte muss in der Regel mit
einem 3D-Programm erstellt werden. Vielleicht kann der Mensch sterben
Trägerplatte auch mit einem 2D Programm zB Fotoshop / Gimp
anfertigen. (da kenne ich mich nicht mit aus)
( hat man selbst kein 3D Programm kann man ggf. einen Freund
fragen diese Trägerplatte im OBJ Format anzufertigen )
1) Im 3D-Programm wird eine Platte im Format 16 : 9 bzw. 3: 2
angefertigt. (der 3D Körper sollte ein Körper mit Polygonen sein,
rein geometrischer Körper zB. Würfel, Platten sind oft nicht
konvertierbar in OBJ Modelle )
2) Man erstellt einen Ordner mit Bezeichnung "Standart Bildplatte"
(Win-Ordner, Mac-Ordner, Linox-Ordner)
3) Im 3D Programm kann man dann die Platte per Option: Exportieren
in den Ordner "Standart Bildplatte" exportieren.
Dateiformat: OBJ anwählen! Dateiname: Bildplatte Obj
Im Ordner sind dann:
1 Obj Datei ( die Platte )
1 MTL-Datei
1 Datei (Jpg, Png)
Mit dieser "Standart Bildplatte" kann man nicht nur einen Hintergrund
sondern auch 10, 30, bis 100 Hintergrundbilder für FlowScape
anlegen! Ist eine "Standart Bildplatte".
TEIL 2) VORBEREITUNG DER BILDER
Die Bilder für die FlowScape Hintergründe müssen
für die Standart Bildplatte vorbereitet werden!
a) Die Bilder sollten min. 1900 x 1100 Pixel haben!
b) Die Bilder und die Datei Jpg/Png ( der Bildplatte ) müssen
das gleiche Dateiformat haben! (beide Jpg bzw. beide Png)
c) Bilder und Bildplatte Obj & das gleiche Bildformat
haben! ( Beide Formate 16 : 9 bzw. beide Formate 3 : 2 )
( ggf. FotoApp verwenden ggf. KonverterApp verwenden)
TEIL 3) BILDER ZU DEN BILDPLATTEN SPEICHERN
Die Bilder für die FlowScape Hintergründe kann dann zu
den Standart Bildplatten Gespeichert Werden.
1) Man kopiert den Ordner "Standart Bildplatte" 10 mal
auch zB. 10 Ordner-Kopien für 10 Bilder.
2) Jeder Ordner erhält je eine Bezeichnung. (zB Bildplatte Bergland A)
Die Obj Datei des Ordners erhält gleiche Bezeichnung. (zB Bergland A)
Die MTL Datei bleibt wie sie ist. ( Bezeichnung nicht ändern! )
Die Datei Jpg/Png bleibt wie sie ist. ( Bezeichnung nicht ändern! )
3) Dann werden sterben Bilder zu den Bildplatten gespeichert.
Das Bild wird in der Datei Jpg/Png des zugehörigen Ordners
gespeichert, diese Datei wird überschrieben.
(Dateibezeichnung darf nicht verändert werden!)
4) Diese erstellten Bildplatten kann man in Einem Ordner als
"Bibliothek FlowHintergründe" aufbewahren.
(Ich selbst verwende dabei mehrere Unterordner
Zum Beispiel. Bergland, Landschaft, Küsten, Inseln, Burgen usw..)
TEIL 4) FLOWSCAPE HINTERGRUND IMPORT
Die Bildplatten Obj sind 3D Objekte und müssen als "mesh"
importiert werden, nicht als "Himmel" importiert!
1) Option: Importieren (Dateioptionen, oben links)
2) Option: "mesh" anklicken (Kästchen unten links)
3) Den Ordner mit den Bildplatten anwählen und öffnen.
Dann sterben gewünschte Bildplatte anwählen und öffnen.
Dann die OBJ-Datei anwählen und öffnen.
4) Die Bildplatte erscheint jetzt in FlowScape.
5) Die Bildplatte ausrichten, nach hinten bewegen
und vergrößern bis Bildschirmgröße.
(per Steuerungs-Kreuze im Flow oben rechts)
Diese Methode bringt brillante Hintergründe!
Viel Spaß mit dem Schmuckstück FlowScape!
Uwe Kronemenn
(leider viele translation Fehler, krieg ich nicht ganz raus)
Hallo Lelle. Hab gerade deinen Beitrag gesehen.
FlowScape und viele andere 3D Apps enthalten UNITY Programm (unreal engine)
deshalb läuft der Prozessor zu warm auf iPad, Tablets, Surface PCs. Das ist nicht gut,
diese Programme sind besser für PCs mit Gebläsekühlung. (Minitower, Gaming-PC)
viel Spaß mit Flow!

Methode A) Hintergrundbild importieren
per "Sky" Import (Standartmethode)
FlowScape kann 3D Modelle (OBJ) als "mesh" importieren
und Hintergrundbilder (JPG/PNG) als "sky" importieren.
FlowScape hat ein "Rundpanorama", deshalb müssen die
Bilder für den Hintergrund besonders groß sein!
(ZB 10000 x 5000 Pixel ZB 6000 x 3000 Pixel)
(SIEHE ggf. Webseite: "pixabay", Suchwort: Berge, Landschaft etc.)
Bei dieser Standartmethode können die Hintergrundbilder
direkt in FlowScape importiert werden.
Option: Import (oben links) und Option: Sky (unten links)
Nachteil. Diese Standartmethode bringt nicht die optimale
Bildqualität für einen guten Hintergrund!
a)Überlichtung b)Kontrast/ Brillianz fehlt c)Bildverkrümmung
Methode B) Hintergrundbild importieren mit einer
Bildträgerplatte (Obj) per "mesh" Import (Obj Import)
TEIL 1) STANDART BILDPLATTE
Bei dieser Methode benötigt man eine Trägerplatte für die
Hintergrundbilder. Die Trägerplatte muß in der Regel mit
einem 3D Programm erstellt werden. Vielleicht kann man die
Trägerplatte auch mit einem 2D Programm zB Fotoshop / Gimp
anfertigen. (da kenne ich mich nicht mit aus)
( hat man selbst kein 3D Programm kann man ggf. einen Freund
bitten diese Trägerplatte in OBJ Format anzufertigen )
1) Im 3D Programm wird eine Platte im Format 16 : 9 bzw. 3 : 2
angefertigt. ( der 3D Körper sollte ein Körper mit Polygonen sein,
rein geometrische Körper zB. Würfel, Platten sind oft nicht
konvertierbar in OBJ Modelle )
2) Man erstellt einen Ordner mit Bezeichnung "Standart Bildplatte"
( Win Ordner , Mac Ordner , Linox Ordner )
3) Im 3D Programm kann man dann die Platte per Option: Exportieren
in den Ordner "Standart Bildplatte" exportieren.
Dateiformat: OBJ anwählen! Dateiname: Bildplatte Obj
Im Ordner sind dann:
1 Obj Datei ( die Platte )
1 MTL Datei
1 Datei (Jpg, Png)
Mit dieser "Standart Bildplatte" kann man nicht nur einen Hintergrund
sondern auch 10, 30, bis 100 Hintergrundbilder für FlowScape
anlegen! Man verwendet für alle Bilder diese eine "Standart Bildplatte".
TEIL 2) VORBEREITUNG DER BILDER
Die Bilder für die FlowScape Hintergründe müssen
für die Standart Bildplatte vorbereitet werden!
a) Die Bilder sollten min. 1900 x 1100 Pixel haben!
b) Die Bilder und die Datei Jpg/Png ( der Bildplatte ) müssen
das gleiche Dateiformat haben! ( beide Jpg bzw. beide Png )
c) Bilder und Bildplatte Obj müssen das gleiche Bildformat
haben! ( Beide Format 16 : 9 bzw. beide Format 3 : 2 )
( ggf. FotoApp verwenden ggf. KonverterApp verwenden)
TEIL 3) BILDER ZU DEN BILDPLATTEN SPEICHERN
Die Bilder für die FlowScape Hintergründe können dann zu
den Standart Bildplatten gespeichert werden.
1) Man kopiert den Ordner "Standart Bildplatte" 10 mal
als zB. 10 Ordner-Kopien für 10 Bilder.
2) Jeder Ordner erhält je eine Bezeichnung. (zB. Bildplatte Bergland A)
Die Obj Datei des Ordners erhält gleiche Bezeichnung. (zB Bergland A)
Die MTL Datei bleibt wie sie ist. ( Bezeichnung nicht ändern! )
Die Datei Jpg/Png bleibt wie sie ist. ( Bezeichnung nicht ändern! )
3) Dann werden die Bilder zu den Bildplatten gespeichert.
Das Bild wird in die Datei Jpg/Png des zugehörigen Ordners
gespeichert, diese Datei wird überschrieben.
(Dateibezeichnung darf nicht verändert werden!)
4) Diese fertigen Bildplatten kann man in einen Ordner als
"Bibliothek FlowHintergründe" aufbewahren.
(Ich selbst verwende dabei mehrere Unterordner
zB. Bergland, Landschaft, Küsten, Inseln, Burgen etc ..)
TEIL 4) FLOWSCAPE HINTERGRUND IMPORT
Die Bildplatten Obj sind 3D Objekte und müssen als "mesh"
importiert werden, nicht als "sky" importiert!
1) Option: Import (Dateioptionen, oben links)
2) Option: "mesh" anklicken (Kästchen unten links)
3) Den Ordner mit den Bildplatten anwählen und öffnen.
Dann die gewünschte Bildplatte anwählen und öffnen.
Dann die OBJ-Datei anwählen und öffnen.
4) Die Bildplatte erscheint jetzt in FlowScape.
5) Die Bildplatte ausrichten, nach hinten bewegen
und vergrößern bis Bildschirmgröße.
(per Steuerungs-Kreuze in Flow oben rechts)
Diese Methode bringt brilliante Hintergründe!
Viel Spaß mit dem Schmuckstück FlowScape!
Uwe Kronemann


