(by Jin)
Hello everyone! Welcome to the first installment of our short, digestible and “bite-sized” tutorials brought to you by ACM Studio at UCLA. This series will cover a handful of useful topics ranging from Unity basics and C# programming to accessibility and UIUX design, suitable for anyone just beginning Unity, looking for tips, or needing refreshers. We’ll be posting these tutorials throughout winter quarter, so new developers in our Student Run Studios program can easily start Unity (check out our student-made games on our itch page)!
Now, let's jump right into this first tutorial, where we give an intuitive intro into the building blocks of Unity games: Game Objects and Monobehavior scripts.
Working with Unity
Start by creating a new Unity Project. Open Unity Hub and select New Project -> 3D Project. You will see a window like this. You can drag the tabs around to change the setup.
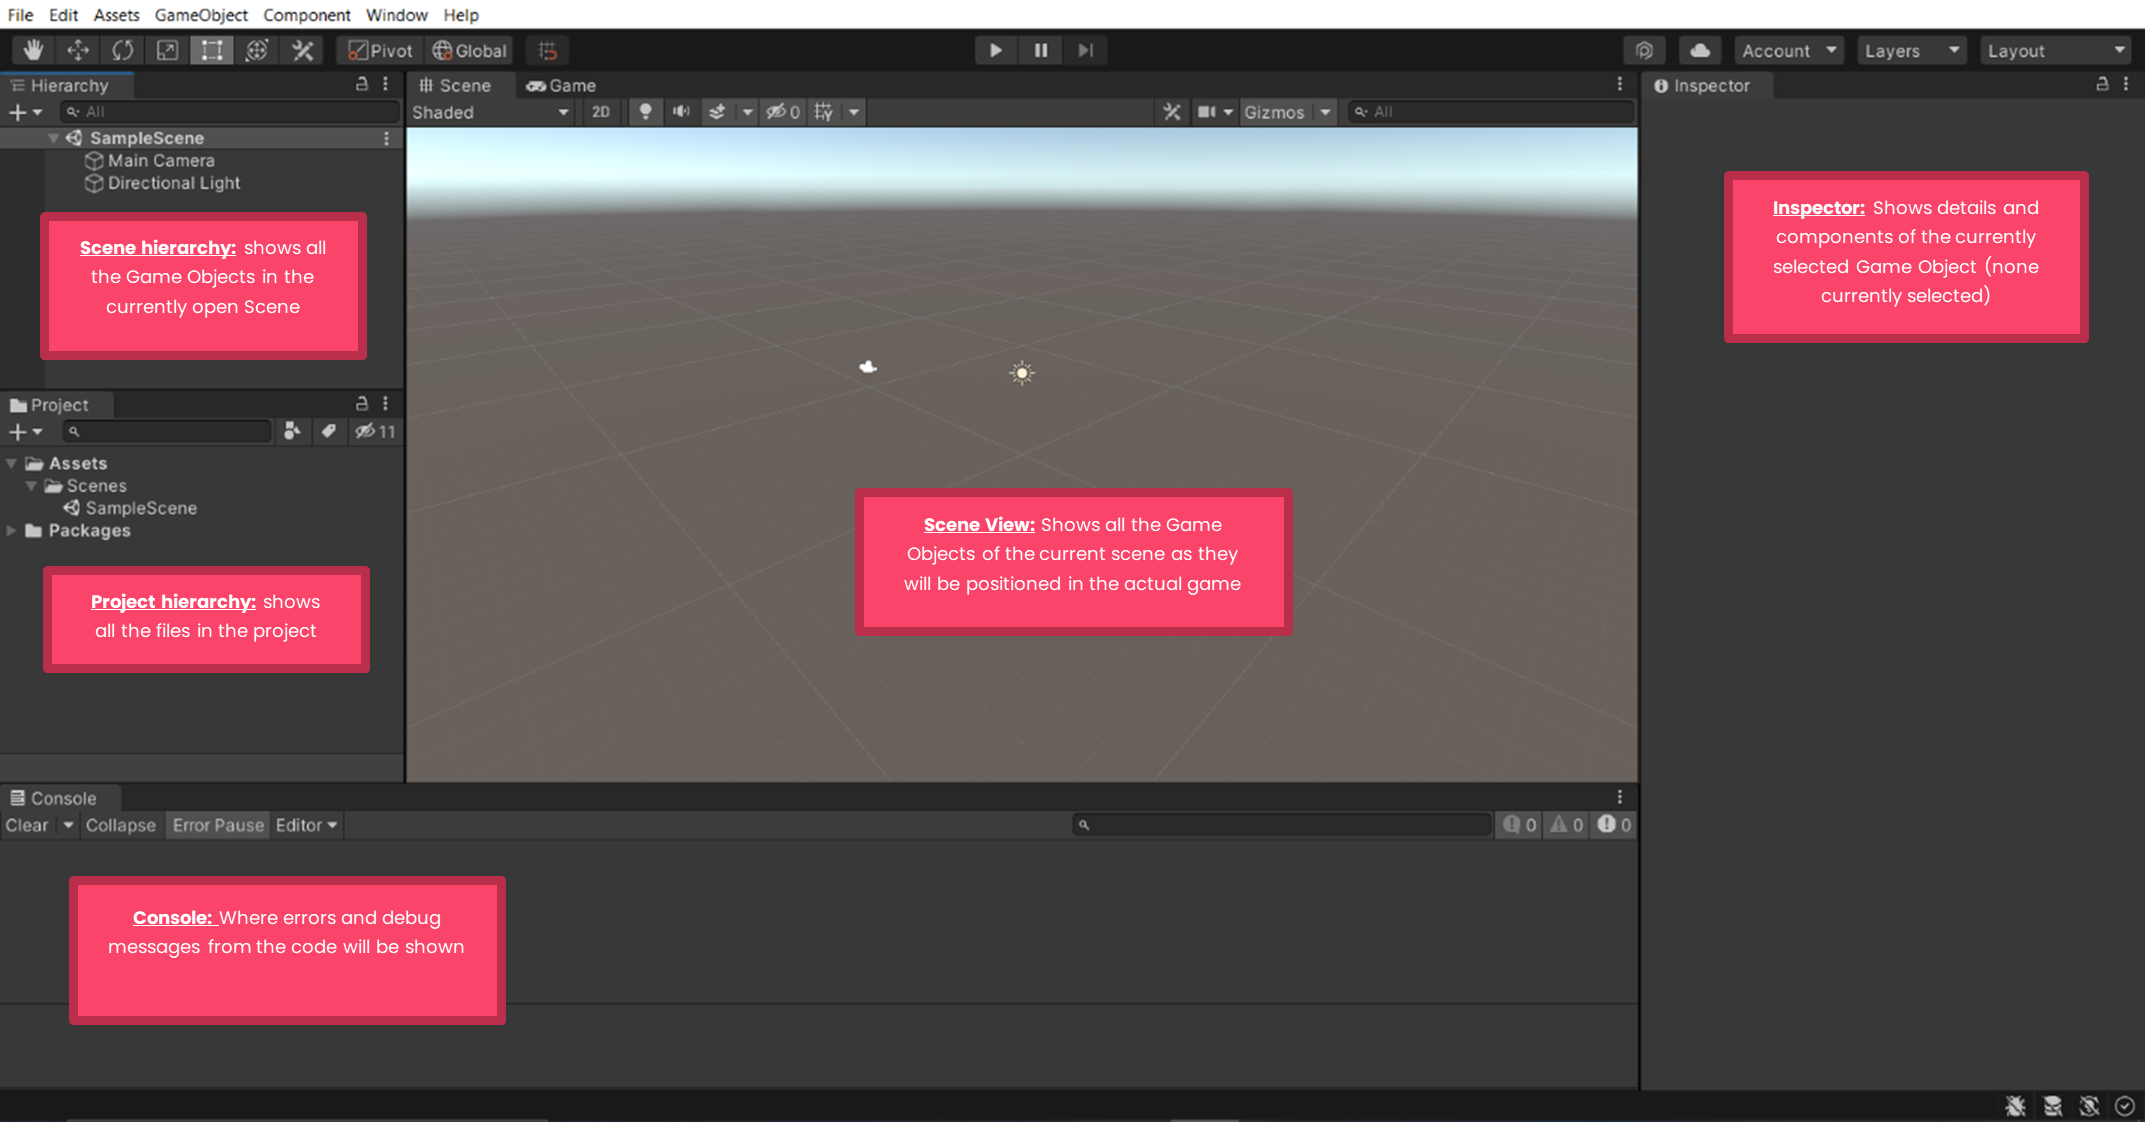
Game Objects <3
You probably have some (or all) of the following things in your game: characters, NPCs, walls, platforms, obstacles, enemies. All of these are referred to as Game Objects in Unity, and are created by right clicking in the Scene Hierarchy, selecting Create Empty (or choosing from the various predefined objects Unity lists below).
A Game Object can have various components on it. A sprite renderer (how it looks) is a component, so is a script (more on this later).
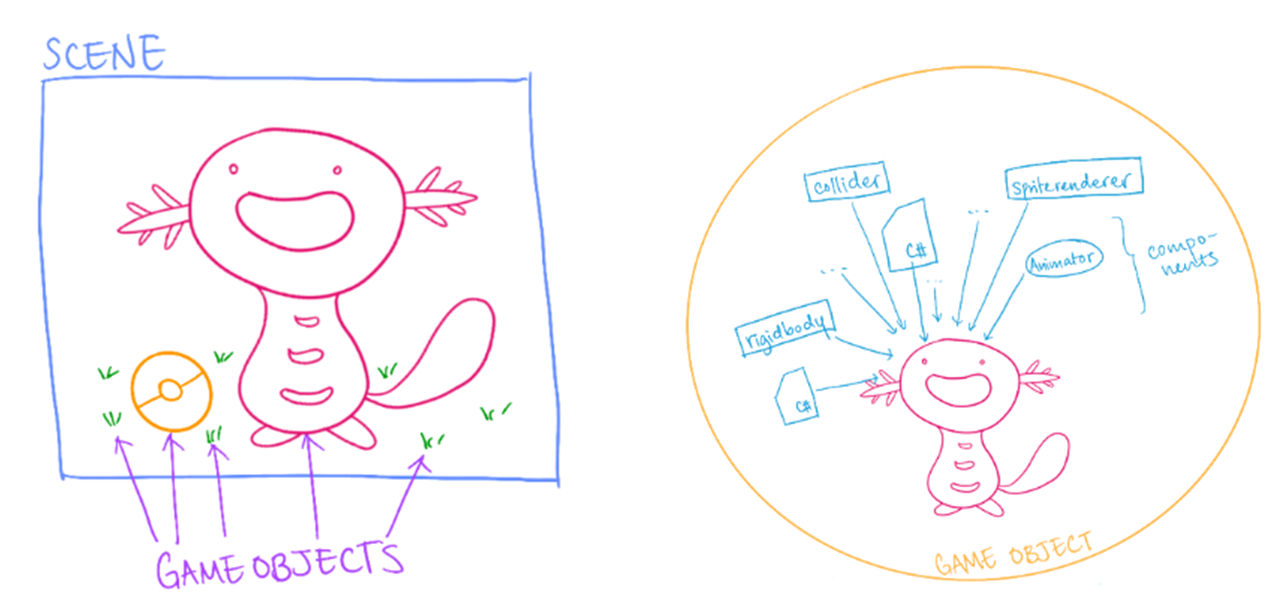
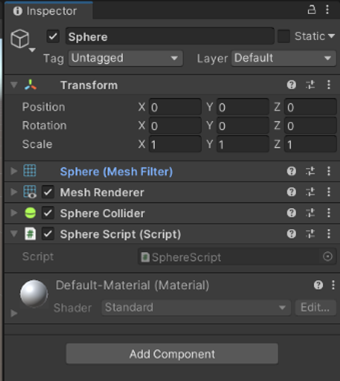
Let’s start by creating a sphere (right click in the Scene Hierarchy, select 3D Object -> Sphere). If we click on the sphere (from the Scene Hierarchy or the Scene View), we will see that its inspector is no longer empty. Instead, it is filled with the following components. For now, we care about only one of these: the transform component.
The transform component determines the position, rotation and scale of the sphere. Try altering these values to see how the sphere changes! (Note that rotating a sphere wouldn't be very visible, so you can try creating different game objects like cubes if you want to visualize rotation)
Scripts
To make the sphere (or any Game Object) actually do something, we attach C# scripts on them to control their behavior. All scripts that are attached to Game Objects inherit from the Monobehavior class. For our current purposes, it is important to know two functions that every Monobehavior script has:
Start: this is called the instance a Game Object is created in game (our sphere is going to be created the instance the game starts, so whatever is in the Start method will be executed when we press play)
Update: this is called every frame (continuously throughout the game, until the Game Object is destroyed)
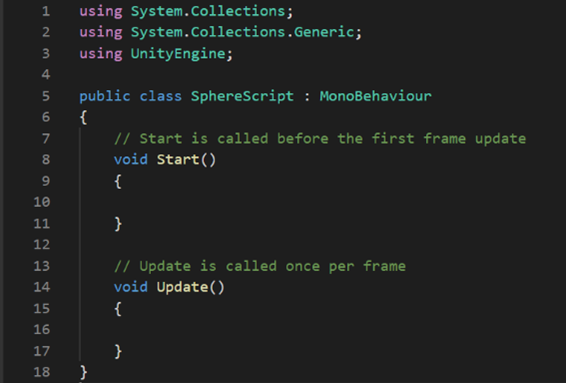
Right click on the Assets folder and select Create -> C# script. Rename this to SphereScript. Double click to open it up in Visual Studio (or any editor you have, I have Visual Studio Code). You’ll see that you are already given the two core Monobehavior functions.
Add the following two lines of code to see these functions in action.
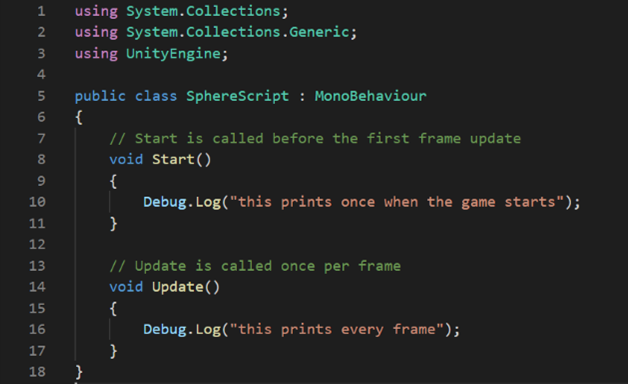
Debug.Log prints the message inside the parenthesis to the console (that bottom area in the Unity UI). It doesn’t print in your actual game, and are just helpful as debugging messages for the developer.
Now, simply drag and drop the script onto the sphere inside the Scene Hierarchy (a Monobehavior script will only do something if it is actually on a Game Object in the scene). You’ll be able to see the script on the Sphere’s inspector window.
Click the play button and scroll through the console messages to see Start and Update in action! (You might want to pause or stop the game since the message in update will be printed continuously)

(It’s a good idea to keep your Project Hierarchy organized. Right click on the folder titled Assets, then select Create -> Folder and name this folder to Scripts. You can drag your script in here.)
In our next tutorial, we’ll see how to actually control the sphere and make it move!


