I probably missed some things that need a tut, or maybe some of these are not clear enough, so let me know if I should add something here!
Adding new colors to your palette
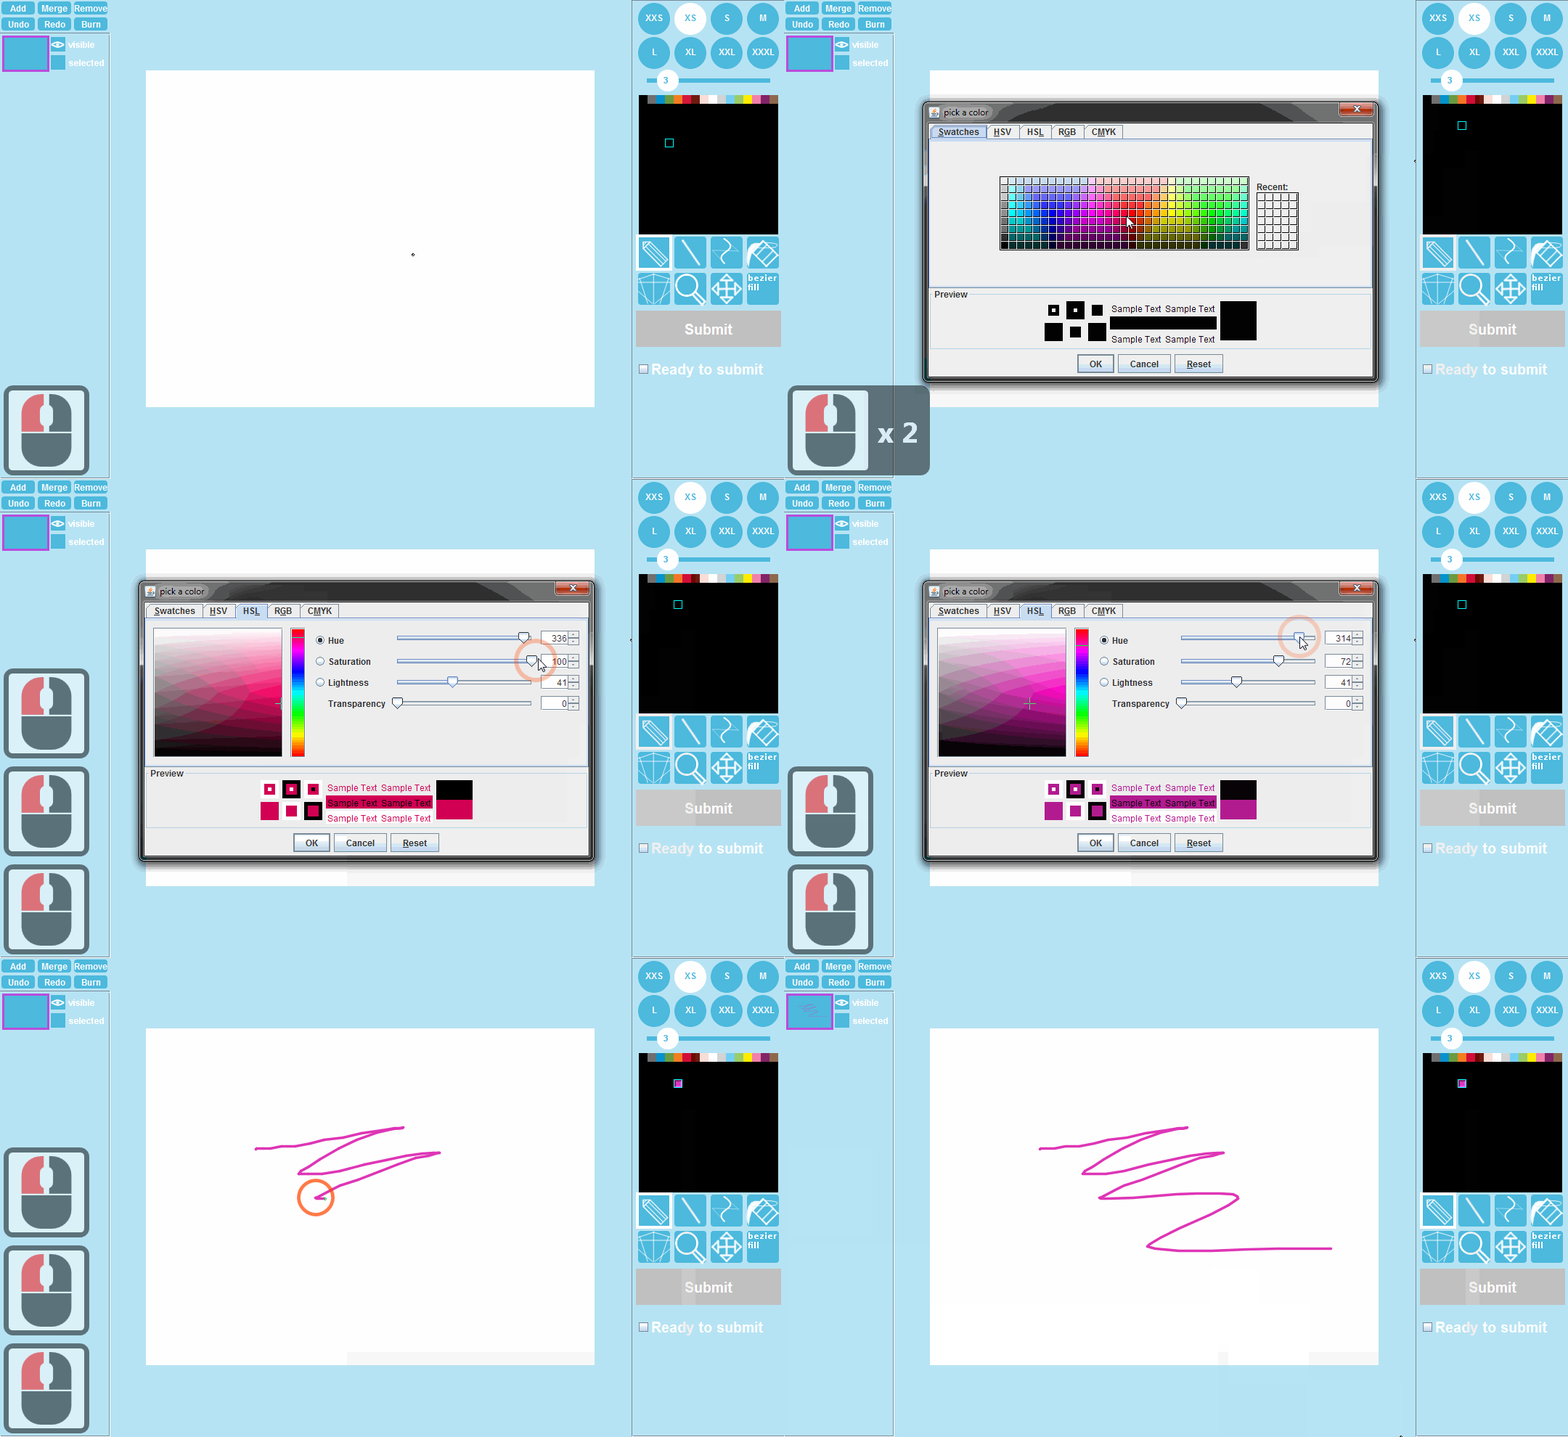
The whole area under the basic colors is your palette, doubleclicking will open a color picker.
Using transparency
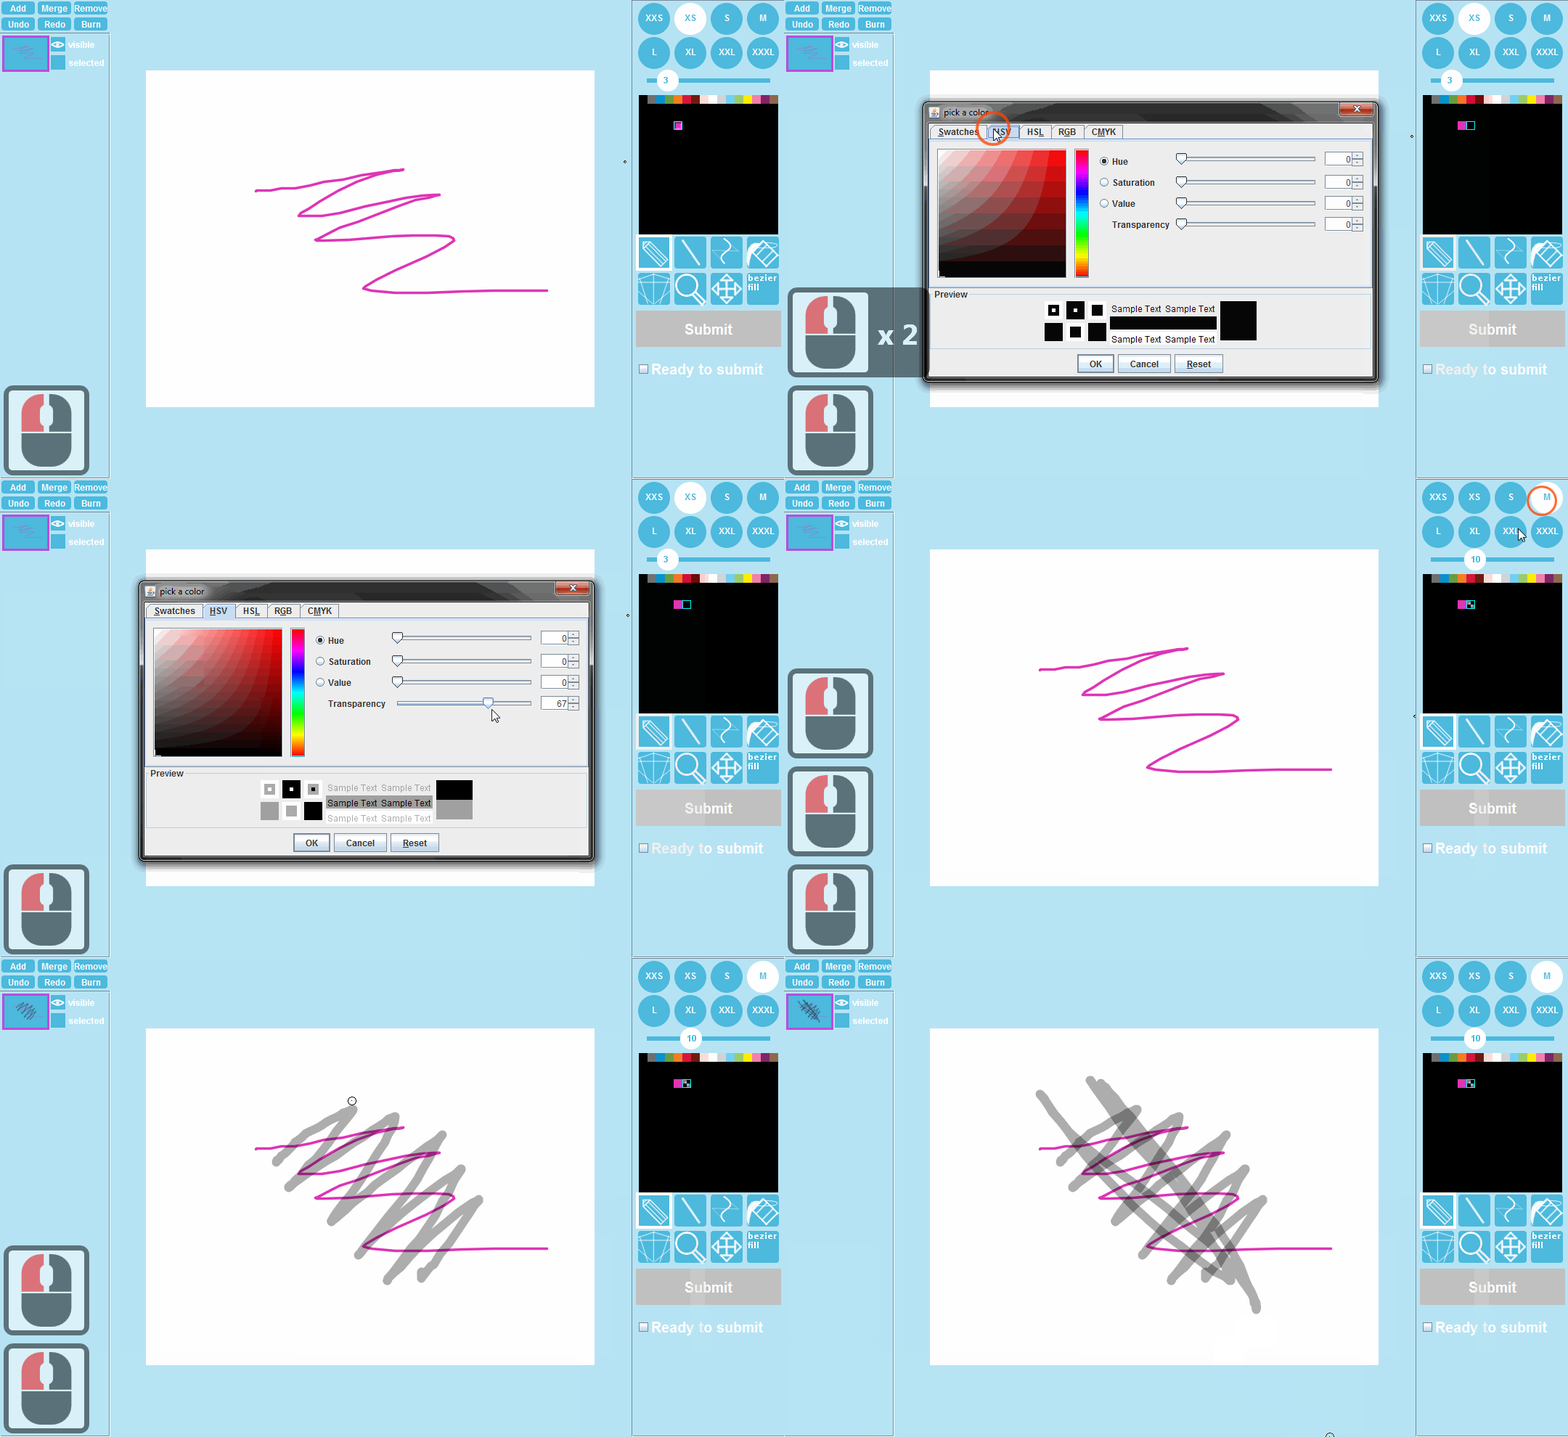
HSV, HSL, RGB and CMYK tabs all have a transparency/alpha slider that can be used to make the color transparent.
Gradient fill
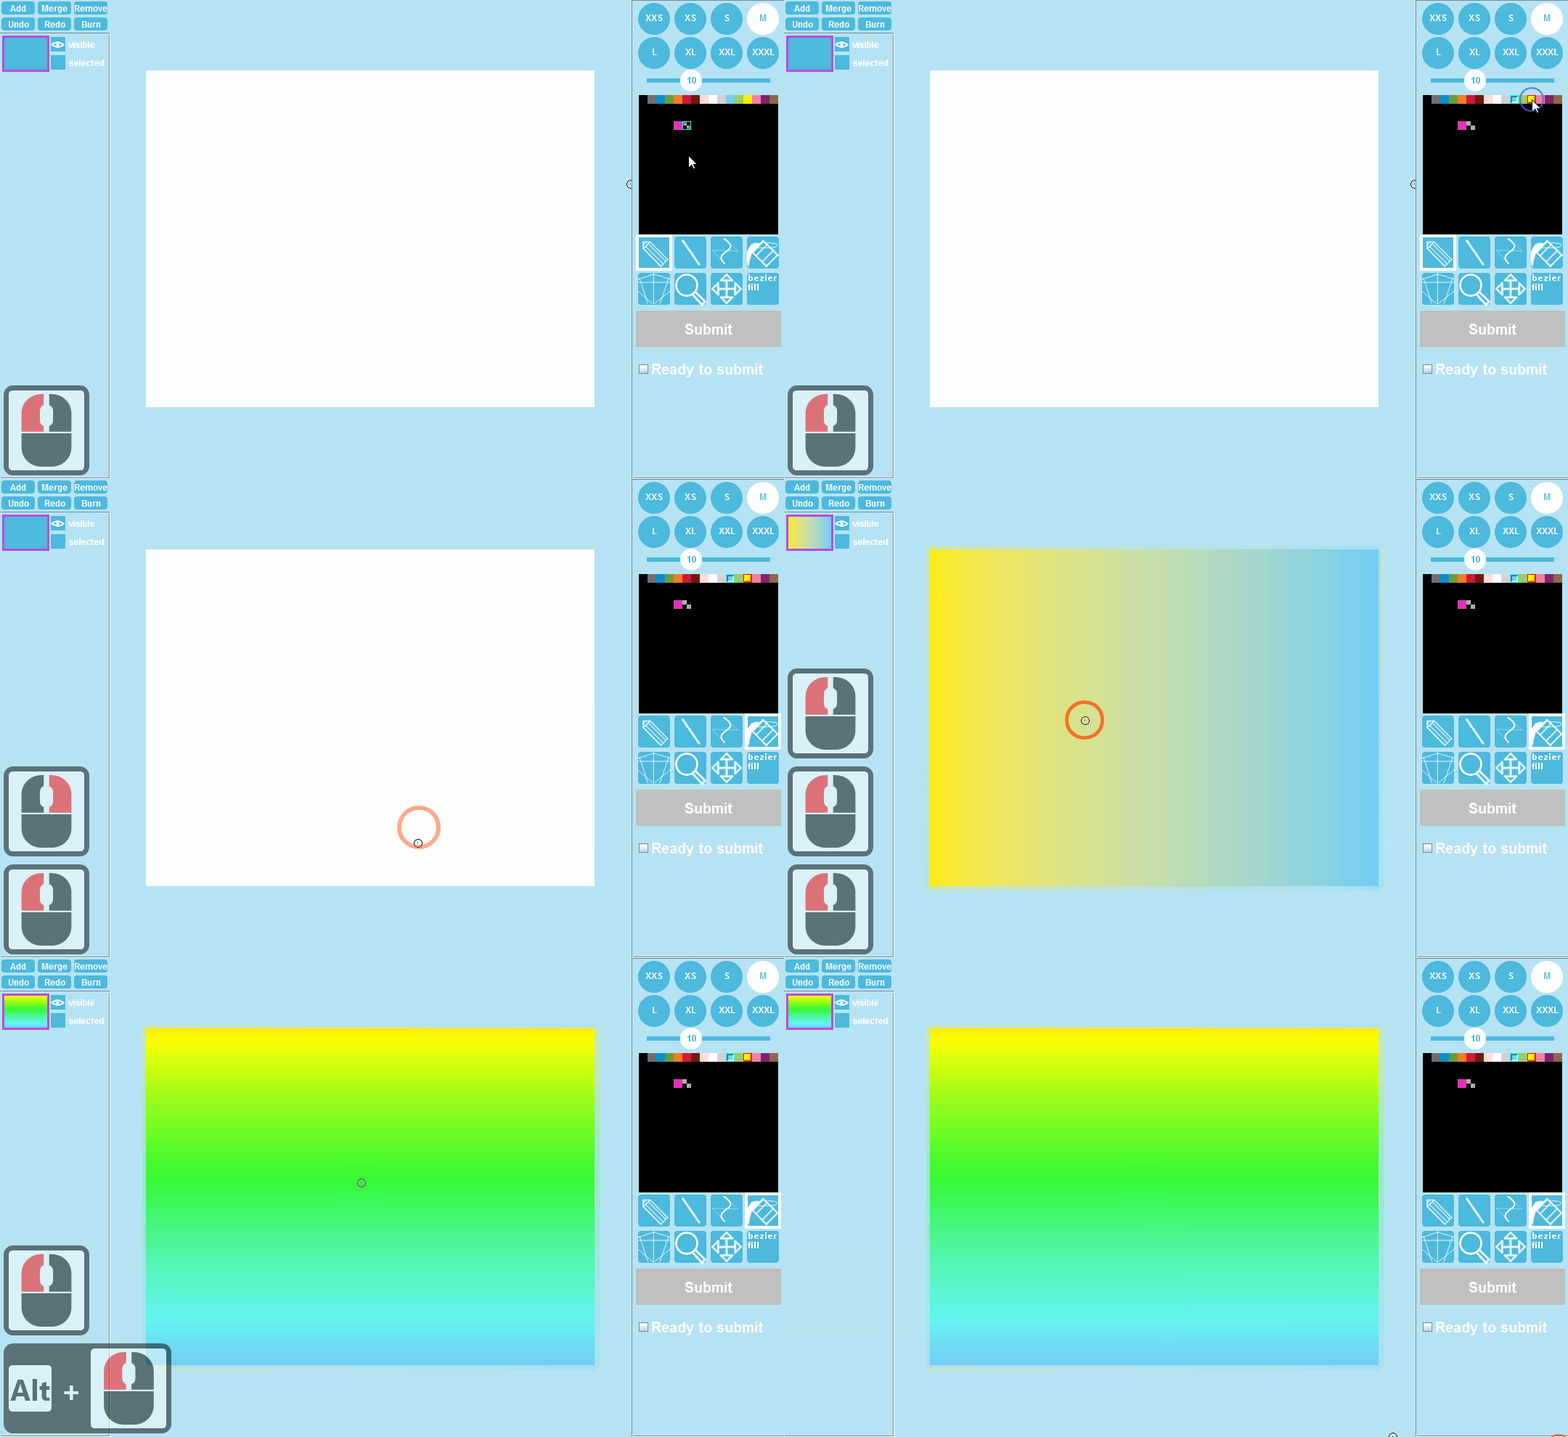
Choose the main color normally, by clicking and if you want to fill a gradient right click the secondary color, which will become the other end of the gradient. Fill tool will use the line size to set the "smoothness" of the gradient, but the smaller the size you use, the more lines the gradient consists of, increasing file size and possibly causing lag if the filled areas are filled multiple times without undoing the previous one.
Drag towards the direction you want the gradient to change in (up, down, left, right). Holding Alt while dragging will interpolate the color in HSV mode, creating different colors.
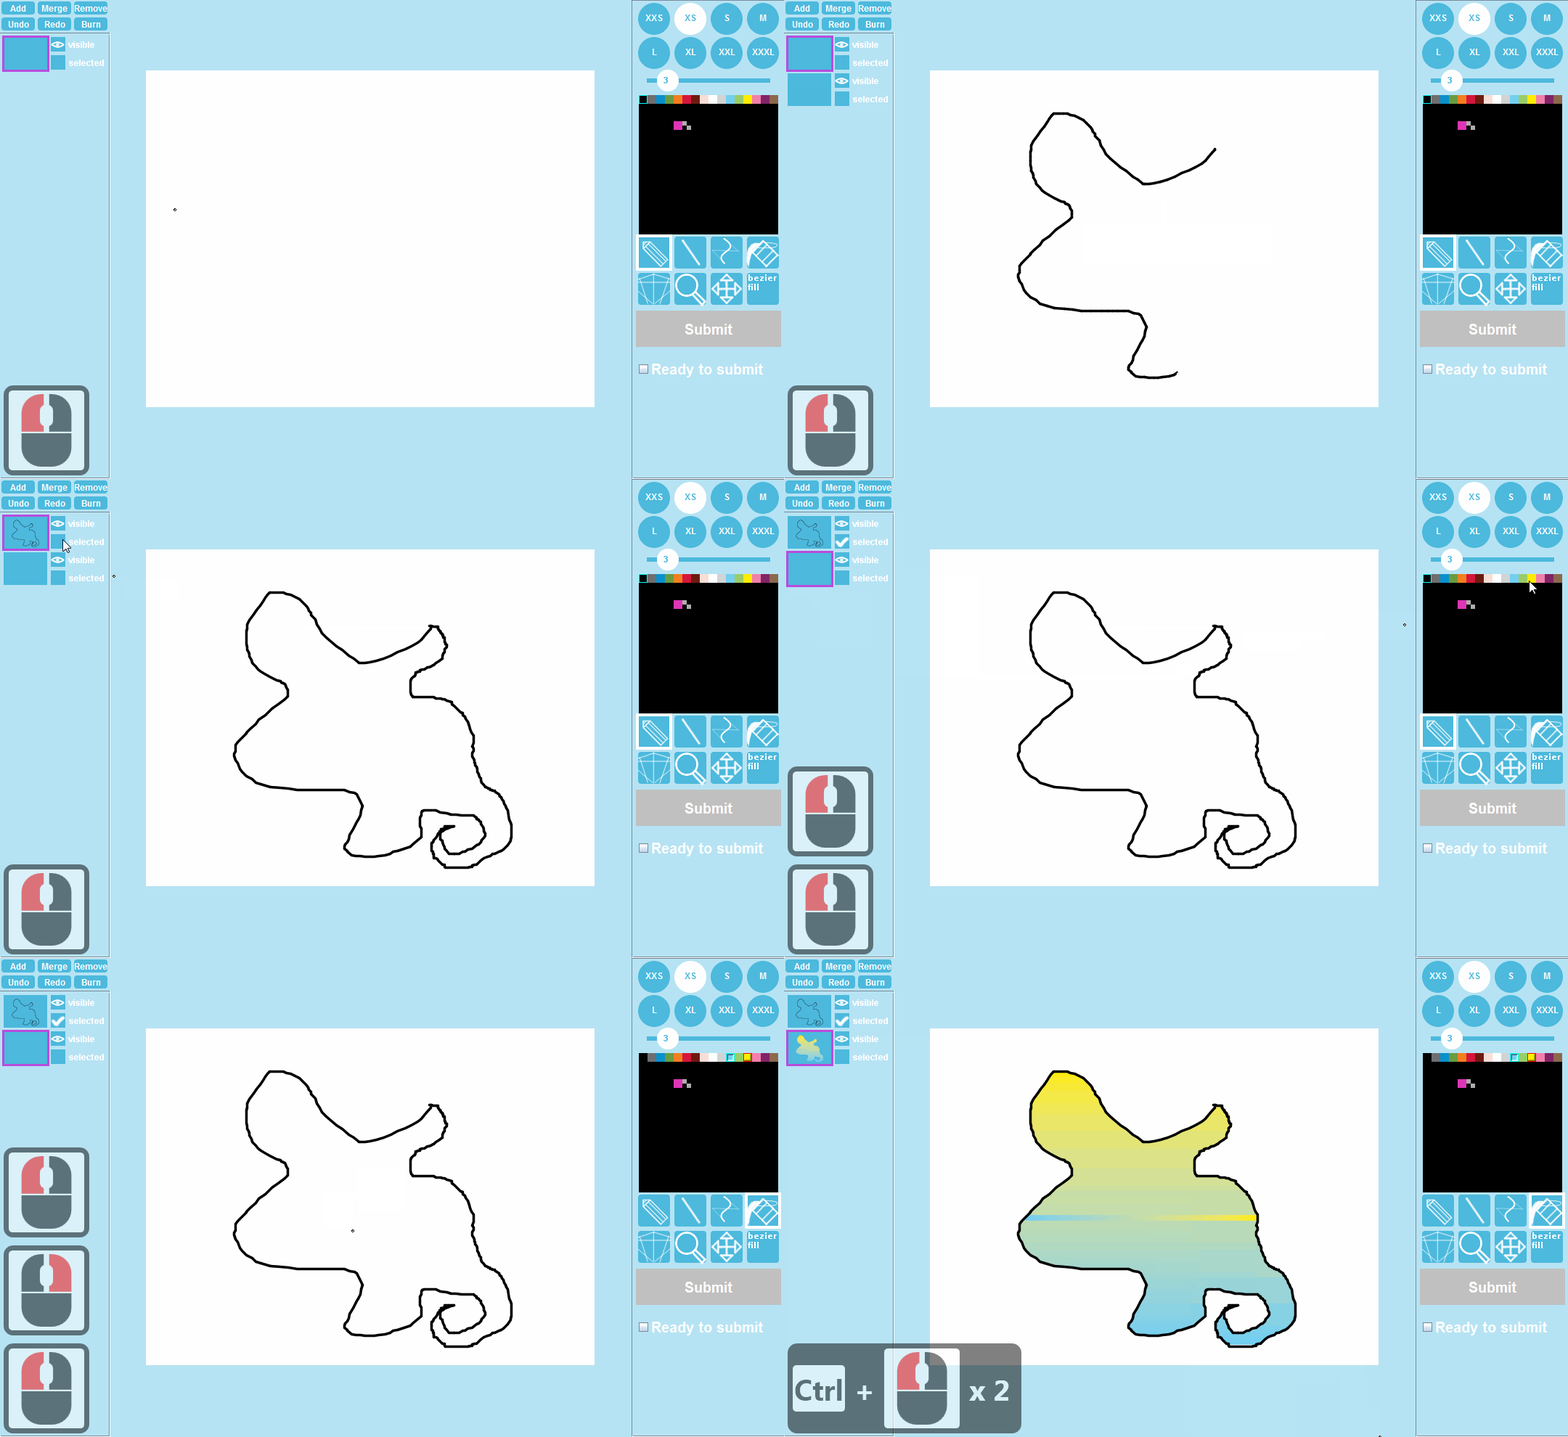
By selecting a layer with a shape you want to fill you can fill the area behind the shape. The current layer is also selected, so in case of flood filling a part of a gradient, you'll only fill one line of it.
Picking color from image
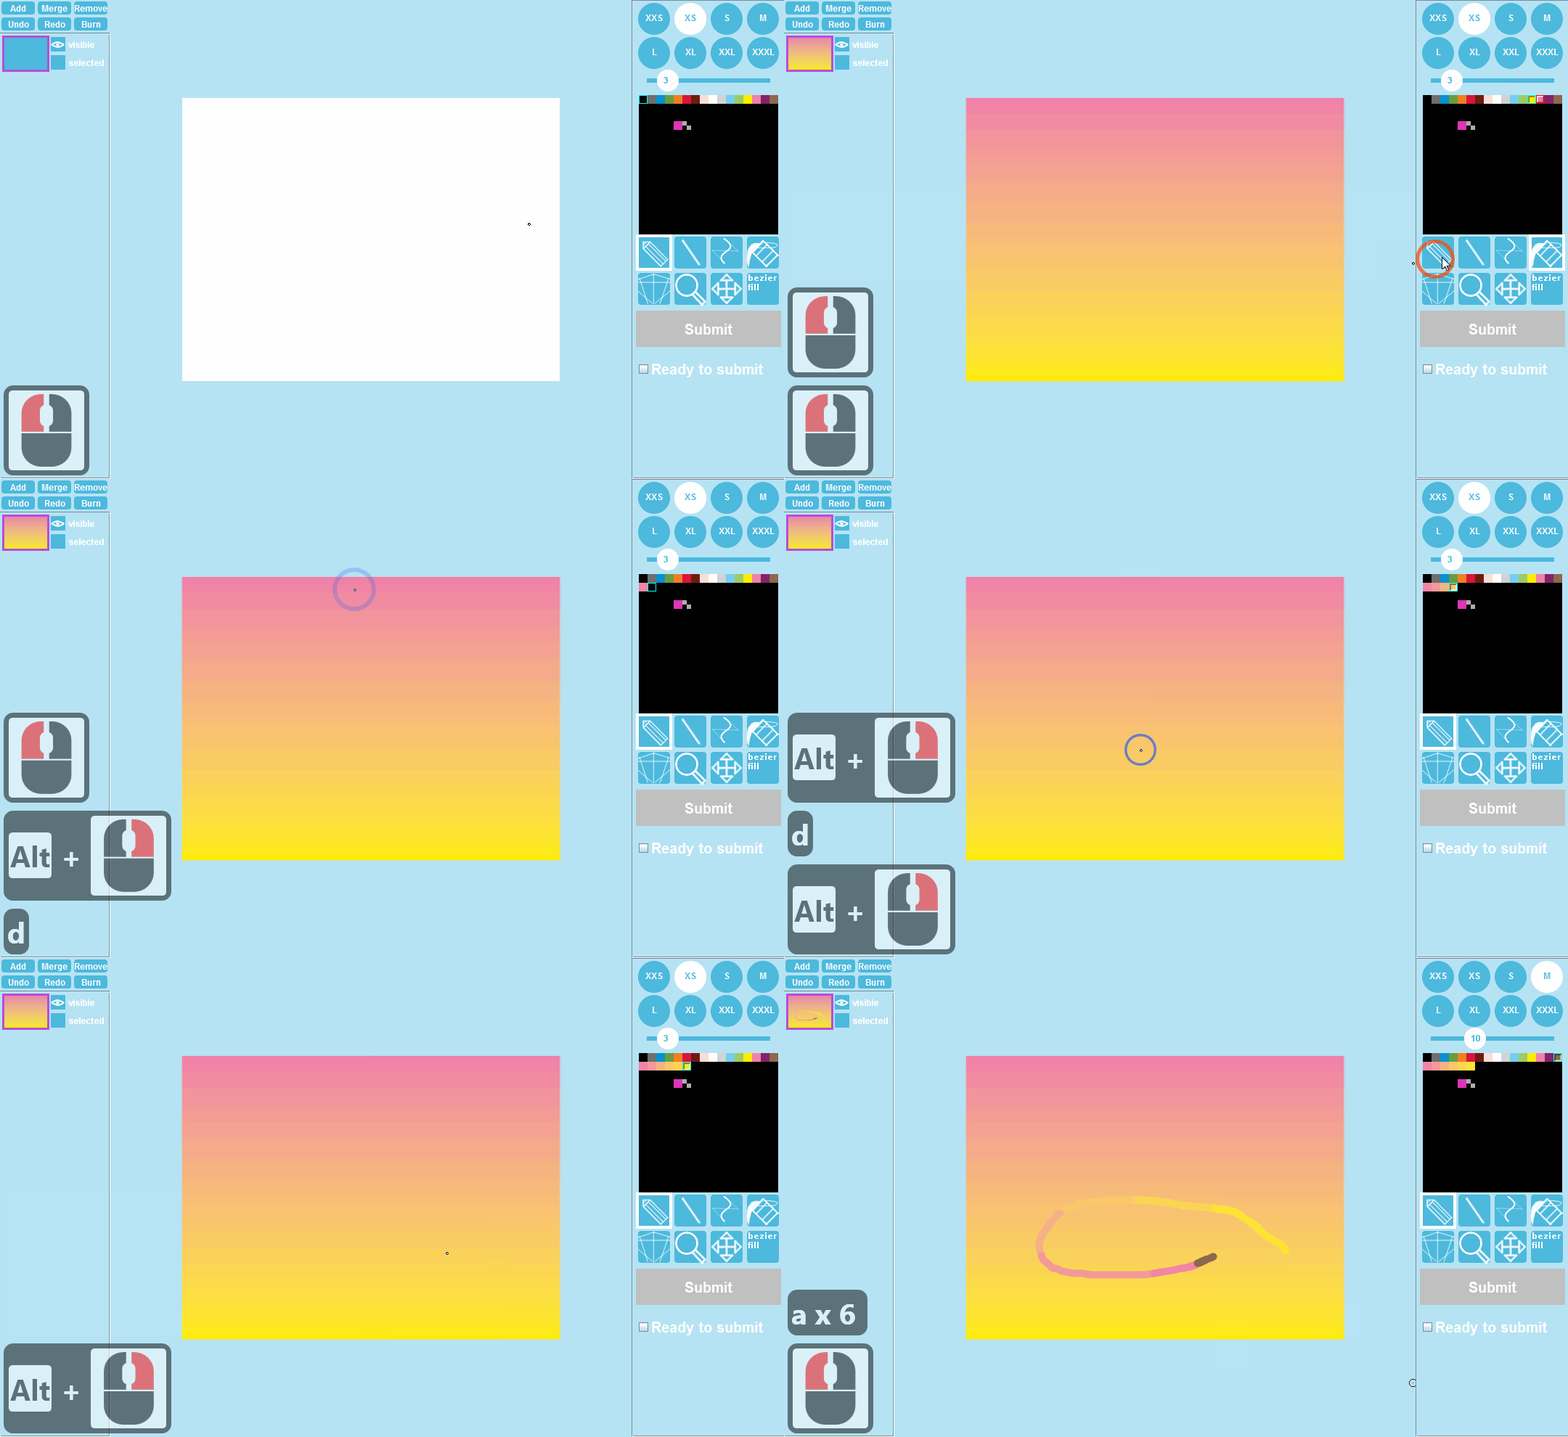
Alt + Right click when using the pencil tool will pick the color from the current layer to the currently selected slot in palette. It can be used e.g. to pick colors from a gradient, or to pick a combined color from semitransparent lines.
Shift + Alt + Right click will pick the color from all visible layers combined on a white background, so it will always give a completely opaque color.
Removing a mistake from inside a layer
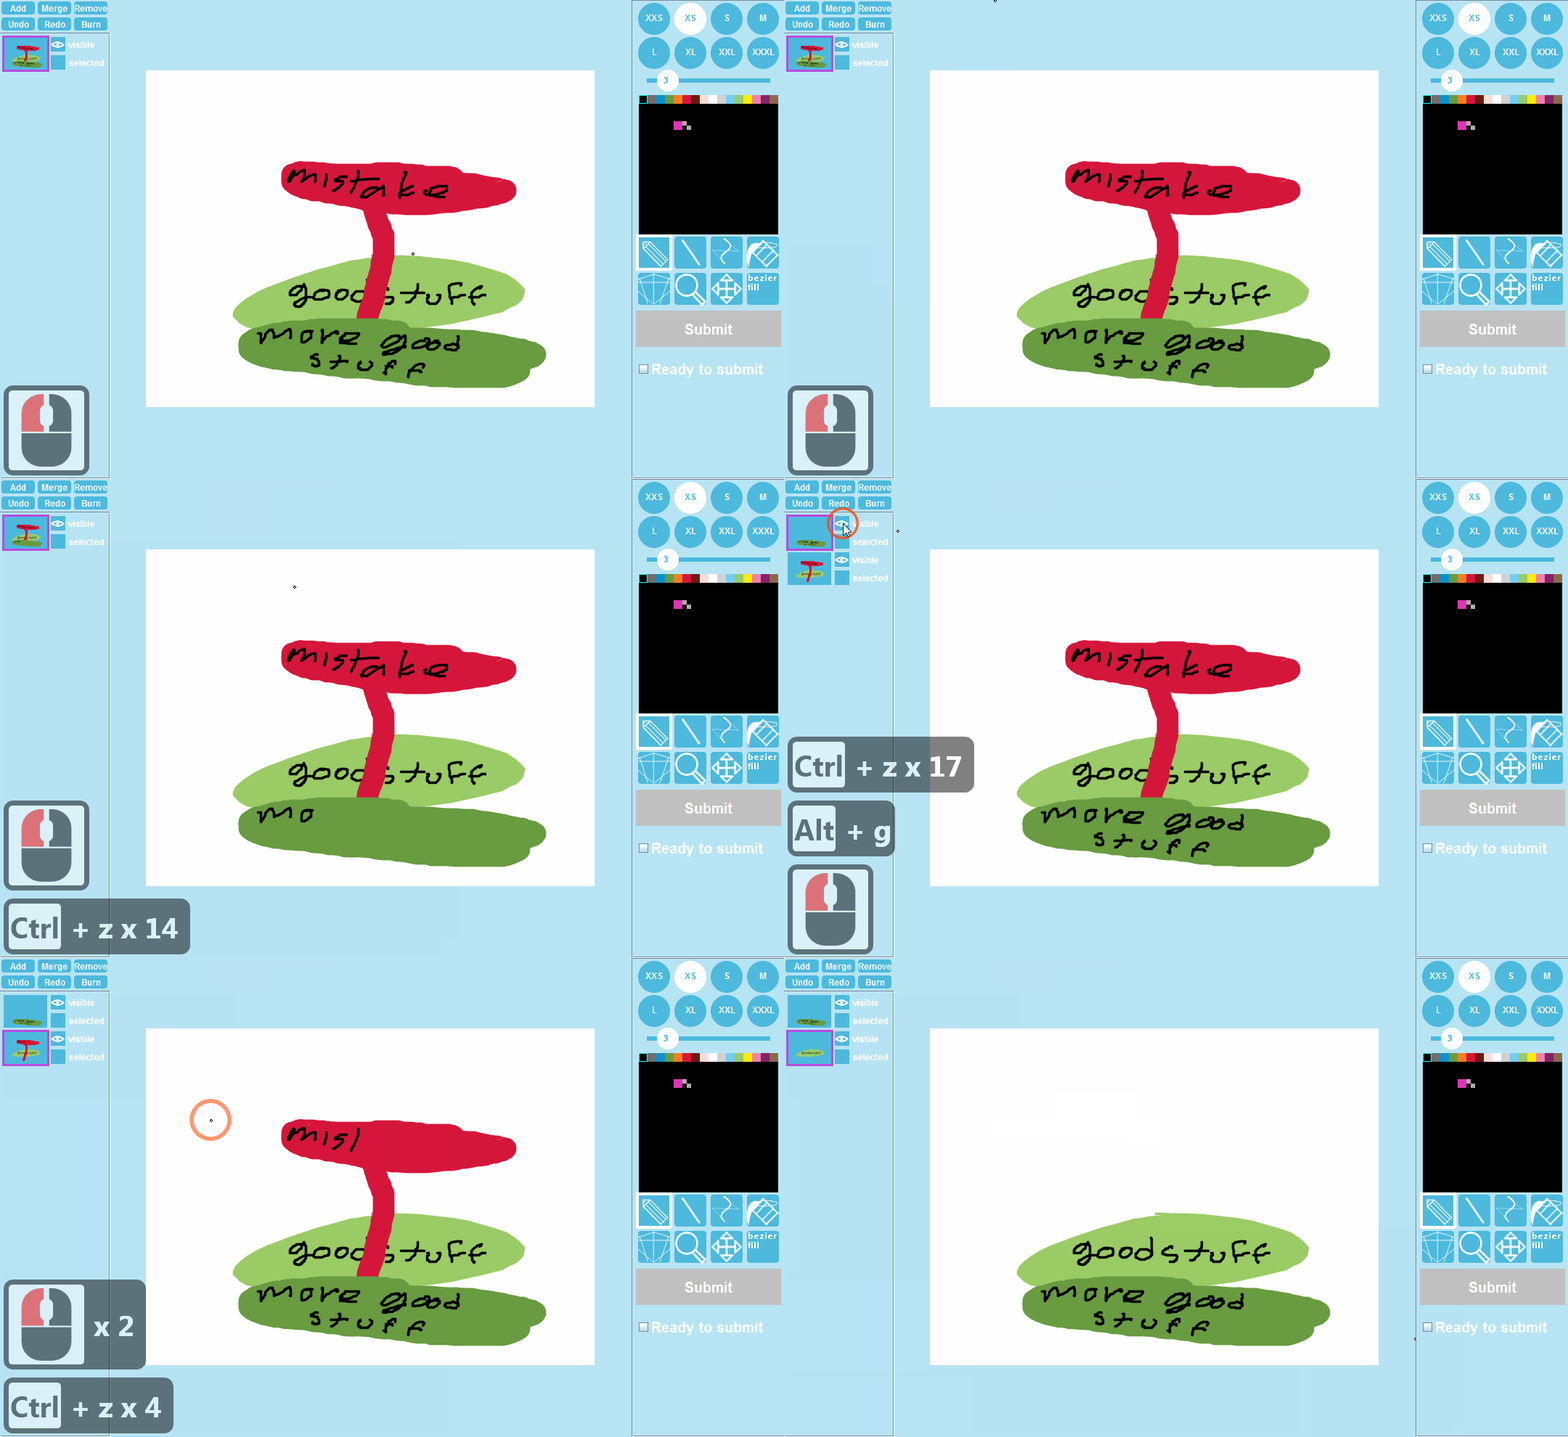
If you undo the part that you have drawn after the mistake and want to save, and press Alt + G, it splits the later strokes into a new layer and the mistake can be undone.
Bezier fill
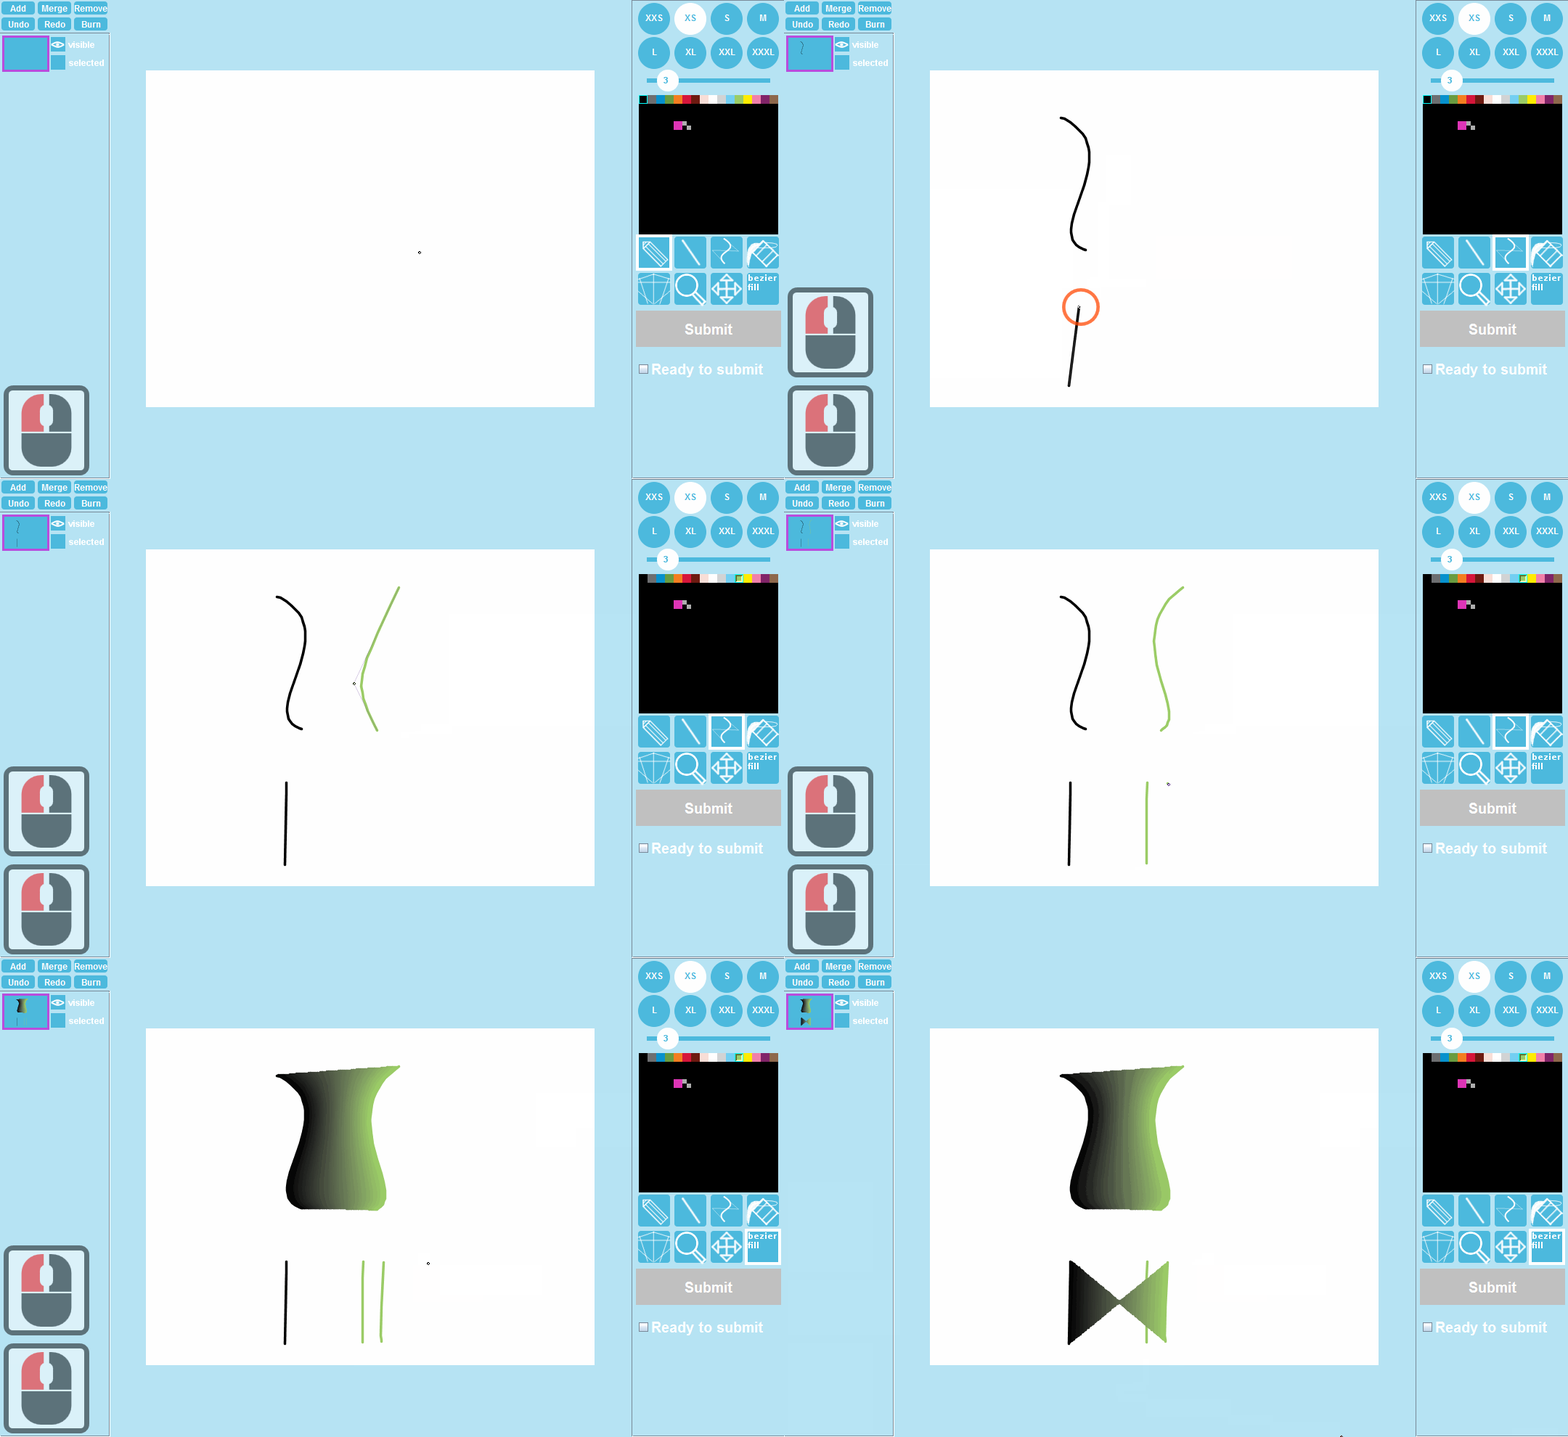
Draw two bezier lines. if you want to make a linear gradient that is not restricted to horizontal/vertical axis, you can use bezier fill to combine two straight bezier lines. Bezier fill will fill the area between two bezier lines with a gradient made of bezier lines. If the lines are in opposite directions, the fill will create an X shape instead of filling the whole area, so make sure the lines are going in the same direction.
Perspective ruler
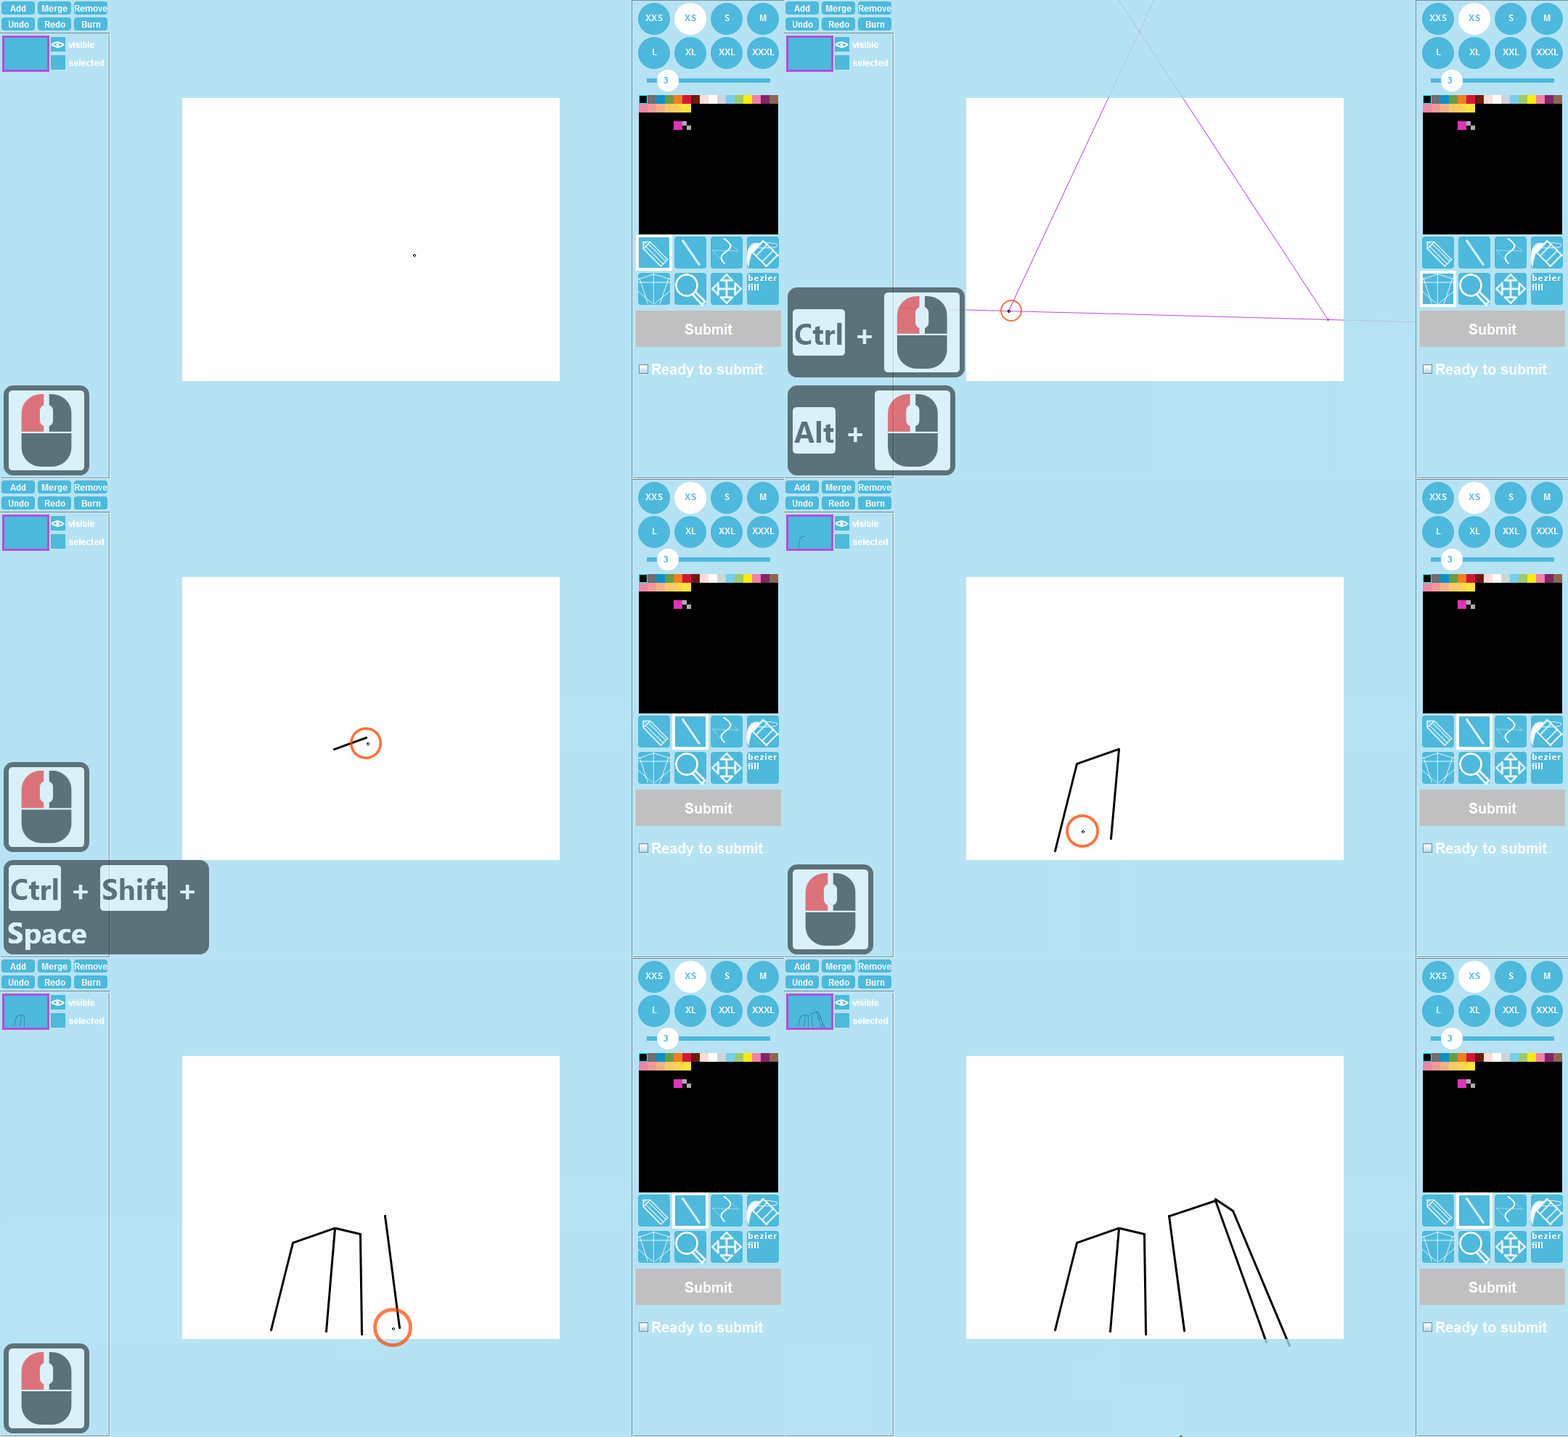
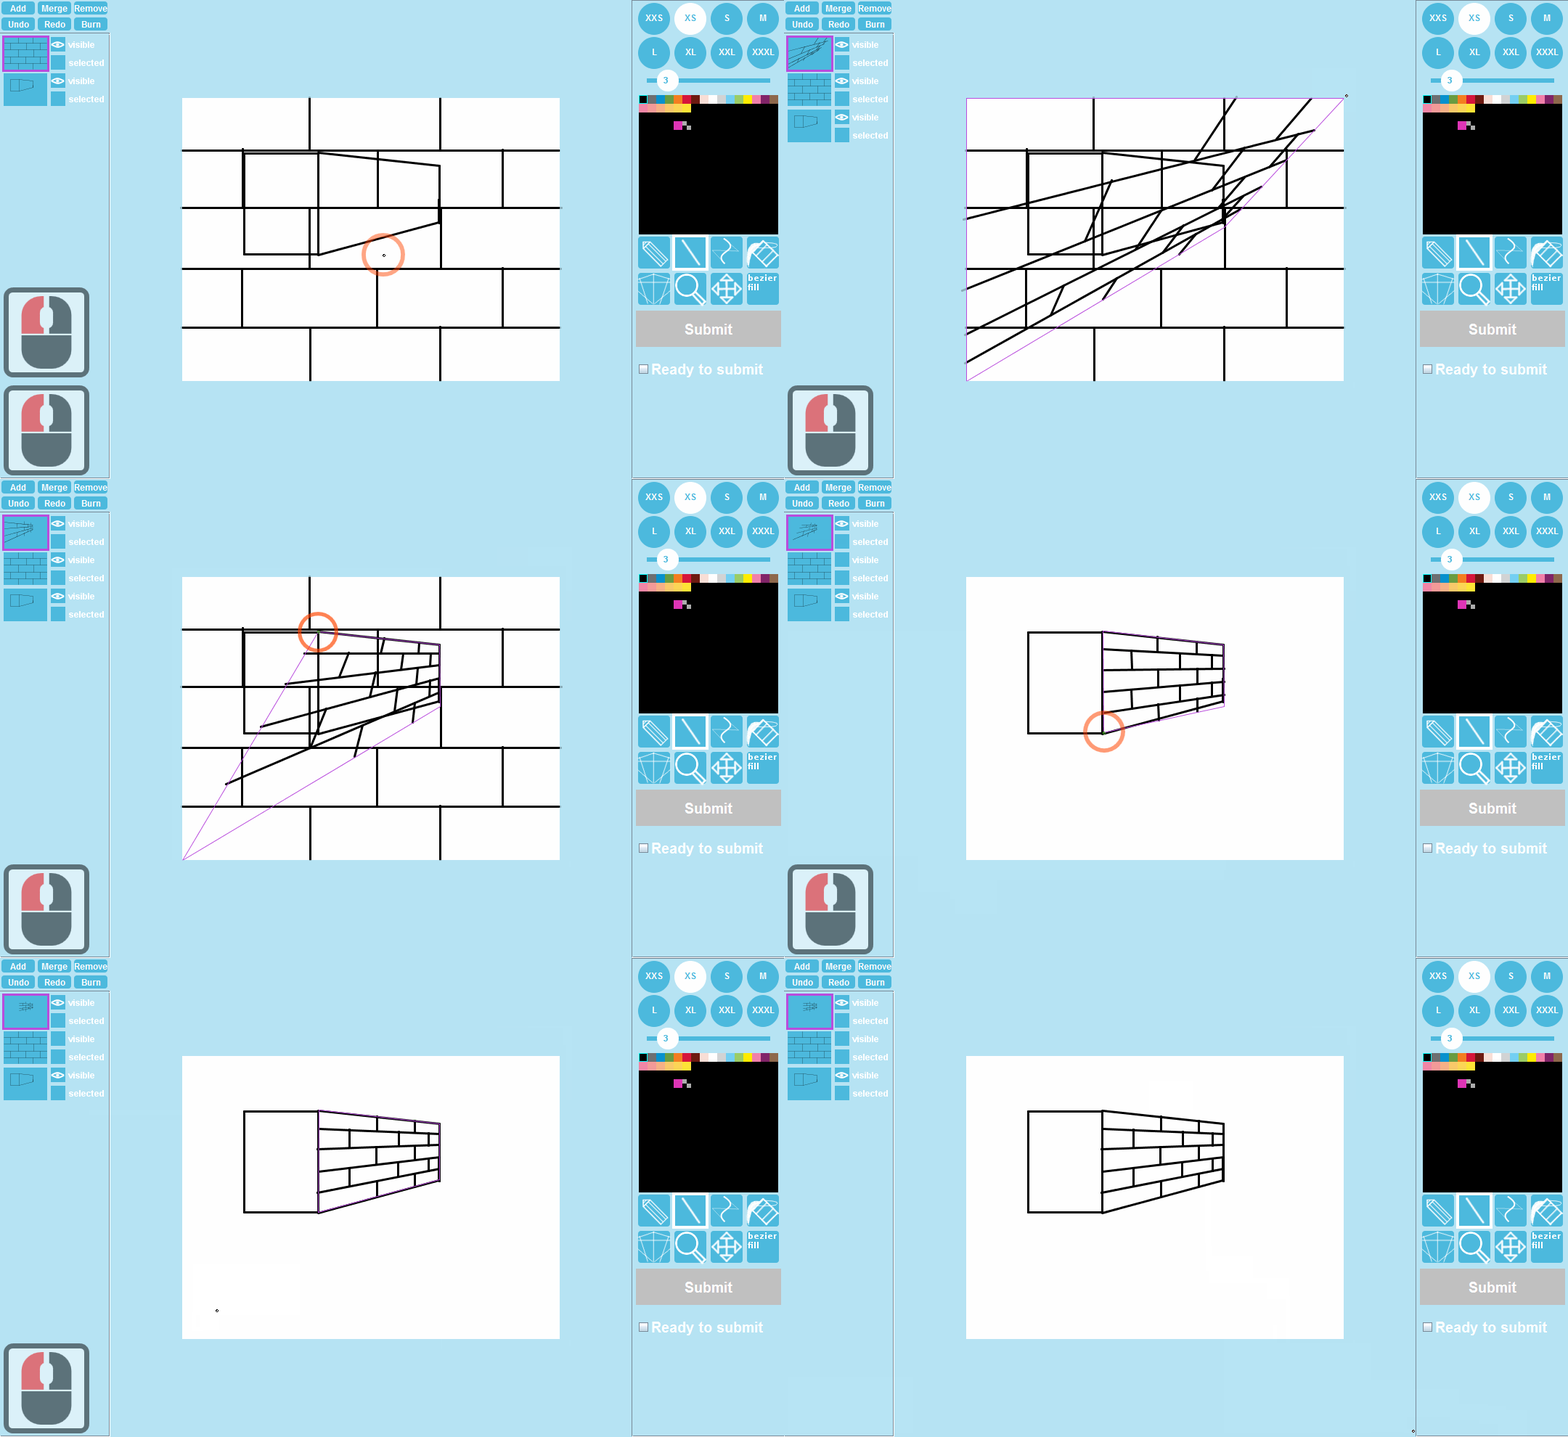
In perspective tool, place 1-3 vanishing points wherever you want, guides for deciding vanishing point locations are probably found elsewhere. When using the line tool, holding Ctrl will use an 8-directional ruler, and holding Ctrl+Shift while dragging the lines will use the perspective ruler. Unfortunately the keypress visualization failed to notice Ctrl+Shift clicks, so I pressed Ctrl+Shift+Space in the beginning to show they are pressed but that might had just been more confusing, sorry.
Perspective transform
A bit more secret functionality, it isn't very polished yet but it gets the job done. Press Ctrl+M to create a perspective transform layer that you can move around from the corners. Press Ctrl+M again to switch the layer back into a regular layer. If the final position is a lot smaller than the original size, It could be better to use a small brush size and only lines/bezier lines for the outlines, as the line widths are kept the same so they get proportionally thicker and freehand lines tend to get slightly jagged.
Minor pen tricks
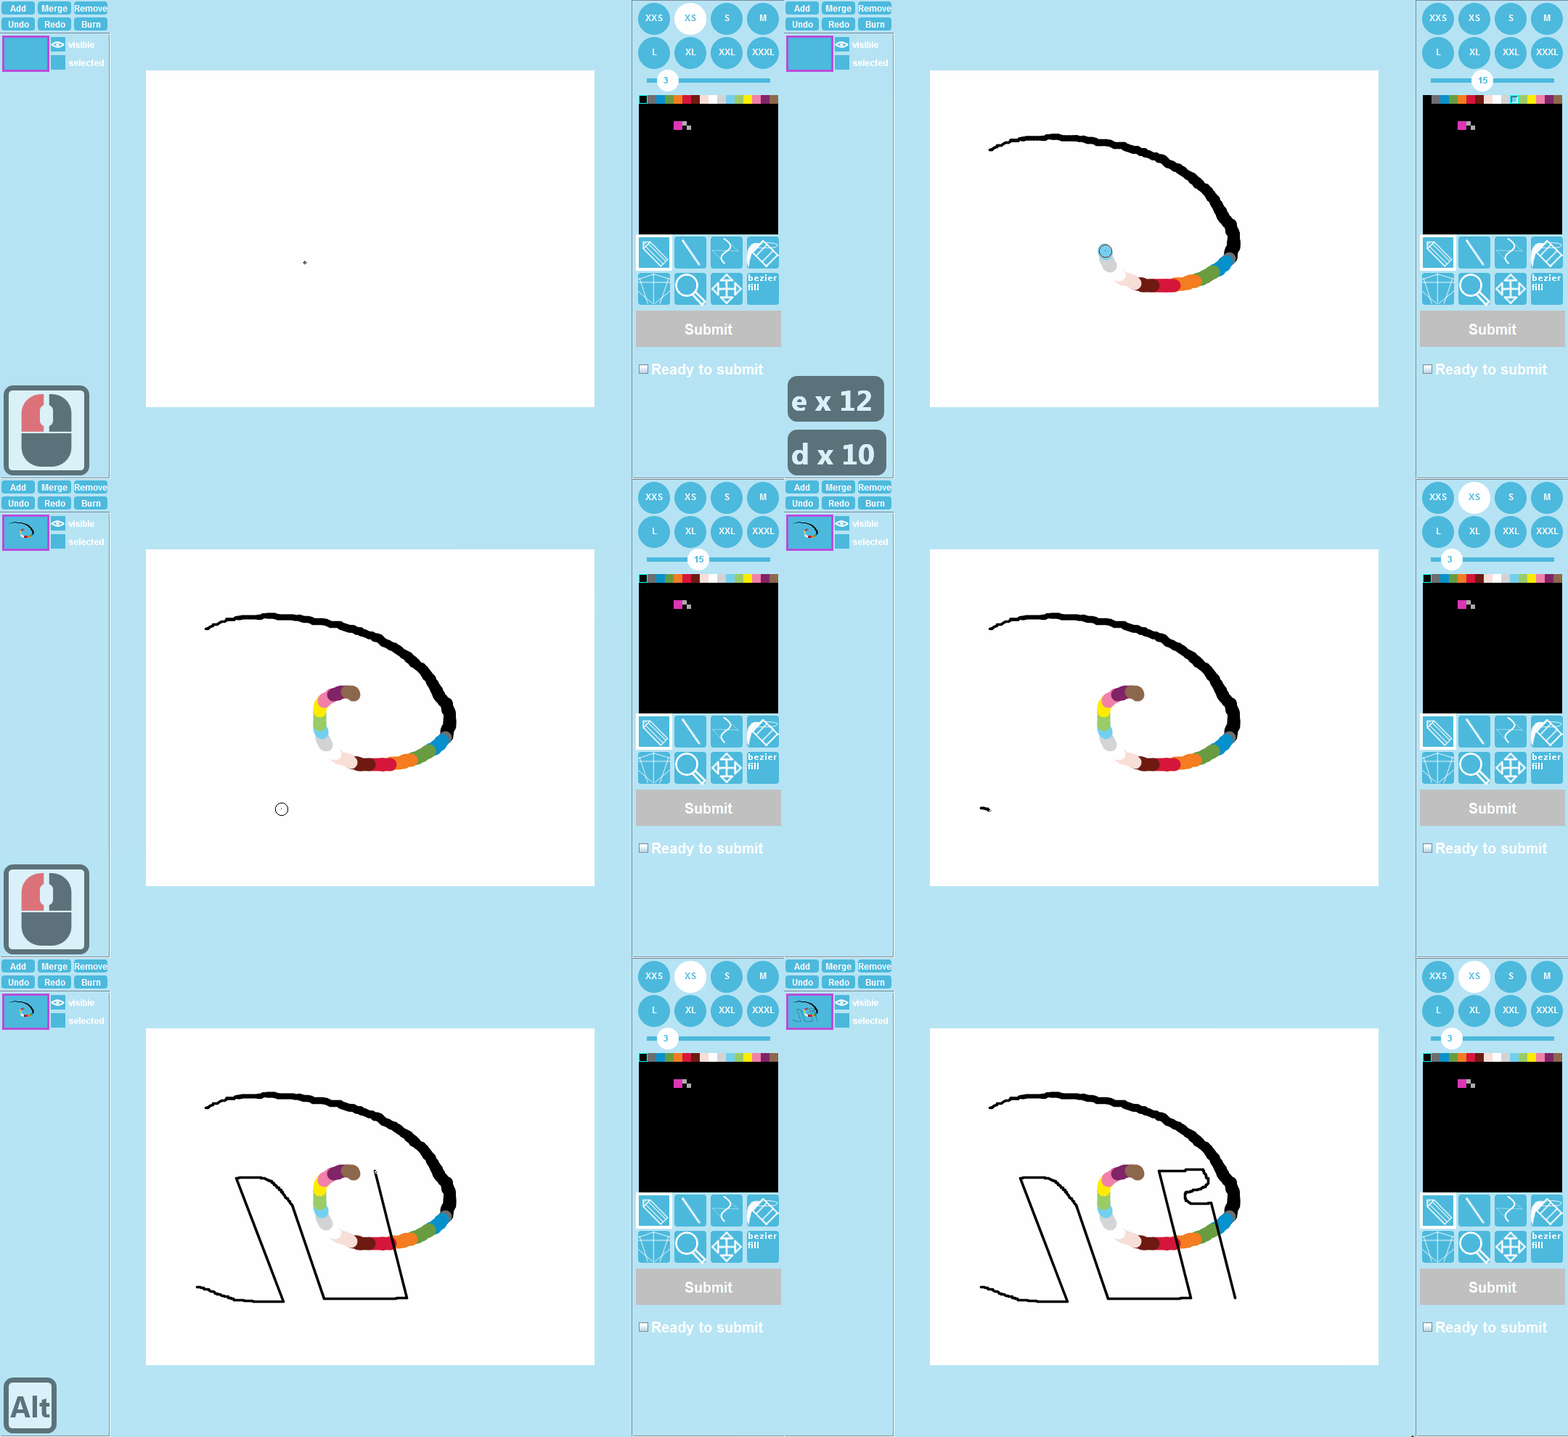
These are probably not that practical but you can change the brush size and colour mid-stroke with the keyboard. You can also hold Alt when using pen tool to make it behave like it was a line. Right clicking while using the line tool will create another segment to the line by the way, as seen from the perspective ruler gif.


