Indie game storeFree gamesFun gamesHorror games
Game developmentAssetsComics
SalesBundles
Jobs
TagsGame Engines

Ritter Map Transform (RPG Maker MZ)

Easily Change the tiles on your game map! All Layers! Regionids! Shadows! · By notRitter

Using MapTransform Prefabs Without Prefab Maker program

A topic by notRitter created Nov 14, 2020 Views: 309 Replies: 3
Viewing posts 1 to 2
(+1)

Can't use Prefab Maker for some reason? 

Follow the steps below to create prefabs without Prefab Maker.

  1. Map out your prefab(s) in a 'TileMap'.
  2. Enter Tilemap prefab data into map notes.
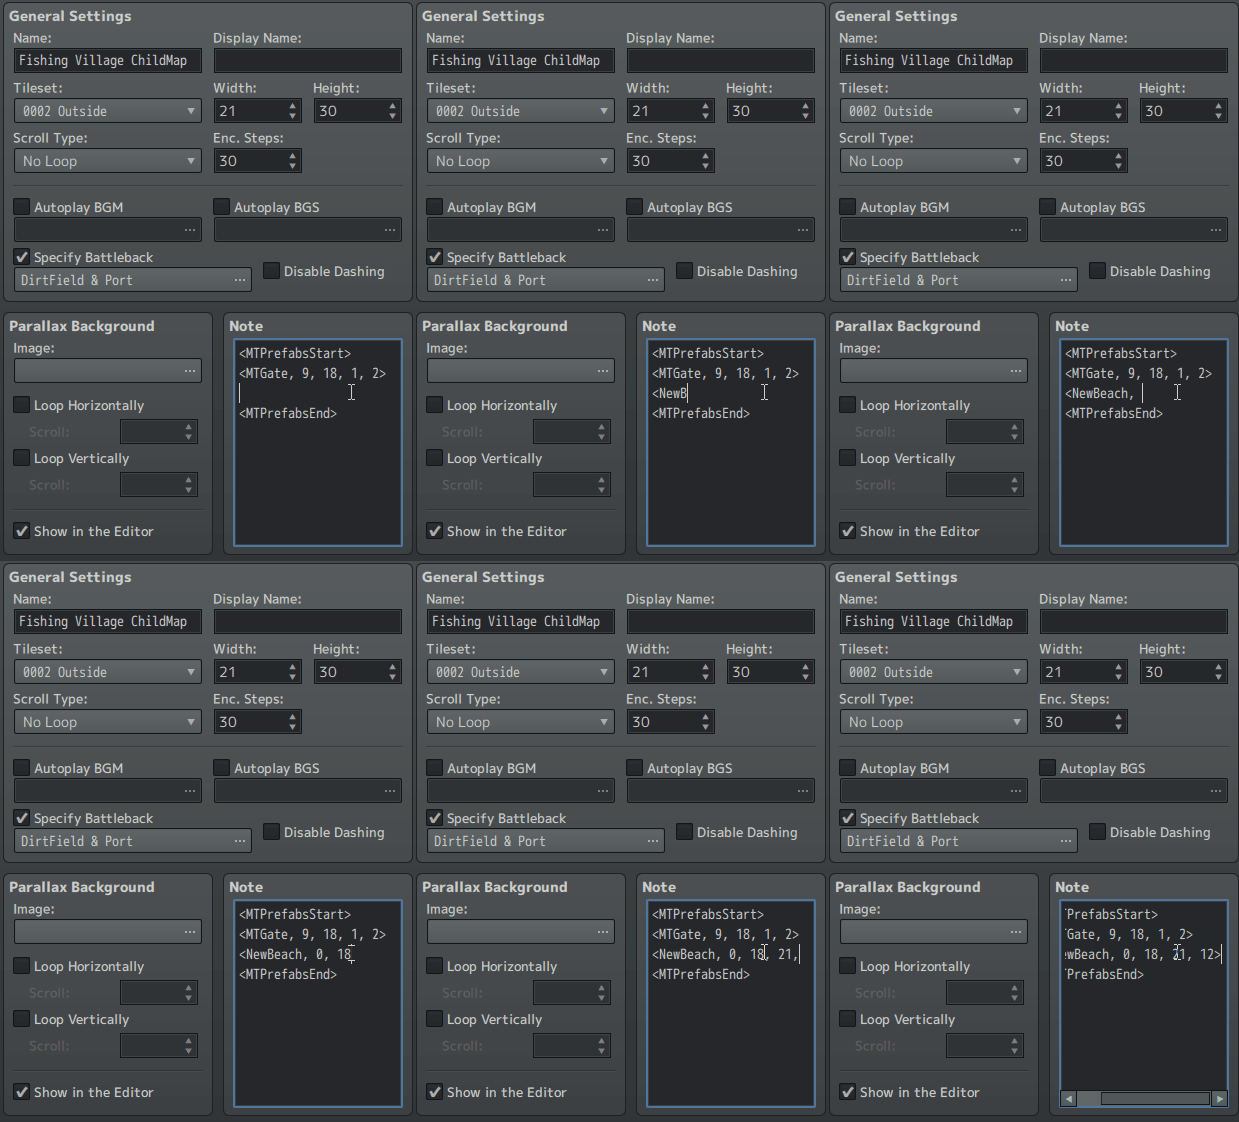
Inside the Note field on your 'TileMap' properties Enter the following:


<MTPrefabsStart>

<MTPrefabsEnd>


Between those two tags you will create your prefabs.


<MTPrefabsStart>

<Name, x, y, width, height>

<MTPrefabsEnd>


Name is the name you wish to assign the prefab.

x is the x location of the upper left tile of the prefab on the 'TileMap'.

y is the y location of the upper left tile of the prefab on the 'TileMap'.

width is the number of tiles wide the prefab will be.

height is the number of tiles high the prefab will be.


Example:


<MTPrefabsStart>

<MyFirstPrefab, 3, 3, 6, 6>

<MySecondPrefab, 2, 2, 4, 4>

<MTPrefabsEnd>


Once you've done this you can call these prefabs using the usePrefab script call.

let Name = "MyFirstPrefab";
let x = 13;
let y = 37;
let changeRegion = true;
let save = true;
Ritter.MapTransform.usePrefab(Name, x, y, changeRegion, save);

So just to confirm the script to change Region ID '1' area with the specific "Prefab"  when using map note will be:

let Name = "MyFirstPrefab";

let changeRegion = true;

letsave = true;

- Do I missed something?

- And how do you define the specific 'Regoin Id' number you want to post the "Prefab" in (with out knowing the 'x' and 'y' location of the region)?

(+1)

This plugin only changes the regionId of tiles themselves, (so if you had a tile with regionId 5 you could change it to regionId 8 for example) it doesn't read any regionId data for showing prefabs or changing tiles themselves. Something like that would require some scripting or using another method.

Prefabs are simply a set of tiles on a 'Tile Map' (much like a spawn map), you create an object which holds all the prefab data needed and give it a name, x location on the tile map, y location on the tile map, width, and height. I'll break down the prefab object creation versus script call. 

When you are creating a prefab you are creating an object which holds the Prefab data mentioned above, all of this data references the location and size of the prefab on the 'Tile Map'.

So you mapped out a 5x5 area on a 'Tile Map' and created a prefab object (using prefab maker or the method in this thread above) specifying a name, x, y, width, height for the prefabs map data from the 'Tile Map'. To show the tiles you specified in the prefab object you use the usePrefab script call.

Ritter.MapTransform.usePrefab(Name, x, y, changeRegion, save);
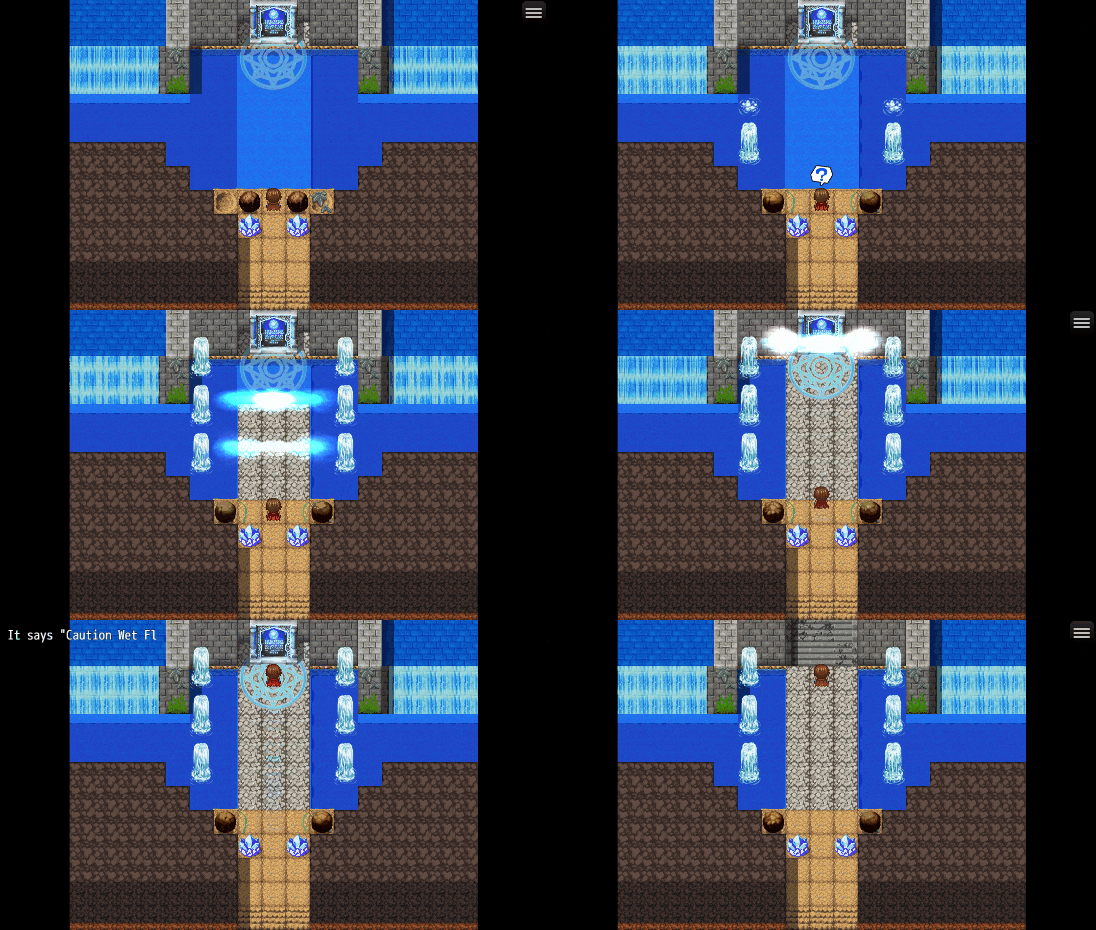
The Name value refers to the name you specified for the prefab when you created the object.

The x, y here refer to where you want to place the prefab on the game map. x, y is the upper left corner of the prefab.

changeRegion = true; would tell the plugin to also check the regionIds of the tiles in the prefab data and change the regionIds on the game map when the tile data is changed.

save would simply make the changes permanent (remains on the map forever, or until you change them again) or temporary which return back to default on map change.


This may not be exactly the feature you're looking for as this is mainly used for a group of tiles. If you're looking to change specific tiles one at a time and if you have the x, y location of the tile you want to switch from the game map to another tile then using swap tile might be a better choice.

Maybe on a 'TileMap' (create a copy of your map) you modify the areas you would like to switch to the game map and whenever your conditions are met you swap out that tile (x, y) with the tile data from the 'TileMap'.

So you would have your default game map where the player is, and a modified copy of that same map with the 'TileMap' or 'ChildMap' tag in the copies name. Then whenever a tile needs to be switched as long as you have the x, y location of the tile that needs to be swapped you just use the swapTile script call.


Ritter.MapTransform.swapTile(mapId, x, y, sx, sy, changeRegion, save) 

Swaps out a tile with all layers of a tile located on another map.

mapId = Tile Map Id 

x = The X Location on the Game Map tile to swap out. 

y = The Y Location on the Game Map tile to swap out.

sx = The X Location of the desired tile on the Tile Map. 

sy = The Y Location of the desired tile on the Tile Map. 

changeRegion = true/false;  // Changes the regionId of tile to match Tile Map tile if true. 

save = true/false;  // Saves the changes made to the map if true.


again for clarity, changeRegion here would look to the 'Tile Map' for regionId data for the specified tile, so setting it to true would change not only the appearance of the tile but also the regionId of that tile itself as well to match the exact tile on the 'TileMap'.


So if you have an event on the tile you want changed for example you can grab that events x, y location and use that as the x, y and then also use x, y as the sx and sy. This would make it swap the tile out with the modified version of it. Kinda like having mirrored maps where you can pull its other version up using the same coordinates. (this is just a simple way of handling this, you can also do it using strictly tile Ids but thats a lot more work)

$gameMap.event(this._eventId).x;

$gameMap.event(this._eventId).y;


But knowing the x, y location on the game map of the tile you want to switch out is very important.


So lets say we mapped out an empty lot for a house. We can create a copy of the lot, or the entire map whichever you prefer, and then map out the house on the copy. We take the upper left corner of the house and use the width and height. Lets say our house is 5 tiles wide by 6 tiles high and the upper left corner of the houses rectangle is located at 7,7.

We create a prefab with the following data.

Name: MyHouse

mapId: the mapId of the Tile Map

x: 7

y: 7

width: 5

height: 6


Now that we have the prefab object and the tilemap set up we can show that prefab on the game map at a specific x, y coordinate.

Ritter.MapTransform.usePrefab("MyHouse", 10, 10, true, true);

This would look to the tile located at 10, 10 on the game map and start transforming tiles from that location going as wide as your width and as high as your height to make a rectangle. It would know the data for the prefab because you called to it by its "Name" and from here just switches each of the tiles in the 5x6 rectangle with the prefab tile data.


I think I explained the same thing a couple times here so I'll end it at that for now, I'm very likely going to do a tutorial video on the entire plugin some time soon. Some aspects of this plugin are very complicated which led me to trying to simplify things while leaving the freedom to handle the tile data yourself if that's your thing. I aimed to make it function a lot like a spawner but for map tiles. It never really spawns anything though.. it just modifies the tile data and refreshes.

I get it now, thanks for the detailed explanation, I think in my mind is actually very cool that you can change the Region ID on the tile in 'x,y' location to the region I'd on the Prefabs map. Never sew plugin the not only replace the tile I'd but also the region I'd. 

And I'm looking forward for the tutorial about The 'freedom to handle the tile 'data', thanks again.