In this tutorial, I'll go over how to set up your personal preferences for Aseprite. This allows you to set up a comfortable and productive workflow as you're drawing. The options to do this are found under the Edit menu bar tab, they are the Preferences and Keyboard Shortcuts.
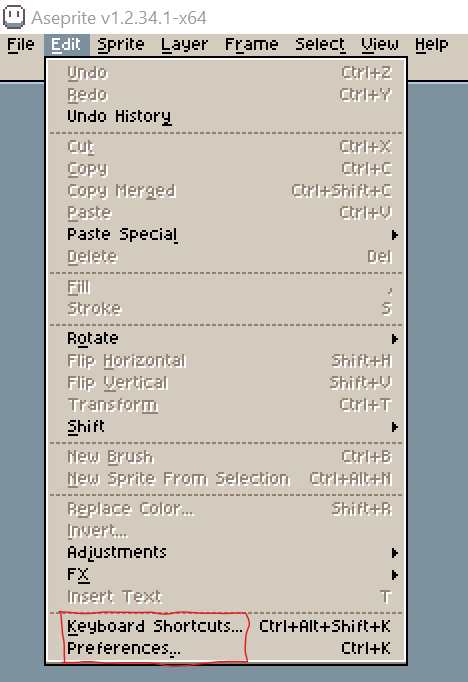
Preferences
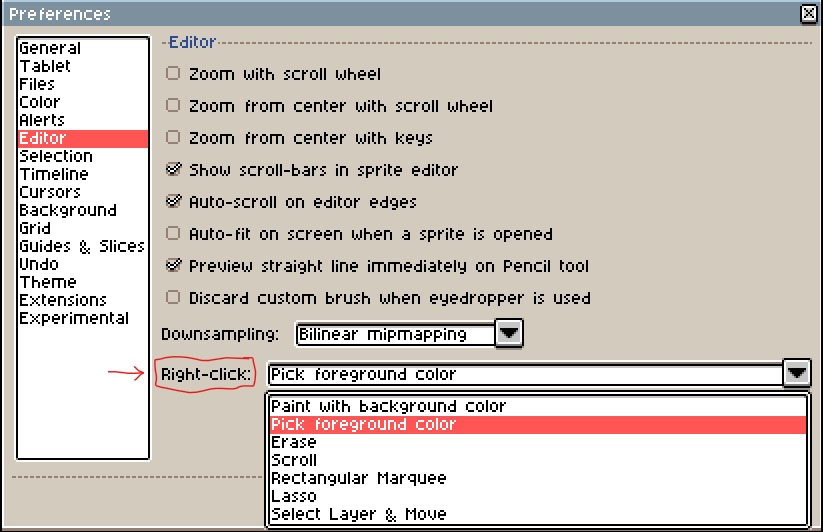
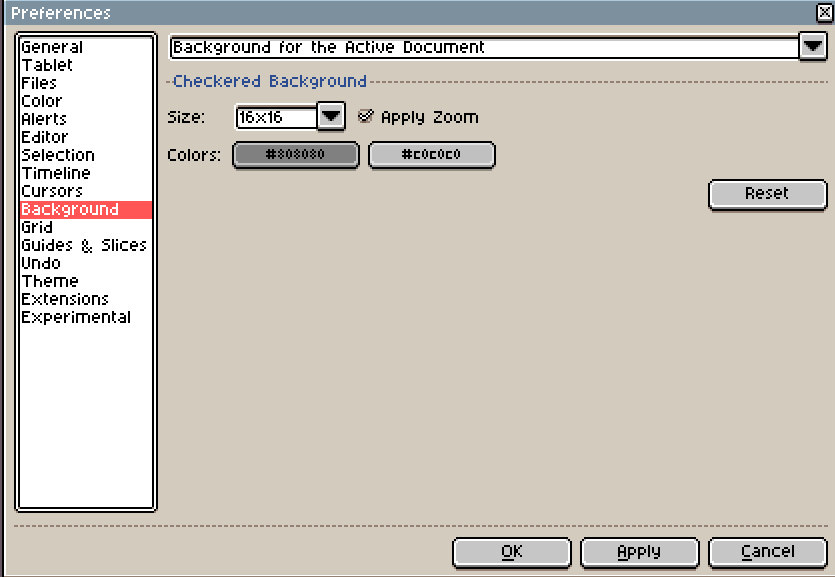
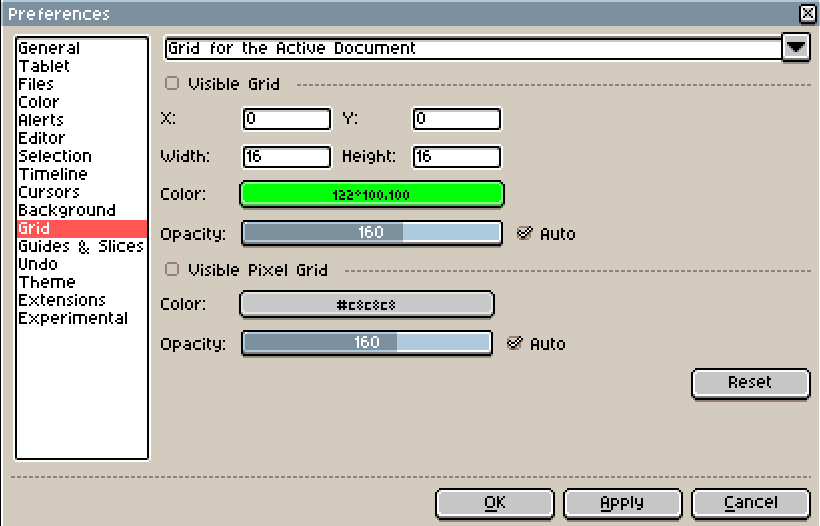
Now if you open up the Preferences window, there's a ton of preferences you can edit, but I feel like you can ignore most of them. However there's a few preferences you may want to look into right now such as Editor, Grid, and Background. In "Editor", I like to set my right-click function to pick colors off the canvas. This saves me a lot of time when I'm drawing because I don't have to recreate colors with any sliders. I can just right click on any existing pixel on the canvas and my selected color immediately becomes that color. For background, I just like to keep the checker pattern 16x16px. Same for Grid. Grid is useful for tile sets and icon sets such as inventory icons.
After that, you can apply any changes you've made. Now moving on to keyboard shortcuts!
Keyboard Shortcuts
So keyboard shortcuts are useful for obvious reasons. They cut down time and energy it takes to do tasks on a computer. Art can take a long time, and I think patience goes a long way, but I still think you should take advantage of what you have. If you open your Keyboard Shortcuts tab, you'll see a lot of shortcuts key combinations you can change. I'm not going to tell you what shortcut to set, but just pick whatever keys you think would work for you, and make sure they don't conflict with each other. Though maybe 2 things I'll suggest are the shortcuts to move the camera and change the brush size of your pencil.
Camera Movement
I have camera panning and zooming set to "Ctrl" so when I press the Ctrl key, I can click and drag to pan the view, and use the mouse wheel to zoom in or out. To do this, you'll need to modify both the options in the Tools and Mouse Wheel tabs. In the Tools tab, find the Hand tool and make sure you select the "quick" version. This is the panning tool but not a zooming tool, and the "quick" specifier specifies that this tool is active only if you're holding down the shortcut key. Here you can set it to "Ctrl" and now you should be able to pan the camera by pressing Ctrl and clicking and dragging the mouse.
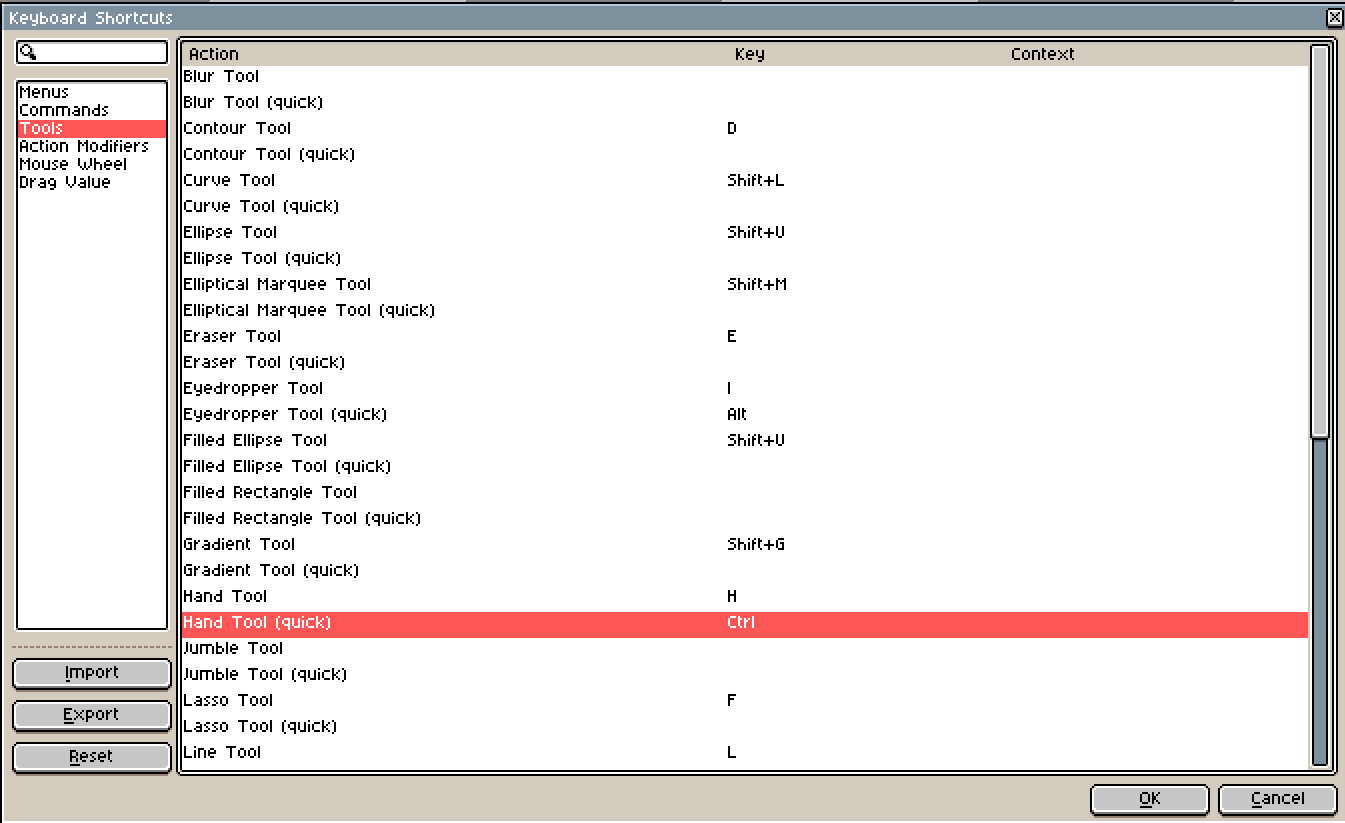
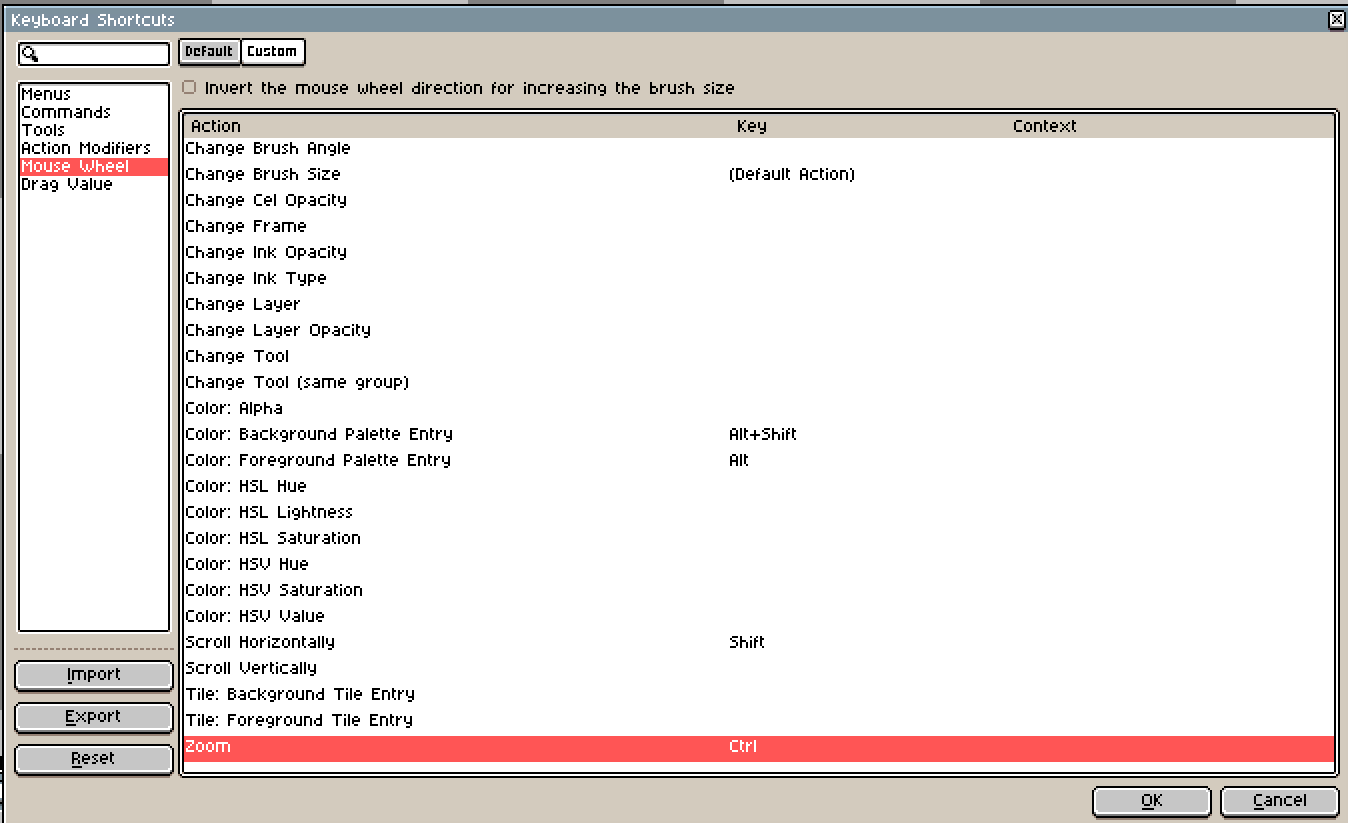
However we still need to set up the zoom functionality. This is found in the Mouse Wheel tab. Set it to Ctrl as well. So now when you scroll the mouse wheel while pressing Ctrl, you can zoom in or out from your canvas.
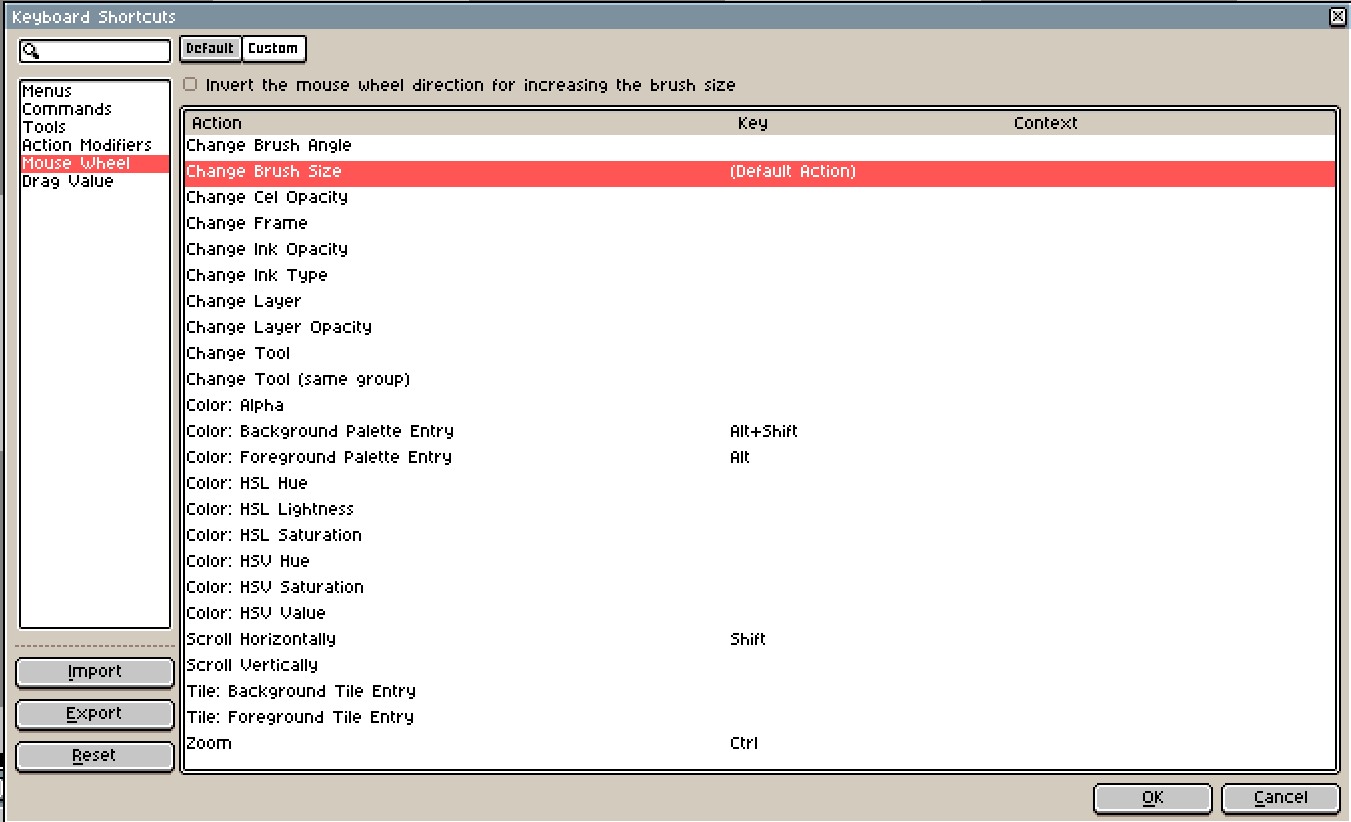
Lastly, I set my brush size my scrolling the mouse wheel as well, but this is by default, not while pressing Ctrl. You'll find this in the Mouse Wheel tab as well.
Conclusion
So this concludes the tutorial, and now you should know how to change your Aseprite preferences. Next I will go over 3 methods you can use to find references for the pixel art you want to make. Thanks for reading!

