Indie game storeFree gamesFun gamesHorror games
Game developmentAssetsComics
SalesBundles
Jobs
TagsGame Engines

Akaki

21
Posts
7
Topics
11
Followers
2
Following
A member registered Jan 25, 2020 · View creator page →

Creator of

Recent community posts

(1 edit)

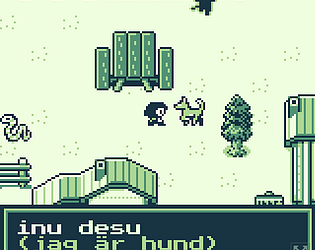
Here is my progress thread for the game I am slowly making. Last updated: Jan 25, 2024.

  • Concept: You learn a basic, simplified version of the main Eskimo-Aleut inuit languages (Inupiaq, Inuktitut, Greenlandic, to some extent Yupik) as you go through an rpg-like world set in the polar north. You travel across the territory and end up needing to fend for yourself in a hunter-gatherer scenario like The Long Dark or Survival Kids.
  • Game Mechanics: 1) Fighting enemies 2) Trading system 3) Onscreen inventory 4) Day/night or seasonal system 5) vehicle system.
  • Estimated Time to Completion: Over a year.
  • Bitsy used: Bitsy Color+.

Tutorials made while working on this game thus far:

1. Coding nests in nests
2. Adding more than 3 colors in Bitsy Color

Current Progress:

Basic trading system & setup for how to teach words created.

First scene ("tutorial mode") is finished, code-wise.
Foreign Vocab: Taught "cat, dog, berry, stone, water, key, thanks, it's open, it's closed, the key opened it".
Currently working on the graphics for the first and second scenes.

Current Problems:

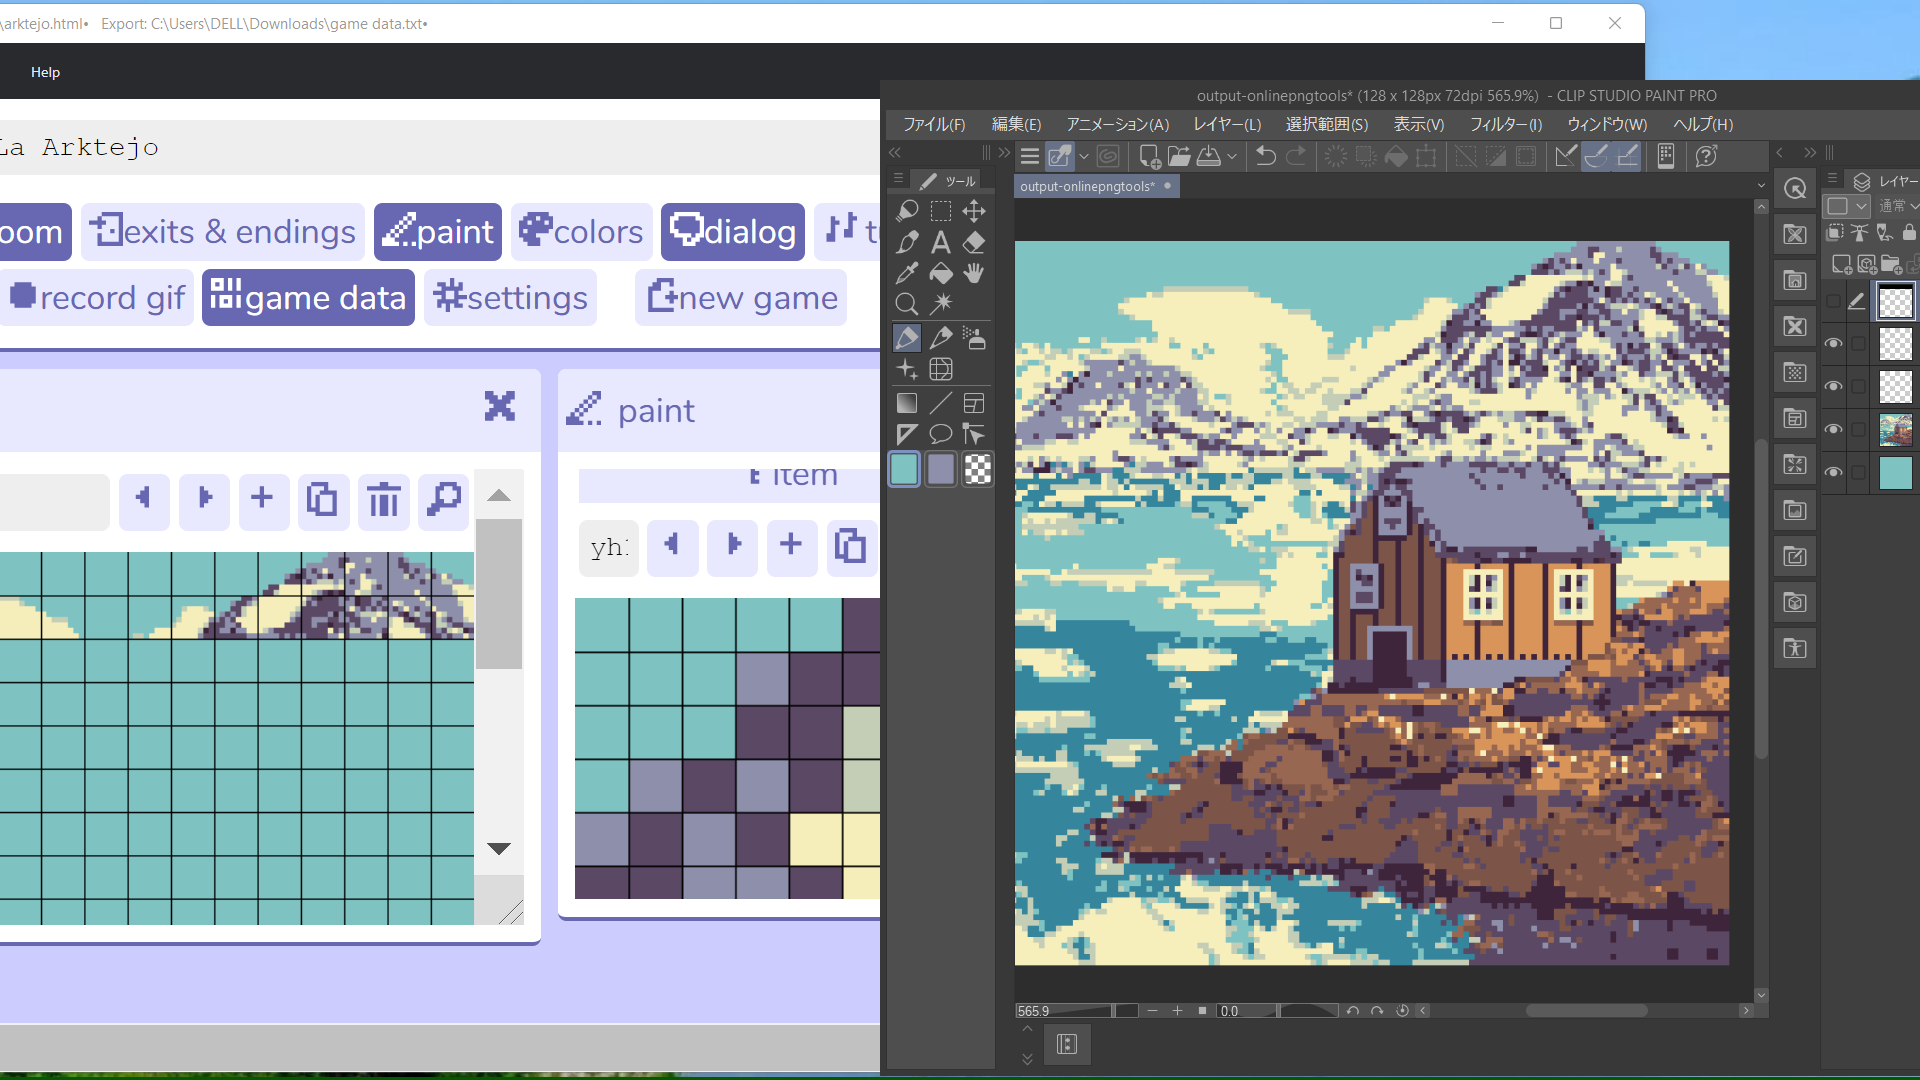
Have to color all backgrounds by hand as I could not find any background image insertion tool that works with Bitsy Color or with pre-existing game data. Due to this I need to adjust all my backgrounds to make them extremely reusable while also minimal effort. Need to implement the Permanent Item hack so the player can both get vocab info from ground tiles and still walk on them. Also the Opaque Tile hack so I can have the player go behind items in the background, and make some scenes and background images more highly reusable.

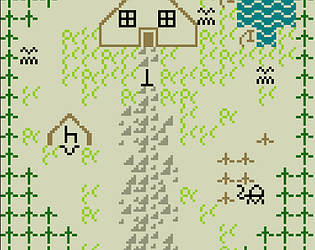
Some image progress (this is me redrawing the bg by hand - i need to go back and simplify the image now):

(1 edit)

Hi. I'm mainly using Bitsy (and Bitsy offshoots) to make short educational games that teach languages. My dream would be to make games that get you from 0 to fluent in a language without feeling like it took effort. There are a lot of so-called "educational games" out there that are really just a flashcard system under a thin veil, I would like to help change that. I would also like to make games (not necessarily educational) in minority languages for which few to no games exist. 

Bitsy is great because you can program a whole game in it with only extremely basic coding knowledge - I have studied BASIC but not Javascript, the in-game Bitsy coding is similar to BASIC.

(3 edits)

I respect the decision to close down the discord but I can't find any of the information that must have been in it, reposted anywhere. I heard the server was set to "read only" - the invite links aren't broken - but current settings also don't allow anyone new to join in order to search those "read-only" past discussions for help. The Bitsy forums are practically empty so it doesn't look like anyone has been migrating the info out of Discord onto the forums. And most of the official Bitsy handbook pages are currently empty - they really only contain info so basic that you could figure it all out just by opening the program for the first time. Very unfortunate as I bet there was a lot of help on the Discord that could have been compiled into a huge tutorial! 

If anyone sees this comment in the future and knows if anyone has conserved info from the Discord anywhere, please let me know!

Thanks. It would be great if little colored squares of all your colors in that palette appeared there!

(1 edit)

In the new version, if you try to copy-paste or insert game data the "next" button is greyed out.

In the old version, it claims to insert the data but when you actually put it into the game none of it works.

The only solution right now is to use the new version, pretend you have a blank bitsy game... and then rename every tile, and every mention of that tile on the room map, to a new name by hand, to avoid naming conflicts with your existing bitsy data, before you copy-paste it into your game. 

(1 edit)

I'm still having this issue now, almost a year later. The devlog hasn't been updated since 2021 and it's now 2024 so we may be out of luck...

(2 edits)

Tried all the different options in the program, couldn't get it to work with Bitsy Color:https://aurysystem.itch.io/multicolorbisty . Not even the silhouette worked, it just bugged up the game so I couldn't playtest anymore. I'm wondering if I'm missing something. For now I'm using Pixsy and recoloring the background by hand.

(5 edits)

I've used it as supplemental review for language classes and am now currently making a game where you learn a foreign language from scratch. Just make some sort of game teaching the concept (in my case vocabulary and grammar) in the game dialog. I like to color the words and grammar that are being taught per screen, for example "dog - kamooks" then the foreign word kamooks would be colored, or if you are learning past tense then "the dog ate" then "ate" would be colored. You can set up a signpost or something else in the game which will act like a book and explain the words/grammar either taught thus far, or in review. 

In the current game I'm working on I have it set so that if you have 0 items of that type, it displays etymological text that looks like this when you first pick the item up:

aq - pick, pluck. 
pi - thing (-age like package, luggage, postage)
k - noun.
aqpik (each part actually being a different color in-game) - "pickage" (direct translation with each corresponding part here being the same color as in the foreign word) - berry (the actual translation).

But if you have 1 or more item of that type, it only shows:
aqpik - berry

That way you aren't just "told something once and never again" despite that you only play once a week, which is a problem I have had in commercial games.

And with each scene, the language slowly gets harder and harder. As an example, the first screen may start with only listing plain nouns. You have to complete a quest before moving on to the second scene. The second scene may have "I want (noun that you previously learned)", and if you give the wrong item they say "I don't want (item you tried to give)". 

Another way is to just make one mini game per unit that the kids are learning and give them access to it as a review.

If you are teaching kids programming, I would just give them a text file or printout with all the possible bitsy commands let them have at it...

Thanks, that's a good idea. I couldn't get the permanent item hack that the other commenter suggested to work, so I will try exits coupled with sprites.

Thanks. I couldn't get the permanent item hack to work. I tried copy-pasting it into my code, tried using the patch editor on Bitsy Savior, and tried using Borksy (which just corrupts my game, it can't handle Bitsy Color, and also it gives me an error about "object destroyed" when I try to run it in Bitsy Savior without my Bitsy Color game data injected). I'll keep trying...

(13 edits)

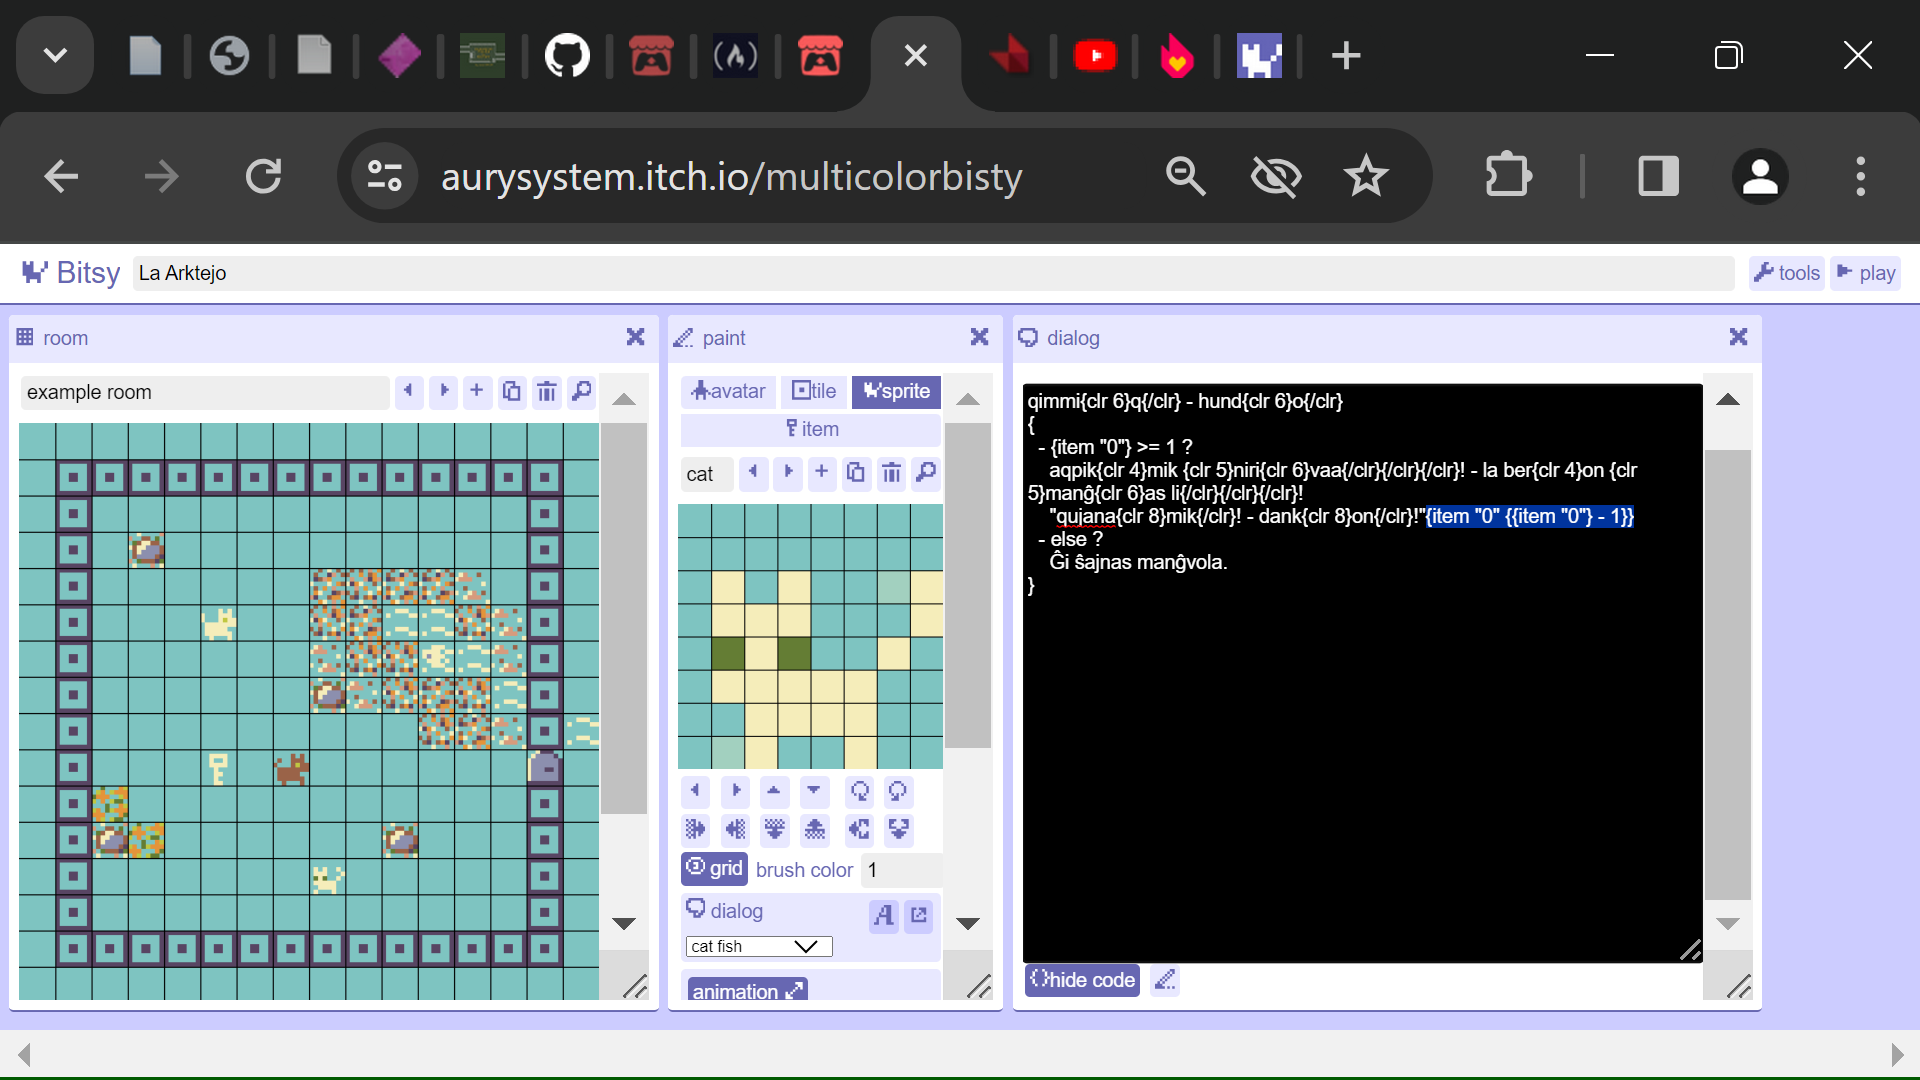
This tutorial is useful for people wanting to make a basic RPG inventory system, a buy/sell system, etc.

Example scenario: You talk to the cat. If you have at least 1 fish it says "Thanks for the fish!" then it subtracts one fish from your inventory, and then it shows you how many fish you have left before moving on to the end of the IF/THEN statement. If you don't have any fish it just says "The cat looks hungry". 

This is called a "nested" statement, and Bitsy can't do it by using its default "branching / conditional" buttons. You can do it easily, but not by using the existing buttons within Bitsy, and not by typing the code directly into the normal dialog box!

Click "edit code" and type it in before the "- else ?" that starts the next option. In my example "berry" is {item "0"} in the code, and subtracting one berry is just the normal code like this: 

{item "0" {{item "0"} -1}}

Again, doing this same exact thing in the normal dialog box menu will make it not work!

 
When you click "hide code" to move back to the normal dialog screen, suddenly it will correctly recognize the subtraction and have it pop up in a special section like this:

If yours looks like anything else, such as has the code as normal text within the dialog box... it will probably not work. If it SHOULD all be working and it isn't, try refreshing the page (copy your game code first).

Now say you want to tell the player how many items they have left.

1) If you want to insert text between the subtraction and the print, for example: "Fish left: 0".

    "Thanks for the fish!"{item "0" {{item "0"} -1}}
    Fish left
: {print {item "0"}}

Will accurately show that you have 0 fish left, only because you inserted text before the PRINT.

If you print the number of fish directly after the subtraction with no text in between, sometimes Bitsy messes up and tells the player they still have 1 fish left. In that case use the normal PRINT command but use a nest to subtract 1 during the PRINT to show an accurate count. Here is the code: 

{print {{item "0"} - 1}}

Remember that in CSS and JavaScript, {} creates a "nest" just like () does in math. So the above code says: 

(((get item 0) subtract 1) print the result}. 

Warning!

Sometimes Bitsy won't visually recognize this 2nd or 3rd nest and it will be completely invisible (not in the dialog box, nor popping up like the subtraction command). It may or may not work in-game. If at any time it doesn't work, in the most unfortunate scenario Bitsy tried to run it and then ate all of your ELSE statements that came after the IF/THEN. So you shouldn't use this technique to create tons of nests inside one dialog box that Bitsy can't visually recognize, it's too risky.

Troubleshooting:

1) If Bitsy merged your two seperate pieces of code into one and now it doesn't work, it means you forgot 1 closing } mark at the end of the first piece of code. Example:

{item "0" {{item "0"} -1} {print {{item "0"} - 1}}

Should be:

{item "0" {{item "0"} -1}} {print {{item "0"} - 1}}

2) Bitsy can't recognize nests that don't have a command right after the opening { mark. So while this is the same code as in 1) just grouped together, Bitsy won't recognize it:

{{item "0" {{item "0"} -1}} {print {{item "0"} - 1}}}

You need to add a command after the first { (this is a nonsense command but it illustrates my point):

{print {item "0" {{item "0"} -1}} {print {{item "0"} - 1}}}

The exception is when are using {} in place of a variable, item, etc. name as in {item "0"}. Then Bitsy can read the {{ .

(1 edit)

I'm using Bitsy Color.

For example, I have water tiles. I want them to always say "you can't swim" or whatever on any water tile for this one room. I know I can just make them as items, but then I will have water tiles clogging up the inventory list and on default the water will disappear when the player walks on them. How can I tell Bitsy to always display "you can't swim" for this one type of tile?

(I will continue to search for the answer myself and edit this post if I find an answer)

(1 edit)

Yes, Bitsy Color does support transparent backgrounds. You may need to refresh the page before it actually works.

You may also be interested in simply using multiple (4+) colors on your item, instead of overlapping an item tile and a sprite tile in order to get multiple colors. That is taught here: https://itch.io/t/3442509/tutorial-adding-and-using-more-colors

bitsy community » bitsy · Created a new topic Tutorial: Bitsy Colors

If you want more colors per item or tile, you can use Bitsy Color, which I made a tutorial for here: https://itch.io/t/3442509/tutorial-adding-and-using-more-colors

Some of the information is also useful for, or works in, vanilla Bitsy.

(33 edits)

There were no instructions for how to actually use more colors in Bitsy Color, so here is a tutorial:

Basic Coloring:

Figure out what color you want to add. Click on "tools" then "game data" and scroll down a little. You'll see something like this:

PAL 0
204,74,90
128,159,255
255,255,255
NAME blueprint

Copy paste more color codes in there, and label them. You can find color codes in any image editing software or a site like: https://www.colorbook.io/colorschemes. Sample list:

PAL 0
243,51,170 // 0 - hot pink or transparent (see below in "Transparent" section)
255,0,0 //  1 - red
255,142,0 // 2 - orange
253,255,0 // 3 - yellow
28,130,0 // 4 - dark green
0,99,132 // 5 - dark blue
77,0,81 // 6 - purple
175,137,105 // 7 - brown
0,0,0 // 8 - black
255,255,255 // 9 - white
NAME blueprint

Create a new DIALOG, save this labelled list in it because Bitsy deletes code notes. Also copy-paste this list to your game data section. Close out of the code box. Your room might look messed up - just copy your game data (in case it gets lost) and refresh the page.

Coloring Tiles: Visual Method

Open your dialog box which contains your labelled list of colors. Rearrange the list so the most commonly used color is first (so you don't constantly scroll the list). 

Go to "Paint" for sprites. Below the image you'll see "Grid" and "brush color". I now have 10 colors in my "blueprint" palette so the brush color will go in order from top to bottom: color 0 is 243,51,170 (hot pink) and so on. Change the number in that box to the number of the color you want to draw on the cat. Click on a pixel on the cat, it will "disappear", click again, it will reappear as the new color without having disturbed any of your colors anywhere else.

Coloring Tiles: Faster Method

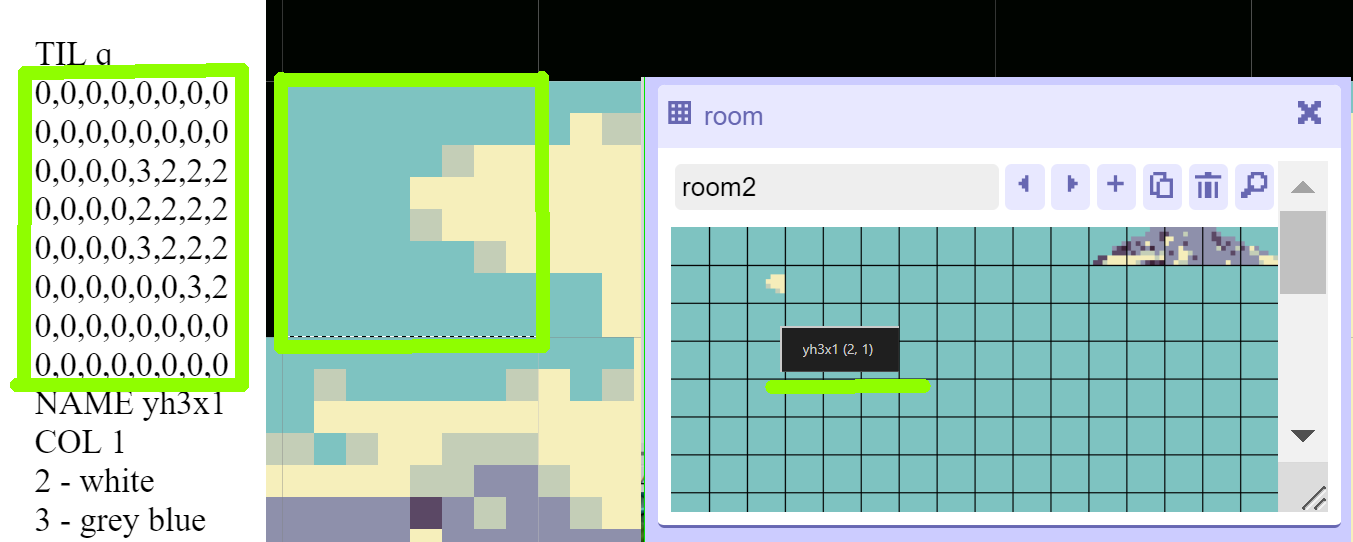
This is a blank 8x8 tile. TIL = short for "tile", q = tile ID which bitsy inserts into scene maps to know which tile goes where (bitsy automatically makes new tile IDs in alphabetical order like p q r s), NAME is how it appears in the editor in-game, COL 1 - you can ignore this:

TIL q
0,0,0,0,0,0,0,0
0,0,0,0,0,0,0,0
0,0,0,0,0,0,0,0
0,0,0,0,0,0,0,0
0,0,0,0,0,0,0,0
0,0,0,0,0,0,0,0
0,0,0,0,0,0,0,0
0,0,0,0,0,0,0,0
NAME yh3x1
COL 1

If you have your image open in an image editor with an 8x8 grid on as a visual guide, you can manually rename the tile to something new, then just TYPE in the numbers that correspond to each color, or copy-paste bits of matching tiles together, which in some cases is much faster. Name it an abbreviation for the room (in mine - yh for Yellow House) and then the x-y coordinates for where it is to be placed on-screen (in mine - row 3 column 1). Hover over a tile in Bitsy to see its coordinates pop up.


Coloring Items:

Items don't have a box where you can choose the color option, but the color number you choose on the "tiles" screen will carry over to the pen color used on the "items" screen. So navigate to "tiles", type in a color number, then navigate back to the item you are editing and draw like normal.

Coloring Text:

The same color codes work for text. Just replace {clr 0} with 1, 2, 3, 4, etc the same as when coloring a picture. But let's say you want to color every word in a sentence a different color. Bitsy suggests you sandwich the word in code elements like this:

{clr 0}I{/clr}  {clr 1}am{/clr}  {clr 2}a{/clr}  {clr 3}cat{/clr}  {clr 4}.{/clr} 

You can also keep them all open and close them at the end:

{clr 0}I {clr 1}am {clr 2}a {clr 3}cat{clr 4}.{/clr}{/clr}{/clr}{/clr}

After you do this, again your room might be all messed up, or your game might not "play" when you hit play. Nothing is lost or broken. Just copy all your game data, refresh the page, and if necessary paste all the game data in again.

Coloring Item or Sprite Images as Text:

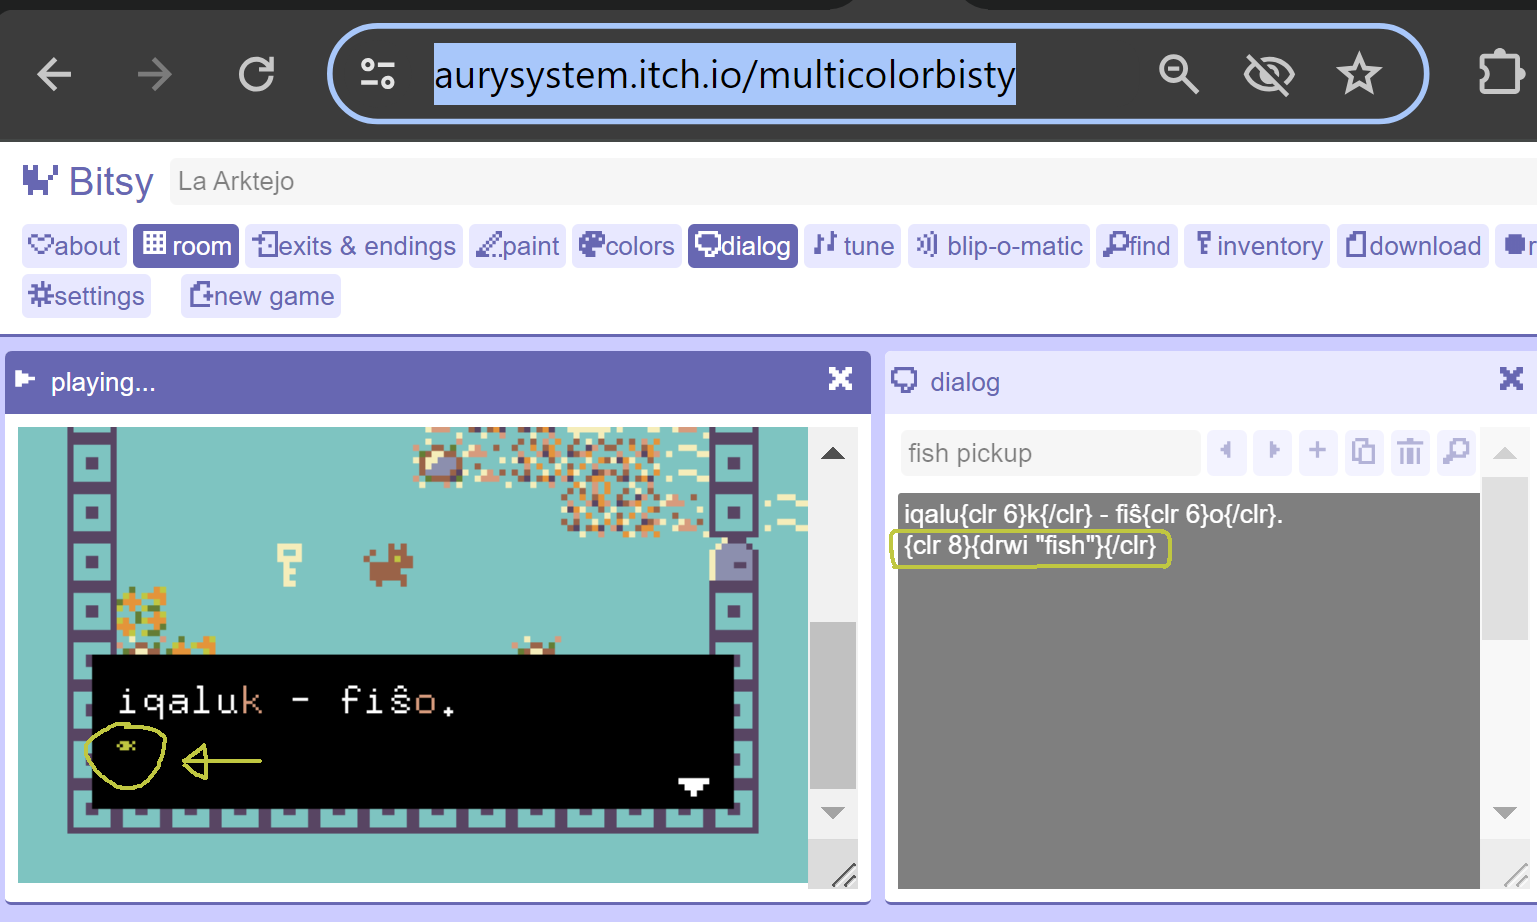
Same as text, but you must click "show code" and write it there, it does not work if you write it in the normal dialog box:

{clr 8}{drwi "fish"}{/clr}


As you can see, the "image as text" IS colored but is also really tiny - this is the Bitsy engine's fault. You can change this via hacks if you know JavaScript.

Coloring Backgrounds:

First you might want to run a photo through Pixelicious to pixellate it: https://www.pixelicious.xyz/. 

(Photo) ー> (Pixelicious round 1) ー> (Round 2)


And a good color reducing tool: https://onlinejpgtools.com/reduce-jpg-colors

Note that RGBitsy (https://janosc.itch.io/rgbitsy) does not currently (Jan. 2024) work with Bitsy Color at all. Pixsy (https://ruin.itch.io/pixsy) only works if you start with a blank game, insertion into an existing game currently doesn't work.

Mass Recoloring (Pseudo paint bucket fill tool):

1) Backgrounds: Open "game data", copy-paste to duplicate the palette for your scene, replace a color number in the palette to change all tiles using that color.

2) Sprites, Items, Avatar, Tiles: Find the picture in the game data. If it's unlabelled, you can tell its shape by the change in numbers. For example, here's a dog:

SPR A
0,0,0,0,0,0,0,0
0,0,0,0,1,0,1,0
0,1,0,0,1,1,1,0
1,0,0,0,1,8,1,1
0,1,1,1,1,1,1,1
0,1,1,1,1,1,0,0
0,1,1,1,1,1,0,0
0,1,0,0,0,1,0,0
>

Paste the code into Google Docs or something, then hit "control f" or use the menu's "find" command, hit the down arrow to get "find and replace", "replace all" to change the numbers easily. For example if I replace 1 to 8 then the entire dog's body will change to the same color as its eye.

Transparent Backgrounds:

You can make the player avatar, sprites and items have transparent backgrounds. Open "game data", add BGC * ("BackGround Color")  underneath the COL line if there is one, for example:

NAME cat
DLG a
POS 0 8,12
COL 2
BGC *
BLIP 1

The player avatar is unlabelled in the game data but starts with "SPR A" and will be the one right before your Cat sprite in a new game.

It is very likely your animations will glitch and look super fast in the game editor after you make their backgrounds transparent. It doesn't matter, they'll appear normal in-game.

Troubleshooting:

Some people have added a few more colors into vanilla Bitsy in a similar way as my instructions above. However when I tried it, it didn't work correctly, whereas Bitsy Color worked with just a copy-paste.

(3 edits)

I've made basic RPG-type fighting  in Bitsy using only super super basic coding knowledge I got from learning the BASIC programming language for about 2 days. All you really have to program is:

- Set player health, player level / strength, enemy health , enemy level / strength as global variables.
- Upon contact with enemy, set random number (you may have to write extra code to set up a faked random number as real random numbers may not be supported - I can't remember what I did). Add your strength or level number to this random number. Subtract that from enemy health.
- If health is less than 0, game over. If enemy health is less than 0, enemy disappears (and you gain 10 exp or whatever). If you reach xx exp, add a point to strength or whatever.

My code did not use any special graphics for when you attack, or have the enemy chase and attack you first, or anything like that. As I said, I figured out how to do it in 2 days of learning BASIC and didn't know any other coding languages, so it is definitely not an advanced thing. You really only need to know if / then statements, variables, global variables, and basic math.

You sold me in the first few seconds right when you showed you can dress up the chickens! Great job, 

Wow! This is great, I would have LOVED being able to play this as a kid back in the 90's! 

Thanks for playing, and for your nice comment! Congrats for beating it as well!! And I'm really glad to hear you were able to pick some words up.

Yeah the battling is definitely a bit of a grind and too boring. I was intending on having a few more rooms and at least one more quest to make it easier but then the deadline neared and I got tired of making rooms lol. Hopefully I can slowly expand this to a full-fledged game as time goes on.

I've thought of exactly that idea of yours before, but I just haven't had the game-making experience to be able to put it into action! I can do the language side of things but not the coding. So hopefully after a few years I can also do the coding T_T Unless someone wants to pair up with me ;D