On Sale: GamesAssetsToolsTabletopComics
Indie game storeFree gamesFun gamesHorror games
Game developmentAssetsComics
SalesBundles
Jobs
TagsGame Engines

GettingRusty

10
Posts
3
Topics
A member registered Jul 07, 2024

Recent community posts

Thanks Charlie, Joe for this discussion.  It’s an exciting topic that has me glued to watching professionals on line do such amazing complex inlays. Eventually I will get to try it. I have only glanced through this for now but it’s going to take a good session of study to get to grips with it all.

Russ

I appreciate the advice on that as I’m thinking my next carving would be of flowers and that’s not going to be easy cleaning with sand paper. I’ve seen a Dremel section in our hardware store with wheels like you’ve shown for fine work. I’ll have another look. 👍

Thanks valhallaCNC.

Also re your suggestion of the rotary brushes for smoothing. I’ve be hesitant in using them as I’m concerned the bristles would gouge out the softer wood between the grains. Do you find that occurs or is it just technique?

Hi,

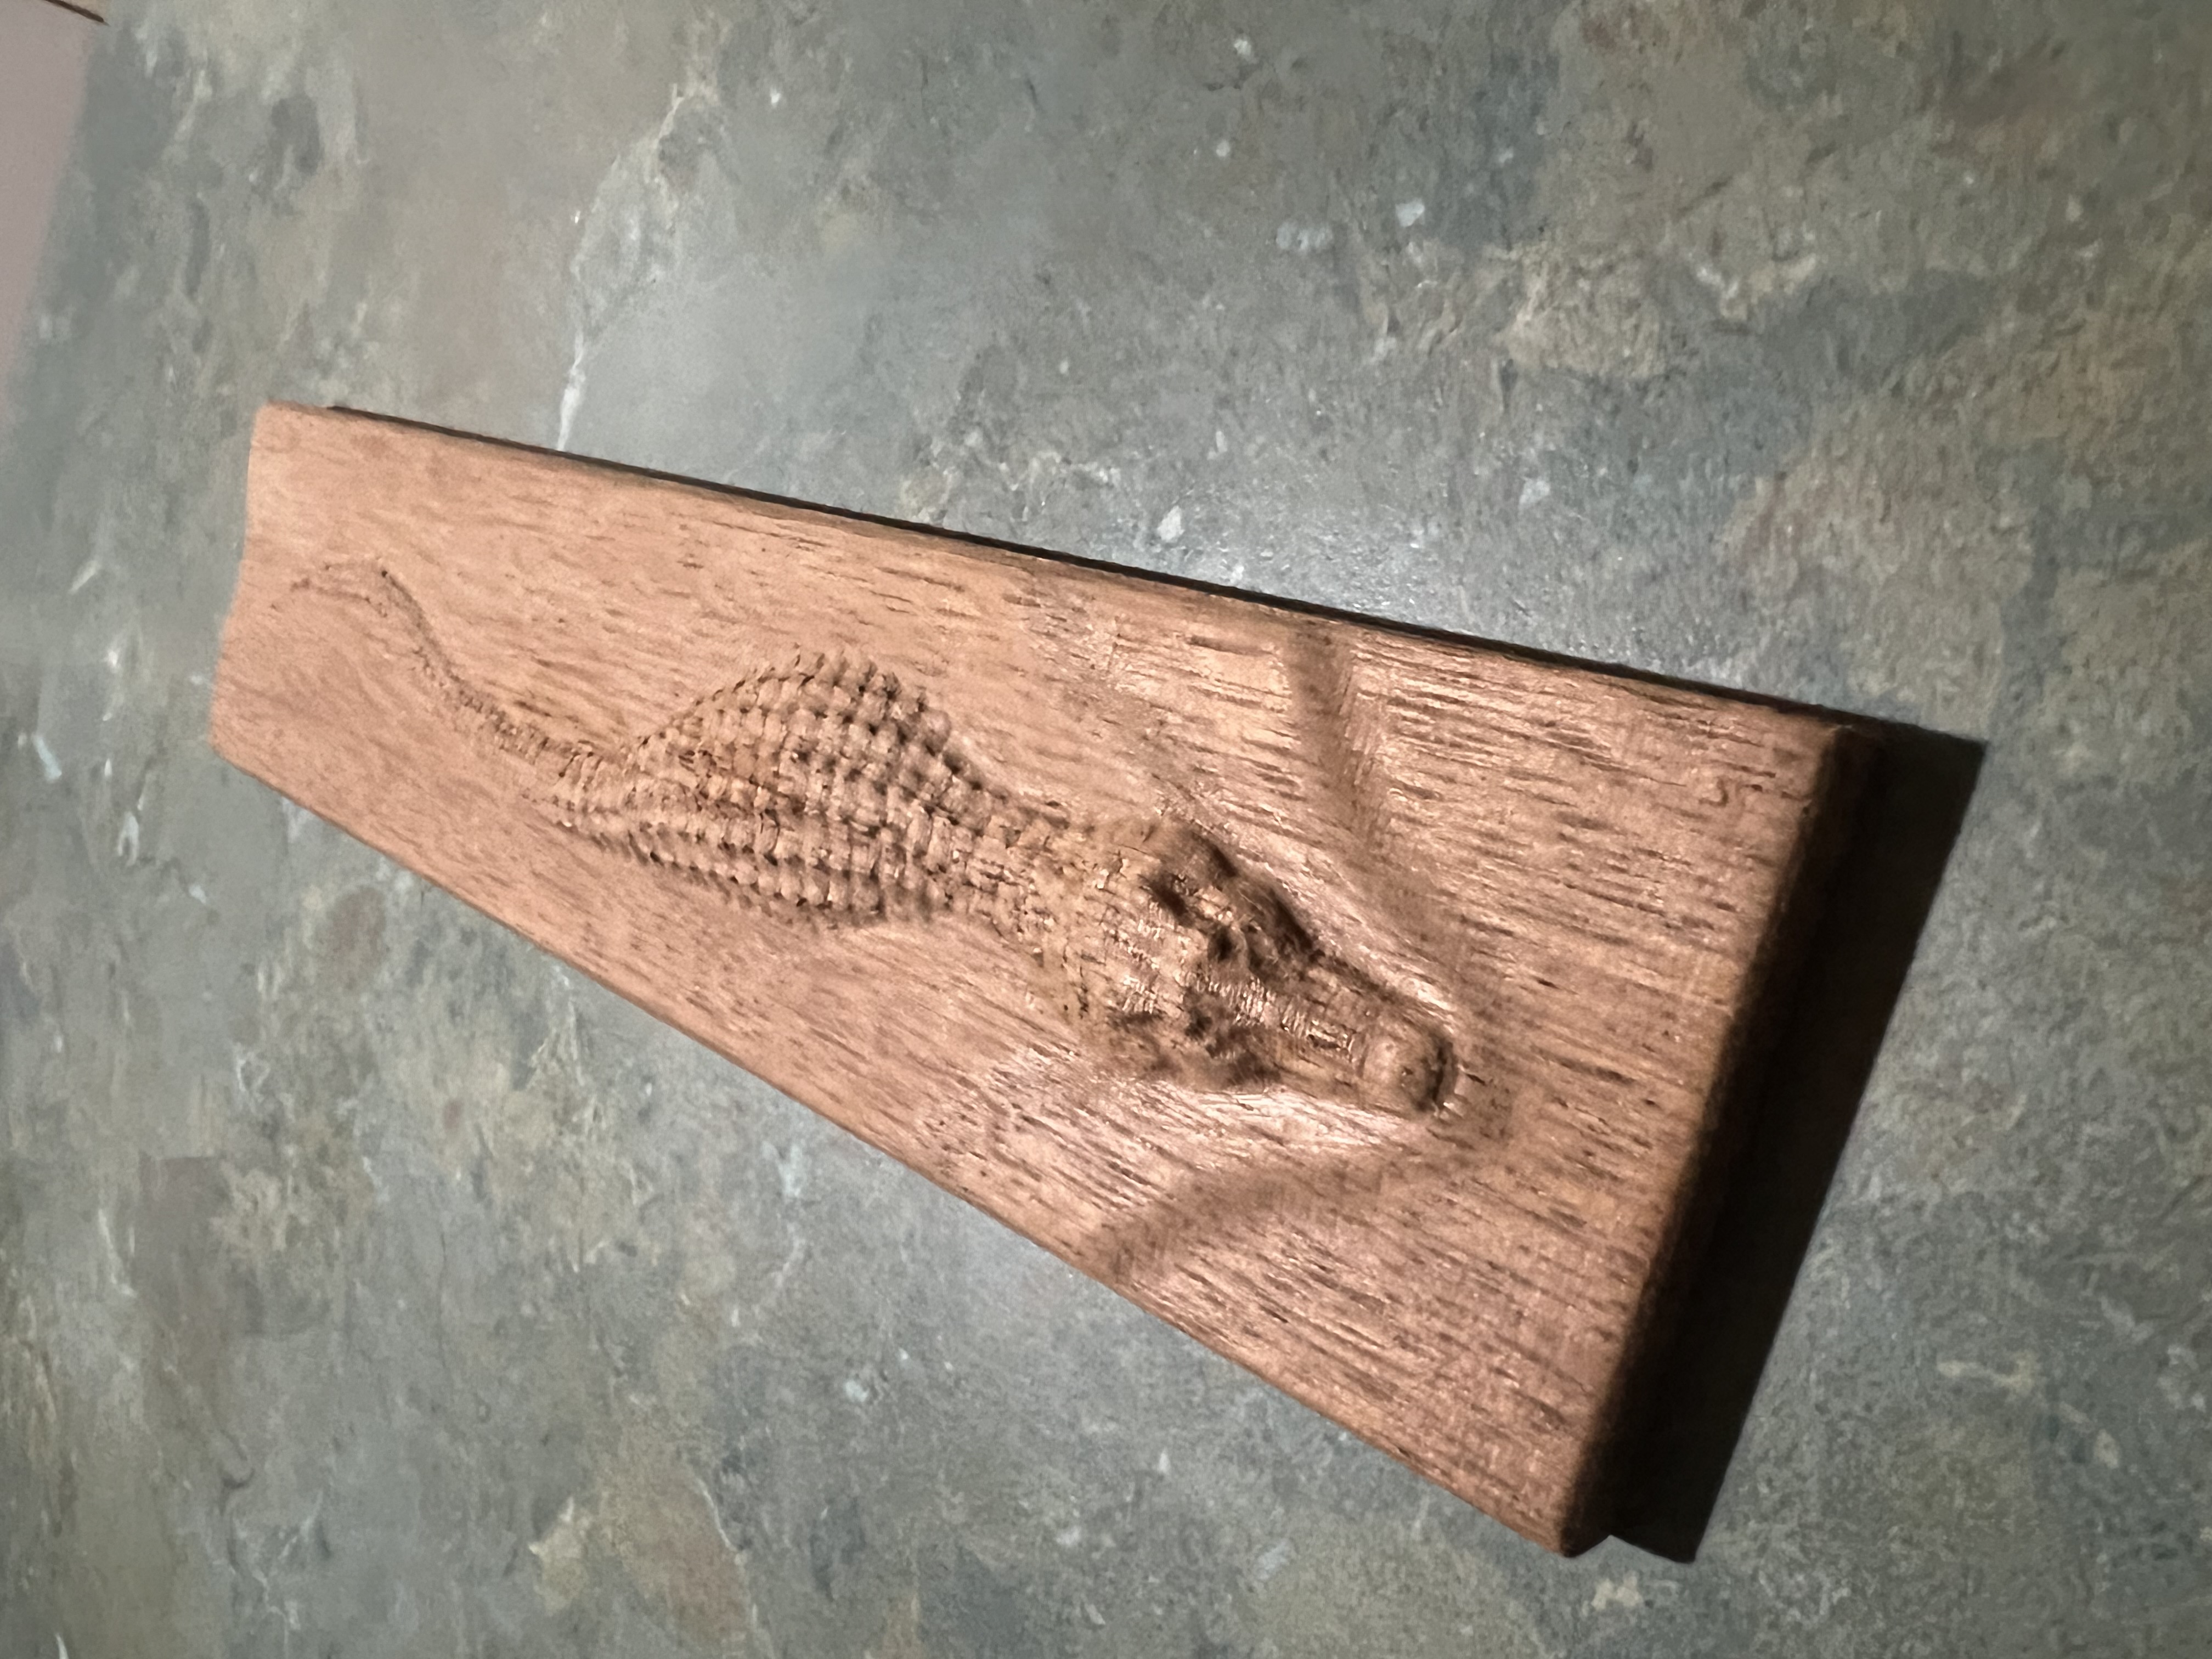
I tried a 3d cut today, one of a crocodile swimming. 

I  found it to be an interesting exercise working out quicker cut types on PixwlCNC.

Firstly I did a rough parallel cut with 1/4 inch flat to remove a lot of wood and following the canvas contour. Then I did another with  a 2.5 mm ball nose lengthwise followed by another parallel cut, cross wise. This cleaned up a lot of the hanging hairs and smoothed out the finish.

I cut it out then finished with a path carving using a 90degree v-bit to chamfer the outside edge.

The finish quality was good except I did have to do some manual sanding as this exercise demonstrated:

1.  My Z-Axis has a little bit of slop in the up down movement.  It left random artefacts of cross lines which I had to sand off. Not large, just visible and annoyingly visible.  They were possibly 100ths of a millimetre in height, just visible and easily sanded.

At least I should be patting myself as it is a home made CNC.

2. I assume I could hide the issue by doing a cross Parallel cut first then a longitudinal one last following the wood grain.  There would be less Z axis movement and cuts. 

3. Setting the Z retract height needs more of my attention as I had the Z retracing way above the canvas contour wasting cut time. I've to work on the what the optimum heights should be to keep Z-axis retraction minimised.

Here is a photo:

Russ

Thanks Charlie, I saw the Depth Offset, I didn’t realise it’s power. So this means I can have a go at lowering the kings face and still medial axis carve it. I could not see an easy way before but now I see I can select the face paths, eyes and mouth as a layer to carve and use its outline to set the blank area to subtract the surface lower to carve on.

I like  the outcome so far and with more experimental  trials I might get proficient in layering and making more details of the card 3 dimensional just because I could.😄

It could be good practice to drive me to more challenging 3D carves.

Russ

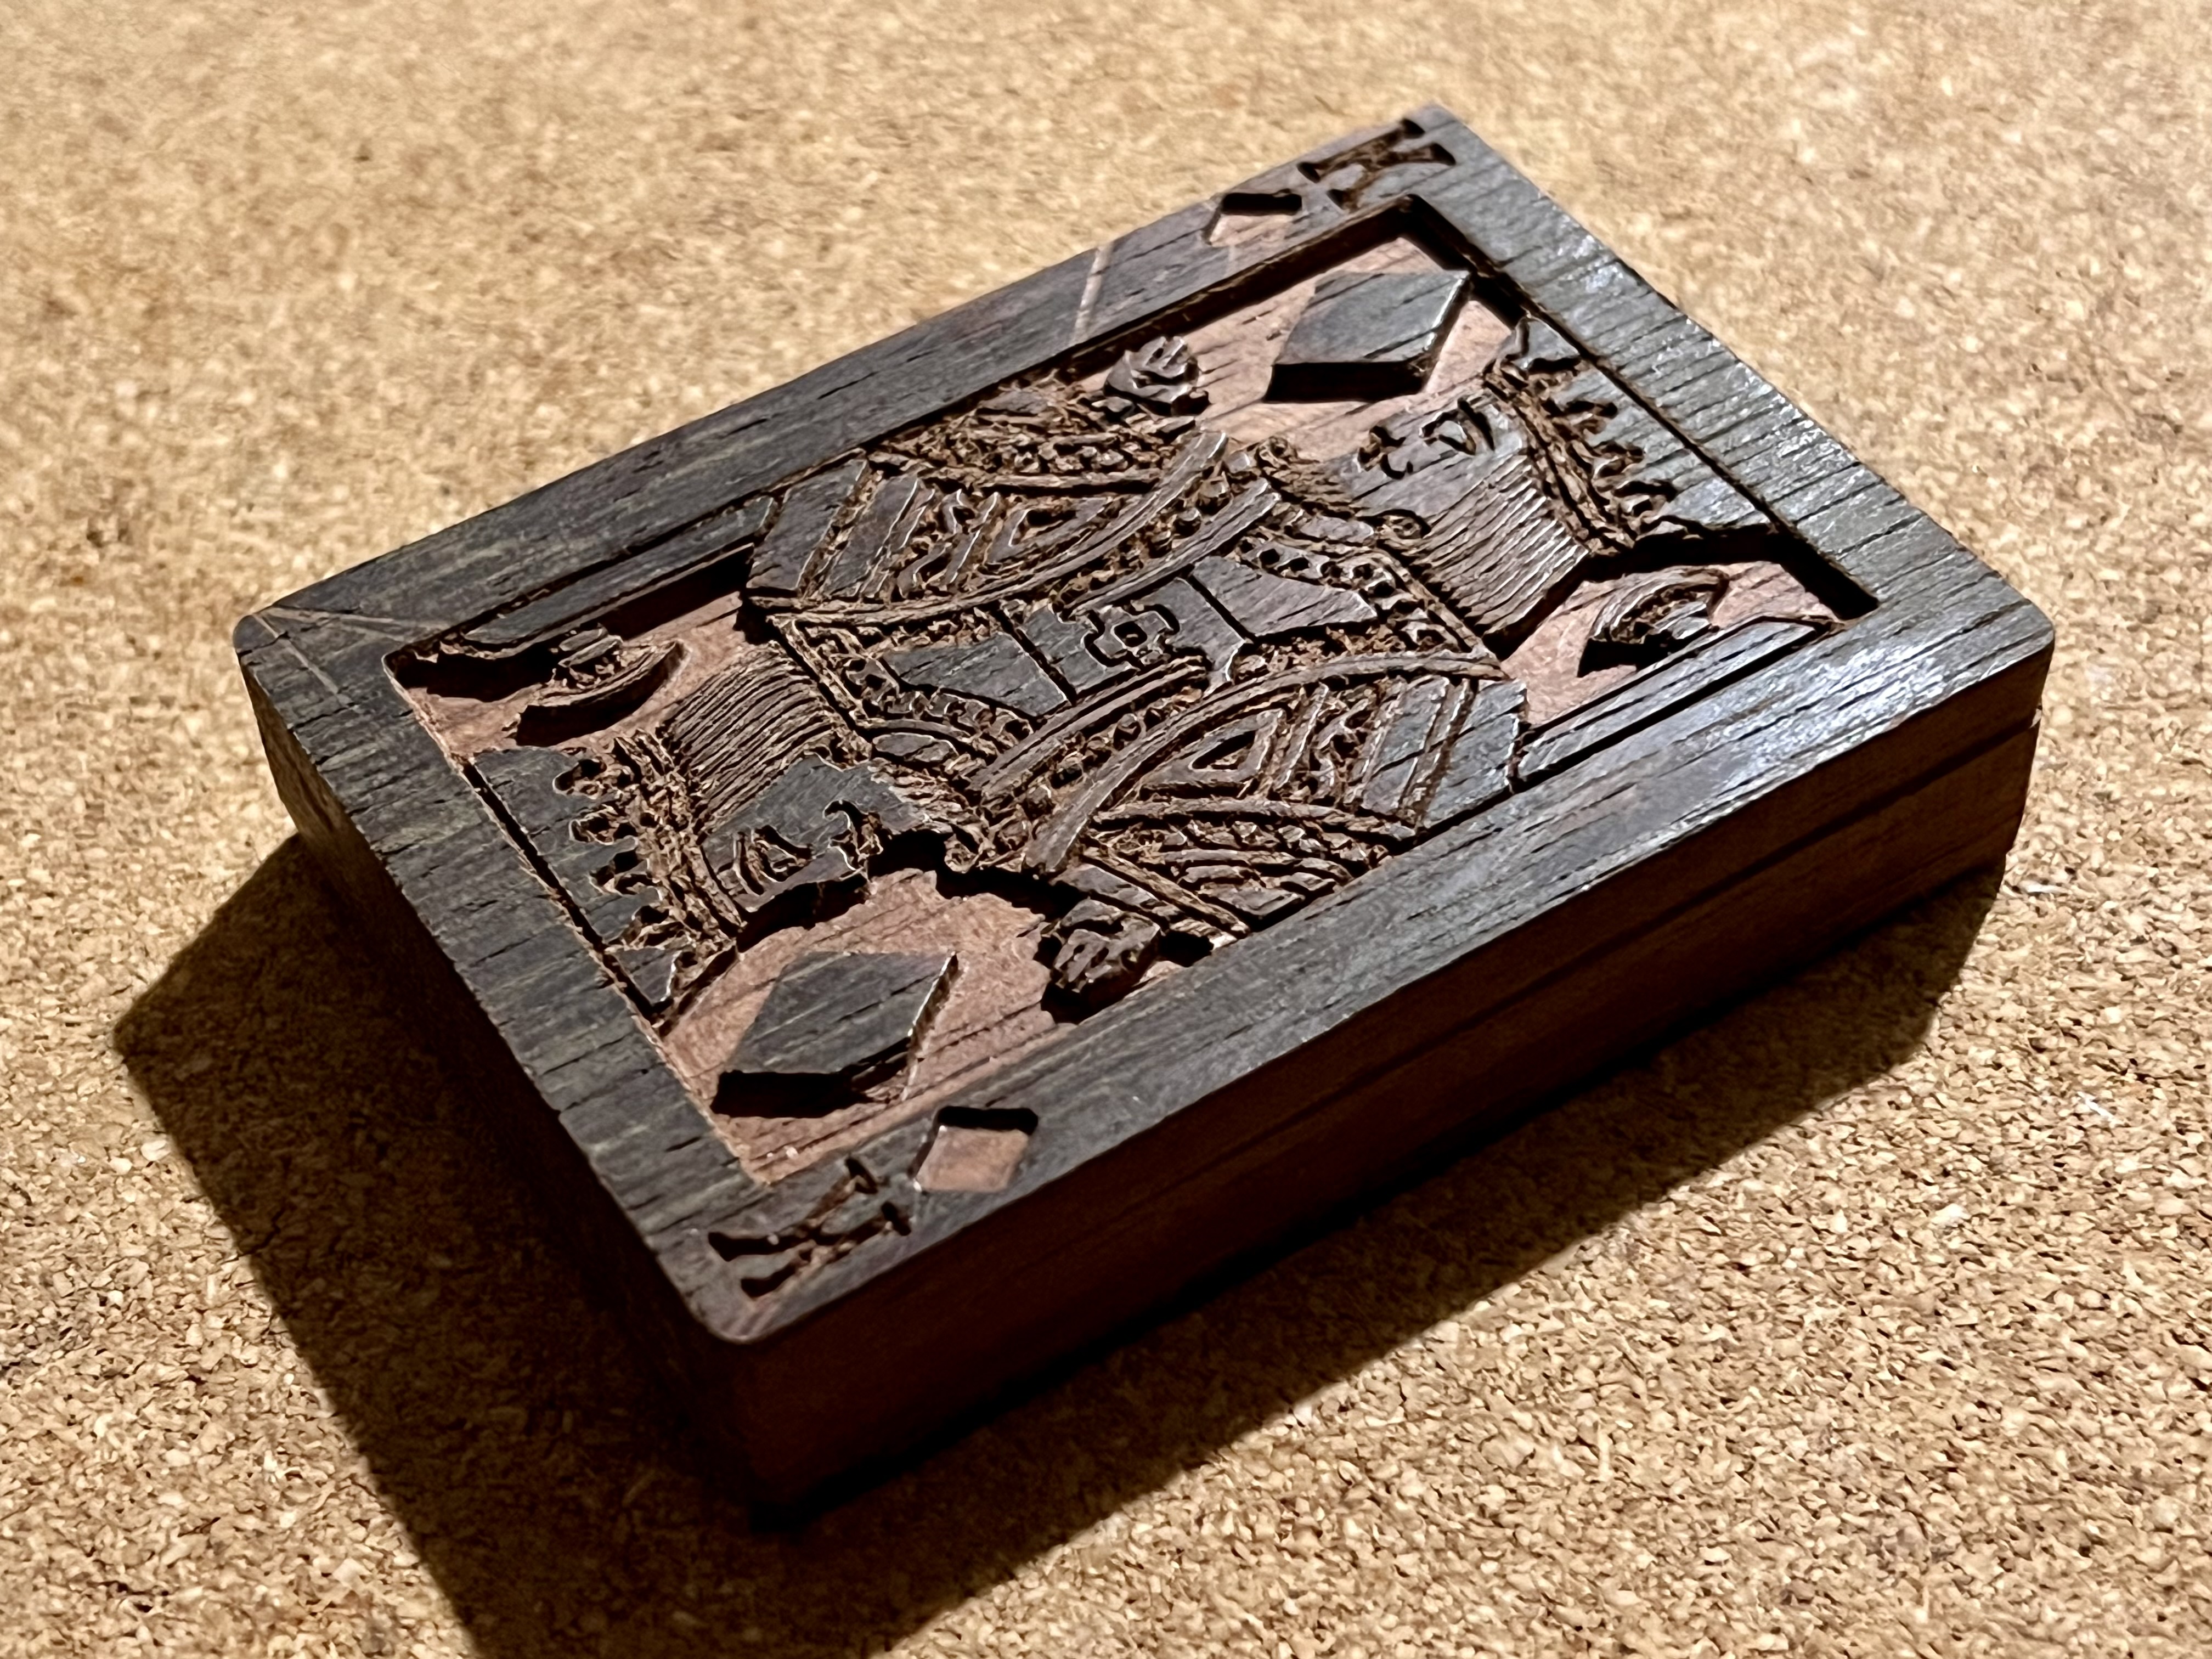
Hi, I’ve progressed, carving it out using v-carving to get the lines worked well. I did not try lowering the face nor hands as I did on my first example, just two lower layers this time.
 The small diamonds are a lot shallower.

Another advantage of this is it cut a lot quicker. 

There’s some tearing, expected but the focus here is to do different height layers and inversions with different blending modes.

I did not clean the top layer this time and I think the contrast between old and clean wood looks good. It helps see the high detail.


I’ve been trying to do a carving of a playing card. It’s been a growth journey.


My first attempt using just black and white to set carved depth worked but didn’t produce an easy viewable outcome. This set me into seeing if I can do a better 3D design.

I decided to try  creating a multi tiered design with various heights to simulate a 3D  so that the king looks as though standing in front of the rear surface/wall.

I targeted making 3 levels. 1: the large diamond inverted so that it stands high rather than sunken, 2: the surround about the large diamond and the king’s hand lower, 3: the kings face lower than the hair.

In doing so the approach was I converted the image into a paths layer. From the paths layer I used the tools to select particular paths eg a diamond, With that I created a new paths layer from the paths and filled the closed paths with a flat fillet with Shapes from Paths which made a new raster layer.

I  set the z layer height with additive blending. With the diamond surrounds I also did a path selection and fillet. I used it then with a subtractive blend to take away/lower the surface. Similarly to the king’s face but with it not as low. 

Getting the z heights right was fiddly. I need better discipline with that.

Unfortunately I did miss raising the cuffs on the sleeve. That was black and sunken. I should have set it higher above the hands. Maybe I will fix that if I cut this again.

I’m sure there are many techniques yet for me to use to simplify.  One  of course is to select multiple similar areas to create as one in a new raster layer.


I’m happy with the outcome as it’s heaps better layered except now that I’ve cut it I see that viewing a wood carving with so much detail is hard. There might needs to be right. The only contrast that the eye has is shadows.

I wonder if anyone has hints on how to finish such a carving?

Russ

Hi Charlie. If this helps, I have the same issue. When I use my MacBook M1 with Parallels and Windows 11  Arm PixelCNC exhibits the same cursor behaviour. I always type in the coordinates such as canvas or layer sizes or positions as mouse control ends up with coordinates in the thousands. The other area is value adjustment eg simulation speed, can’t get anything inverted min and max. So I use it for convenience in the lounge room. Detailed work is on the PC in the workshop.

Russ

Thanks Charlie, great reply. The Dragonfly did its job, a small test of cutting abilities and to impress friends with an easy carried piece. It worked.

As for using photos I’ve recently and rapidly become acutely of aware of the significance of height maps and the limit of grey scale. I cut a portrait. 😫 The detail was great but the facial shadows stuffed it. In researching this subject and 3D models I’m seeing a great need to learn more in photo editing and I’ll also try at some stage STL file generation with laser scanning. My iPhone apparently can do it. Also I have now a greater appreciation of the need to learn the power of your conveniently included pixel modification tools.

Successful machine carving as an artist is far more complex than I thought.

I’ll study your examples.

Thanks again. Russ

(1 edit)

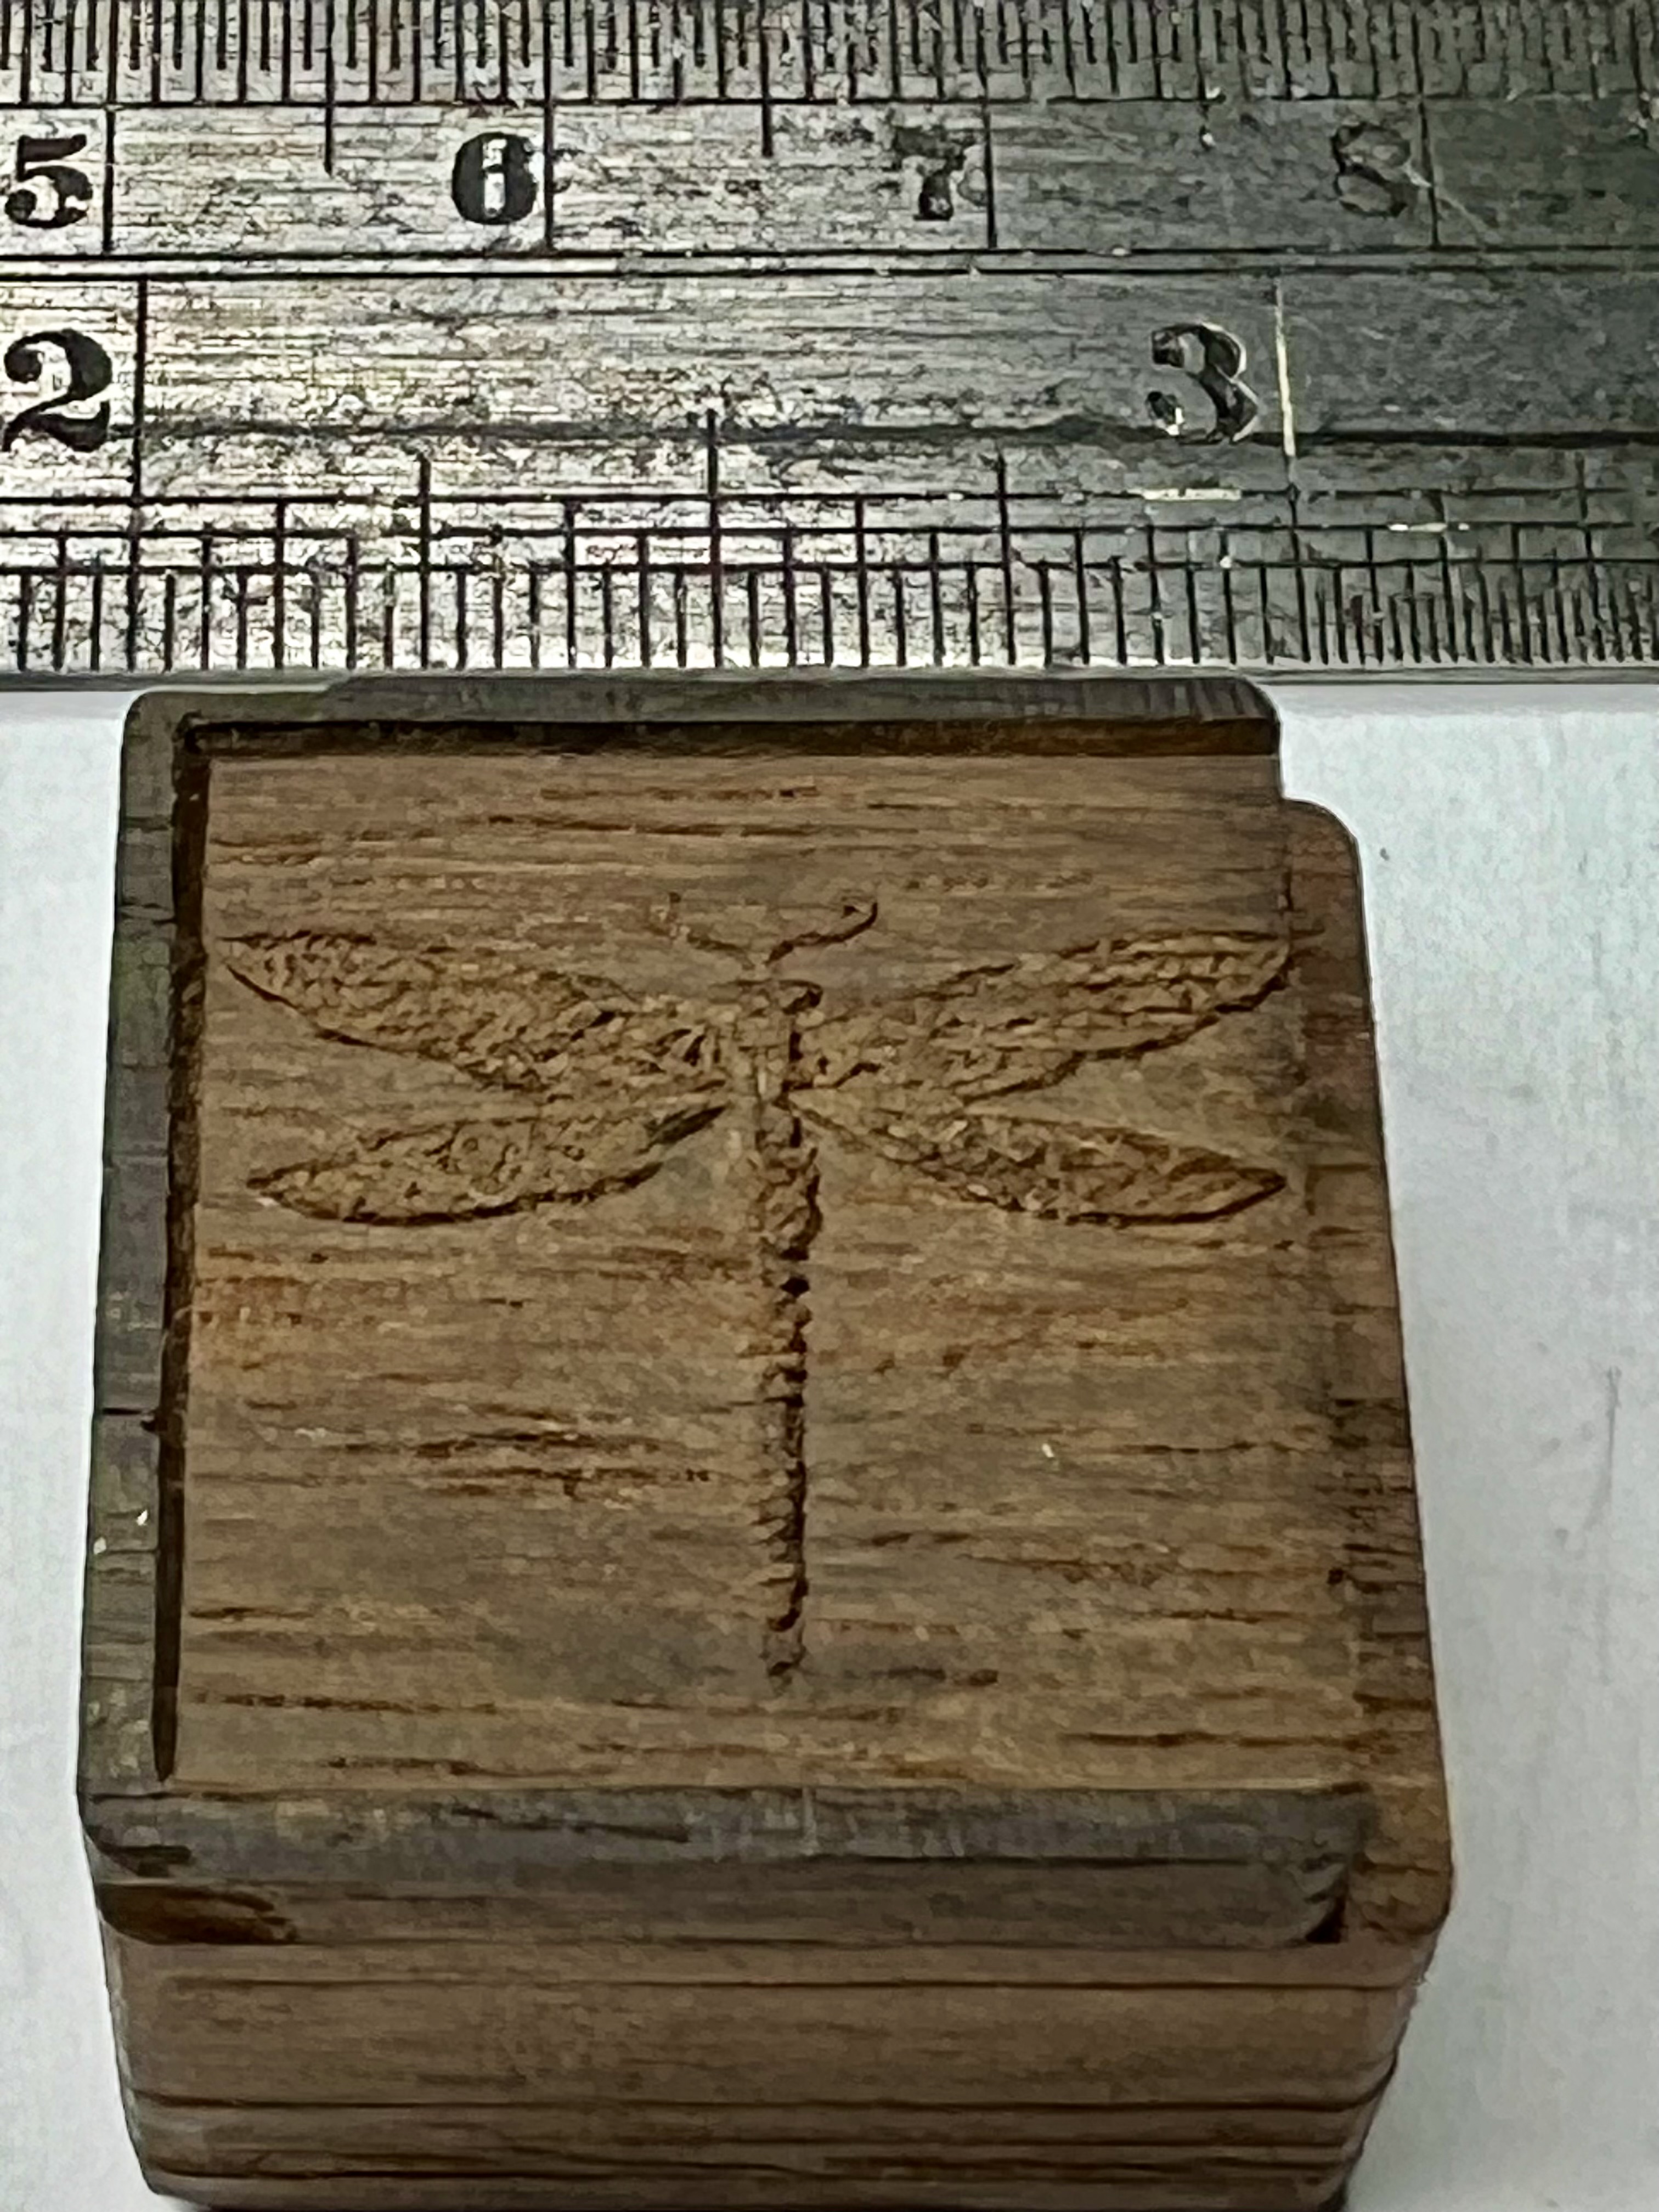
Hi, I am thrilled. As a new user to PixelCNC I tried to see how well a high detailed cut of 20mm would be delivered in fine grain wood. I found a grey scale photo of jewellery in the shape of a dragonfly.


I used a number of bits, a 1/8” flat, a 1mm ball and a 60degree v-bit.  It was amazing to see my machine gradually cut this out, especially the attempt to cut out the wing veins. 1/100mm layers was used to finalise it at 1/2mm depth.

What made this extra special to me was that it done on my home made, designed and built machine done withwith a hack saw, file and drill press.


There were some challenges. One significant one was my dismal start where I couldn’t get anywhere near the resolution of showing any wing details at all. The answer, canvas resolution … 1000pixels did it. Of course the quality of the wood is a significant factor.

For this example I used scrap timber hardwood decking. I’ve no idea what it is. It’s medium hardness not anywhere as hard as Australian Eucalyptus hardwood.

My understanding of the cutting parameters is growing, albeit slowly. My earlier cuts were abandoned as taking far too long. 6 hours and still not finished is  the worst and depressing. I did get it down to 2.5 hours. Most of this was in cutting the wing details. Surely I can do better.

Another area for me to grow my understanding is cut type. I need more experience to best know what to use where and when. Currently it looks like the spiral 3D is the most efficient. Profile 2.5d is good too for roughing.

The cutting out of the block worked well when I worked out the offsetting to get the border spacing. I did though need to do trial and error to get the supporting tabs in preferred positions. In the example above I did have a border alignment issue. My mistake done when changing the bit. I need to take more care.

Now I know how detailed I can get I will start progressing to bigger carves. I can fit  A3 and in the distant future maybe a sheet A3+A3 long.  The challenge is there.

Aluminium is another. Maybe I could try this out on 3mm sheet, make it like a pendent?

What are your challenges?