Indie game storeFree gamesFun gamesHorror games
Game developmentAssetsComics
SalesBundles
Jobs
TagsGame Engines

Building a Font Importer

A topic by Internet Janitor created Sep 28, 2023 Views: 1,557 Replies: 4
Viewing posts 1 to 3
Developer(+6)

I recently came across Damien Guard's ZX Origin, a collection of hundreds of 8x8 fixed-width bitmapped fonts intended primarily for use on the ZX Spectrum. While these cannot be used directly in Decker, it is fairly straightforward to build a utility that takes a bitmap tilesheet like this one:


And converts it into a proper Decker font. Let's build one together, step-by-step!

Previews

First, let's make a system for previewing all the fonts in the current deck. Make a field widget named "preview" with some example text and a grid named "fonts" which will contain our font list:
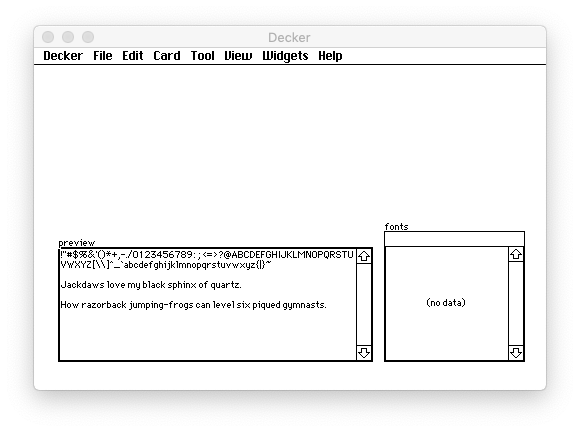
We need to populate "fonts" with the names of all the fonts in the current deck. We can update this information in the "view[]" event handler for the card, which fires every time a card is visited (including when you first open a deck). Fill out a card script like so:

on view do
 fonts.value:select "Font Name":key from deck.fonts
 preview.font:first fonts.rowvalue
end

Piece by piece:


Note that "fonts.rowvalue" will be an empty dictionary if no row is selected. This is fine, because setting the font of "preview" to an invalid font name resets it to the default "body" font.

In order to make changing the selected row of the grid update the preview we also need to give the grid an event handler that kicks off the card "view[]" function when the row is changed:

on click do
 view[]
end

Switching to Interact mode will update our grid and allow us to try different builtin fonts:
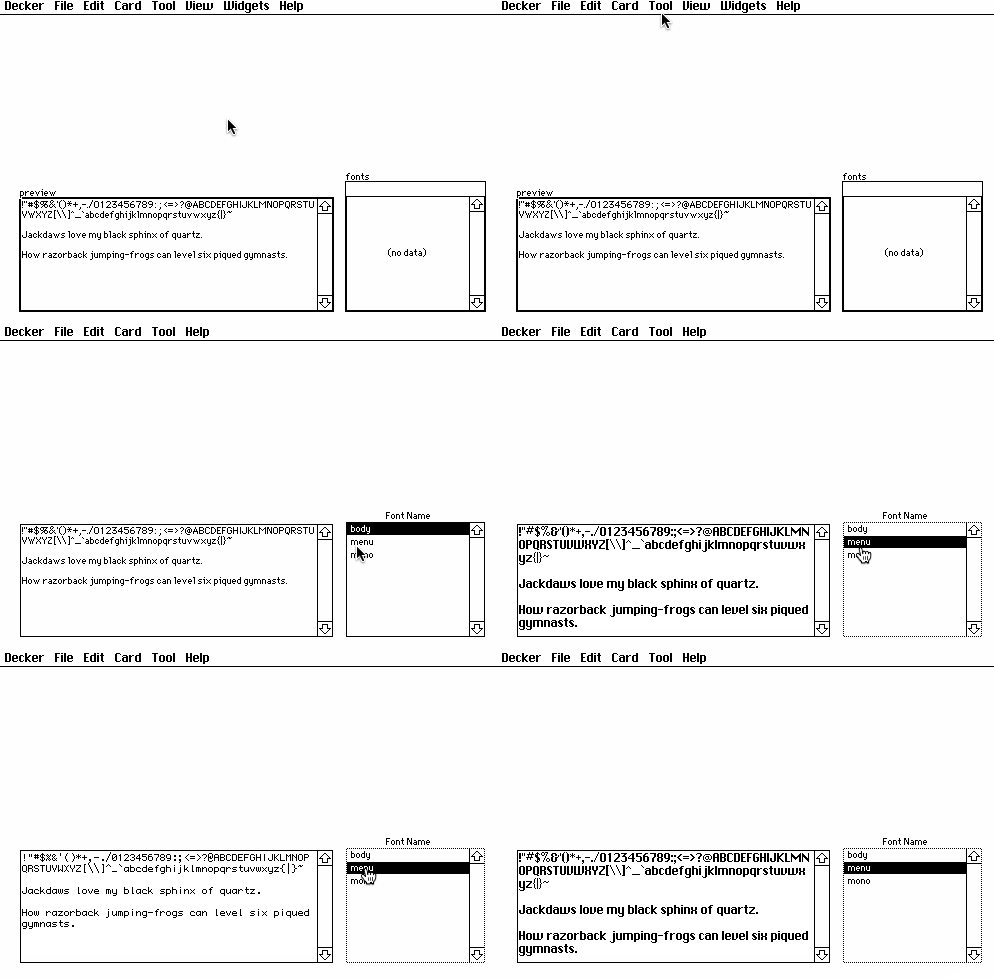

Image Import

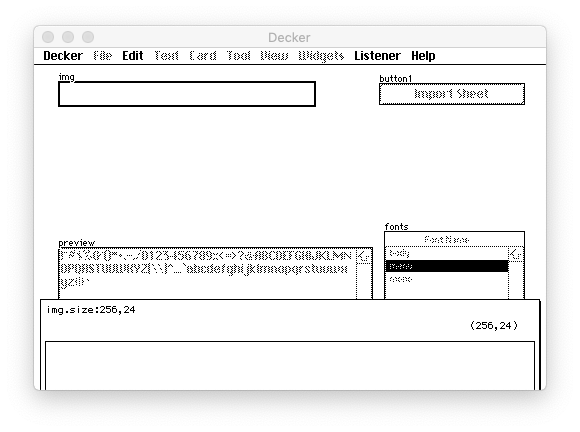
Next, let's make a system for reading in images. Create a canvas named "img" and a button labeled "Import Sheet". Use the Listener to resize the canvas to the exact dimensions of the ZX Origin sprite sheets, 256 by 24 pixels:
Now we flesh out the script for the button:

on click do
 img.paste[read["image"]]
end

The "read[]" function prompts the user to open an image and turns it into an Image Interface, and then "canvas.paste[]" splats the image onto the canvas:
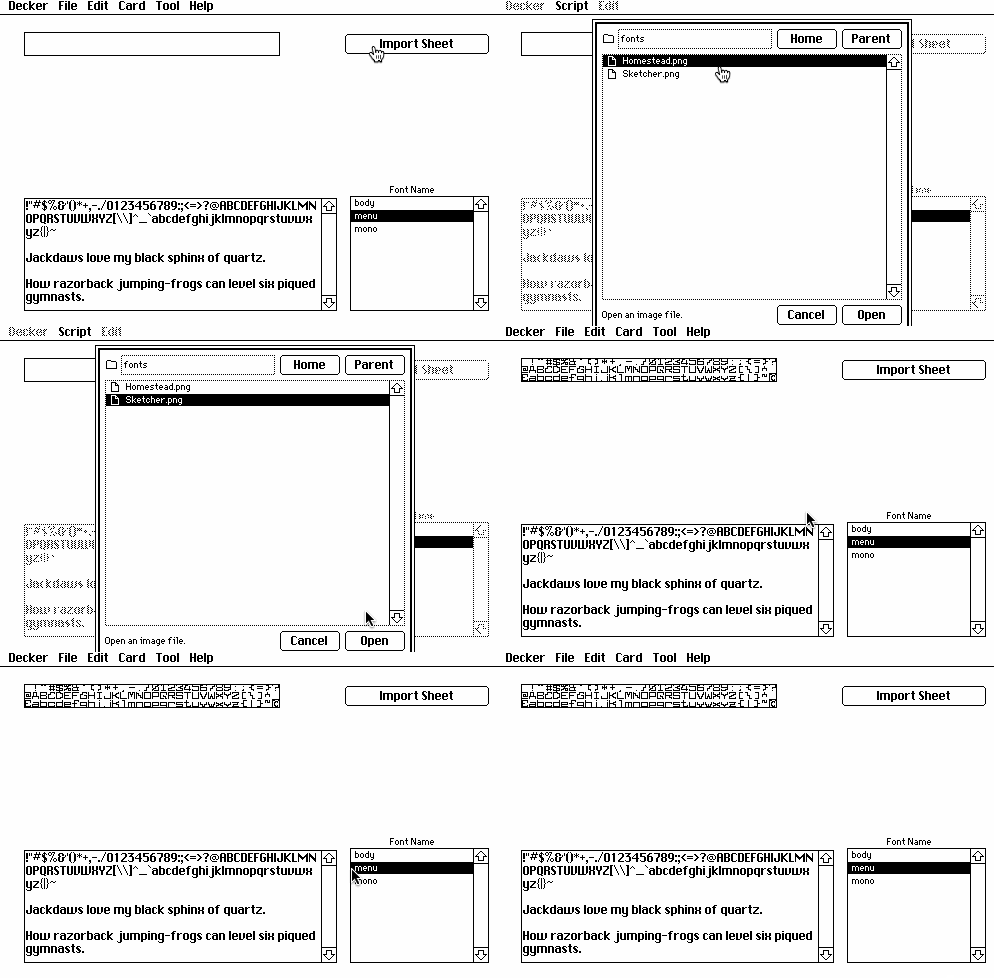
Once again, note that we don't need to write explicit error-handling code: if a user cancels choosing an image with read["image"], it will return an empty image. Pasting an empty image onto a canvas is a harmless operation which has no effect.

Building a Font

Now we're ready to get to the heart of our tool: actually creating a font! Add a button labeled "Create" and a field named "name" which will specify the name of our new font:
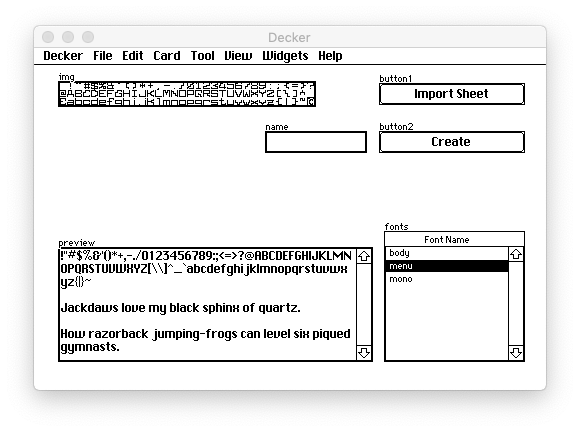

Then, flesh out the button's script:

on click do
 f:deck.add["font" 8,8 name.text]
 f.space:0
 each p i in 8*32 cross 3
  f[i]:img.copy[p 8,8]
 end
 f[95]:image["%%IMG0AAgACAAAAAAAAFQA"]
 view[]
end

Piece by piece,

For additional reference, see the Font Interface.

With this script written, we can now import a tile sheet and create a usable font from it:
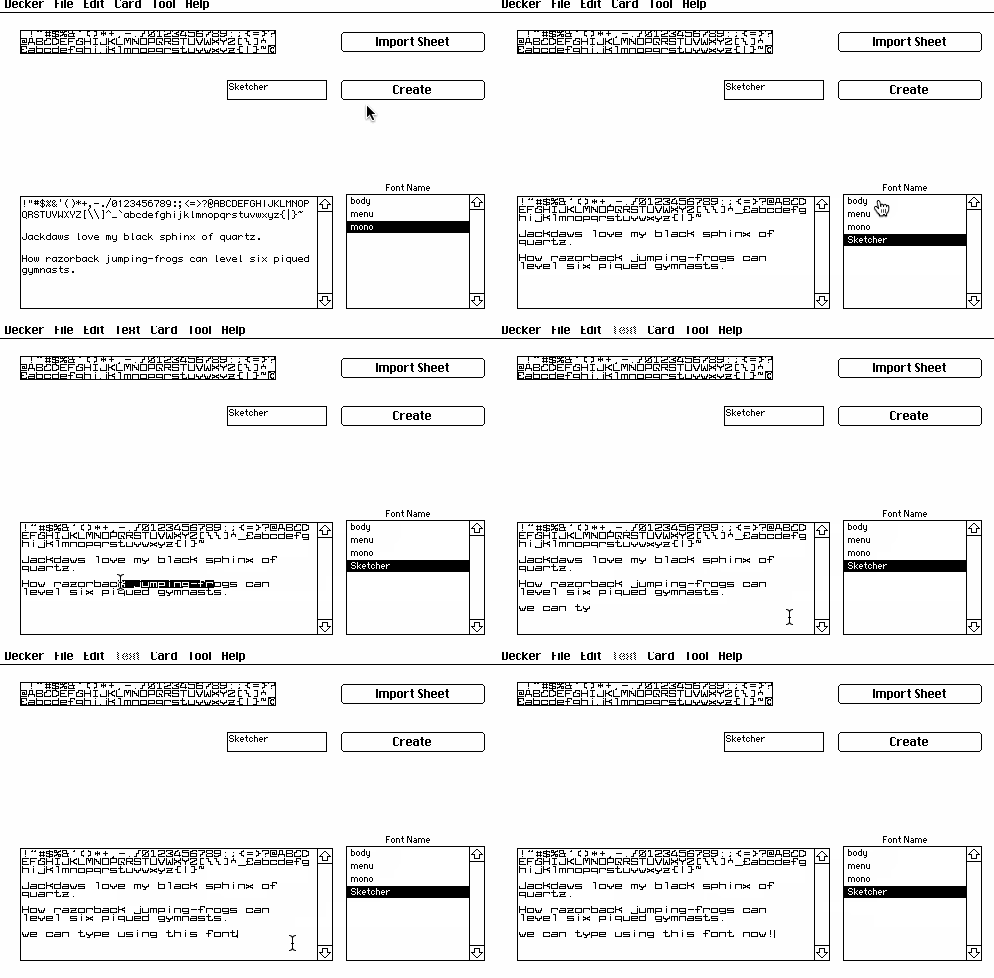

With the deck saved, we can then import our new font into other decks using the Font/DA Mover as usual.

Now that our minimal importer tool works, I'm sure you can imagine lots of ways of making it fancier! As an exercise, consider trying some of the following:

  • Add a button for deleting unwanted fonts
  • Make "create" prompt for a font name using "alert[]" instead of a name field
  • Disable "create" if the img canvas is empty
  • Warn a user if they attempt to create a font with a duplicate name, or replace such an existing font
  • Arrange and style the UI more nicely (for your personal definition of "more nicely")
  • Make the font spacing configurable
  • Adapt to font dimensions other than 8x8 when loading a larger or smaller tile sheet
  • Rework this tool into a Lilt script that can convert dozens of font images at once

Happy fontsmithing!

(+2)

This is SUPER COOL! And I love how well explained it is :)

(+1)

How might one go about generating grid coordinates for uneven cells? Like, 32 columns at x, 3 rows at y? I'm trying to generate from a font that is 6x8 and the end result glyph dimensions are fine but due to the efficient and even nature of x*32 cross 3, they're printing visually offset. I ended up brute forcing past this by making the characters in my image map even with extra space and truncating it after generation, but I'm sure there's some better way to avoid doing this that I simply don't know enough (or any) lil to articulate.

Developer(+1)

We can use a different cell size with some relatively small changes. Here's a 6x8 bitmap font I was able to track down:


Let's start by generalizing the "Import Sheet" script to adjust "img" to suit the dimensions of the imported bitmap. As an extra precaution to suit this example image, I'll also use image.map[] to convert any white pixels (pattern 32) into transparent pixels (pattern 0):

on click do
 i:read["image"].map[32 dict 0]
 img.size:i.size
 img.paste[i]
end

Note that the size of images and widgets (the .size attribute) is given as a (width,height) pair instead of as separate ".x" and ".y" fields. In Lil, arithmetic operators like + and * generalize to work between single numbers (scalars) and lists of numbers:


These operators also generalize to work between two lists, pairing up every corresponding element of the lists:

(2,3)+(10,20)    # (12,23)

Given the size of an image, if we assume three rows of 32 characters, we can compute the cell size with a single division:

cell:img.size/(32,3)     # (6,8)

This process of generalization between numbers and lists of numbers is called "Conforming", and is described in more detail in the Lil reference manual.

In our "Create" button's script, we use the "cross" operator to create a list of coordinate pairs for every cell of the grid:

32 cross 3
# ((0,0),(1,0),(2,0),(3,0),(4,0),(5,0),(6,0),(7,0),(8,0),(9,0),(10,0),(11,0),(12,0),(13,0),(14,0),(15,0),(16,0),(17,0),(18,0),(19,0),(20,0),(21,0),(22,0),(23,0),(24,0),(25,0),(26,0),(27,0),(28,0),(29,0),(30,0),(31,0),(0,1),(1,1),(2,1),(3,1),(4,1),(5,1),(6,1),(7,1),(8,1),(9,1),(10,1),(11,1),(12,1),(13,1),(14,1),(15,1),(16,1),(17,1),(18,1),(19,1),(20,1),(21,1),(22,1),(23,1),(24,1),(25,1),(26,1),(27,1),(28,1),(29,1),(30,1),(31,1),(0,2),(1,2),(2,2),(3,2),(4,2),(5,2),(6,2),(7,2),(8,2),(9,2),(10,2),(11,2),(12,2),(13,2),(14,2),(15,2),(16,2),(17,2),(18,2),(19,2),(20,2),(21,2),(22,2),(23,2),(24,2),(25,2),(26,2),(27,2),(28,2),(29,2),(30,2),(31,2))

Instead of scaling every number in this list of pairs by 8, we now want to scale the first of each of these pairs by 6 and the second of each of these pairs by 8.

The "flip" operator transposes the x and y axes of a matrix (a list of lists). Given a list of (x,y) pairs, it produces a pair of lists: the first containing x coordinates, the second containing y coordinates:

flip 32 cross 3
# ((0,1,2,3,4,5,6,7,8,9,10,11,12,13,14,15,16,17,18,19,20,21,22,23,24,25,26,27,28,29,30,31,0,1,2,3,4,5,6,7,8,9,10,11,12,13,14,15,16,17,18,19,20,21,22,23,24,25,26,27,28,29,30,31,0,1,2,3,4,5,6,7,8,9,10,11,12,13,14,15,16,17,18,19,20,21,22,23,24,25,26,27,28,29,30,31),(0,0,0,0,0,0,0,0,0,0,0,0,0,0,0,0,0,0,0,0,0,0,0,0,0,0,0,0,0,0,0,0,1,1,1,1,1,1,1,1,1,1,1,1,1,1,1,1,1,1,1,1,1,1,1,1,1,1,1,1,1,1,1,1,2,2,2,2,2,2,2,2,2,2,2,2,2,2,2,2,2,2,2,2,2,2,2,2,2,2,2,2,2,2,2,2))

We can then multiply this pair of lists by our cell size, and then "flip" again to turn them back into a list of (x,y) pairs. In a more conventional language you'd probably have to write a loop (or two) to built this list of coordinates. Learning to use conforming to your advantage is the secret to concise and fast Lil.

cell * flip 32 cross 3
# ((0,6,12,18,24,30,36,42,48,54,60,66,72,78,84,90,96,102,108,114,120,126,132,138,144,150,156,162,168,174,180,186,0,6,12,18,24,30,36,42,48,54,60,66,72,78,84,90,96,102,108,114,120,126,132,138,144,150,156,162,168,174,180,186,0,6,12,18,24,30,36,42,48,54,60,66,72,78,84,90,96,102,108,114,120,126,132,138,144,150,156,162,168,174,180,186),(0,0,0,0,0,0,0,0,0,0,0,0,0,0,0,0,0,0,0,0,0,0,0,0,0,0,0,0,0,0,0,0,8,8,8,8,8,8,8,8,8,8,8,8,8,8,8,8,8,8,8,8,8,8,8,8,8,8,8,8,8,8,8,8,16,16,16,16,16,16,16,16,16,16,16,16,16,16,16,16,16,16,16,16,16,16,16,16,16,16,16,16,16,16,16,16))
flip cell * flip 32 cross 3
# ((0,0),(6,0),(12,0),(18,0),(24,0),(30,0),(36,0),(42,0),(48,0),(54,0),(60,0),(66,0),(72,0),(78,0),(84,0),(90,0),(96,0),(102,0),(108,0),(114,0),(120,0),(126,0),(132,0),(138,0),(144,0),(150,0),(156,0),(162,0),(168,0),(174,0),(180,0),(186,0),(0,8),(6,8),(12,8),(18,8),(24,8),(30,8),(36,8),(42,8),(48,8),(54,8),(60,8),(66,8),(72,8),(78,8),(84,8),(90,8),(96,8),(102,8),(108,8),(114,8),(120,8),(126,8),(132,8),(138,8),(144,8),(150,8),(156,8),(162,8),(168,8),(174,8),(180,8),(186,8),(0,16),(6,16),(12,16),(18,16),(24,16),(30,16),(36,16),(42,16),(48,16),(54,16),(60,16),(66,16),(72,16),(78,16),(84,16),(90,16),(96,16),(102,16),(108,16),(114,16),(120,16),(126,16),(132,16),(138,16),(144,16),(150,16),(156,16),(162,16),(168,16),(174,16),(180,16),(186,16))

Here's a complete modified script for the "Create" button that should work for any size of monospaced font with the correct 32x3 grid:

on click do
 cell:img.size/(32,3)
 f:deck.add["font" cell name.text]
 f.space:0
 each p i in flip cell * flip 32 cross 3
  f[i]:img.copy[p cell]
 end
 f[95]:image["%%IMG0AAgACAAAAAAAAFQA"]
 view[]
end

Does that help?

(+1)

This was immensely helpful and much cleaner than what I had come up with originally but couldn't finish. I had looked at the lil ref manual and even looked up an sql write-up to try and understand better but was still struggling. Thank you!