On Sale: GamesAssetsToolsTabletopComics
Indie game storeFree gamesFun gamesHorror games
Game developmentAssetsComics
SalesBundles
Jobs
TagsGame Engines

CliffracerX

34
Posts
7
Topics
31
Followers
5
Following
A member registered Aug 29, 2016 · View creator page →

Creator of

Recent community posts

Unless they've totally busted the build system in modern releases (i.e, 2020 and beyond), that was basically never the case when I did development under Windows.  IIRC 5.0.0ish did have some issues with Mac builds never making it past the splash screen, but it was fixed shortly after, and the Linux ones legitimately never broke, even back into the dark ages of Unity 4 and the likes.

Also, it's important to remember that while Mac OSX and Linux are both unix-derived, Linux != Mac OSX.  Macs are nightmarishly overcomplicated, ridiculously locked-down, and their "applications" being folders w/ metadata in addition to executables and data files is where I recall many of the 5.0-era build bugs happening.  Linux is a lot more akin to Windows in that applications are just executable files, with no need for a fancy folder structure or a hundred different pieces of hidden metadata that'll break everything if they're messed up.

TL;DR: Linux builds from Windows should be fine, it's not a tenth as picky as Macs are, and AFAIK Mac builds from Windows machines will be fine as well, in all cases doubly so if you use something like Butler for uploading builds instead of relying on Windows' at-time janky system for working with zip flies.

(As for Unreal: to my knowledge, you can only build for the platform your editor is running in, so while you can make a game cross-platform with it, you've gotta dual-boot and keep an identical editor setup on both, or worse, triple-boot if you want to cover Macs as well.)

(1 edit)

If you're a creator looking to ensure as many of your fellow devs as possible will be able to play & rate your stuff, please note that CORE does not work under WINE & the likes, rendering Linux and Mac players unable to access your games!  Pure Unreal 4 games can usually run via tools like SteamPlay/Proton/a raw Wine setup, so if you've got the U4 chops you're fine, and Unity games almost always work with those tools in addition to the native support for building cross-platform games, but CORE is a no-go at the moment.

This means devs on Linux or Macs - myself included as I only run XUbuntu at this point - likely won't be able to play or rate your stuff if you make it with CORE, certainly not in time for meaningful jam participation.

EDIT 1: Forgot the "as possible", whoops

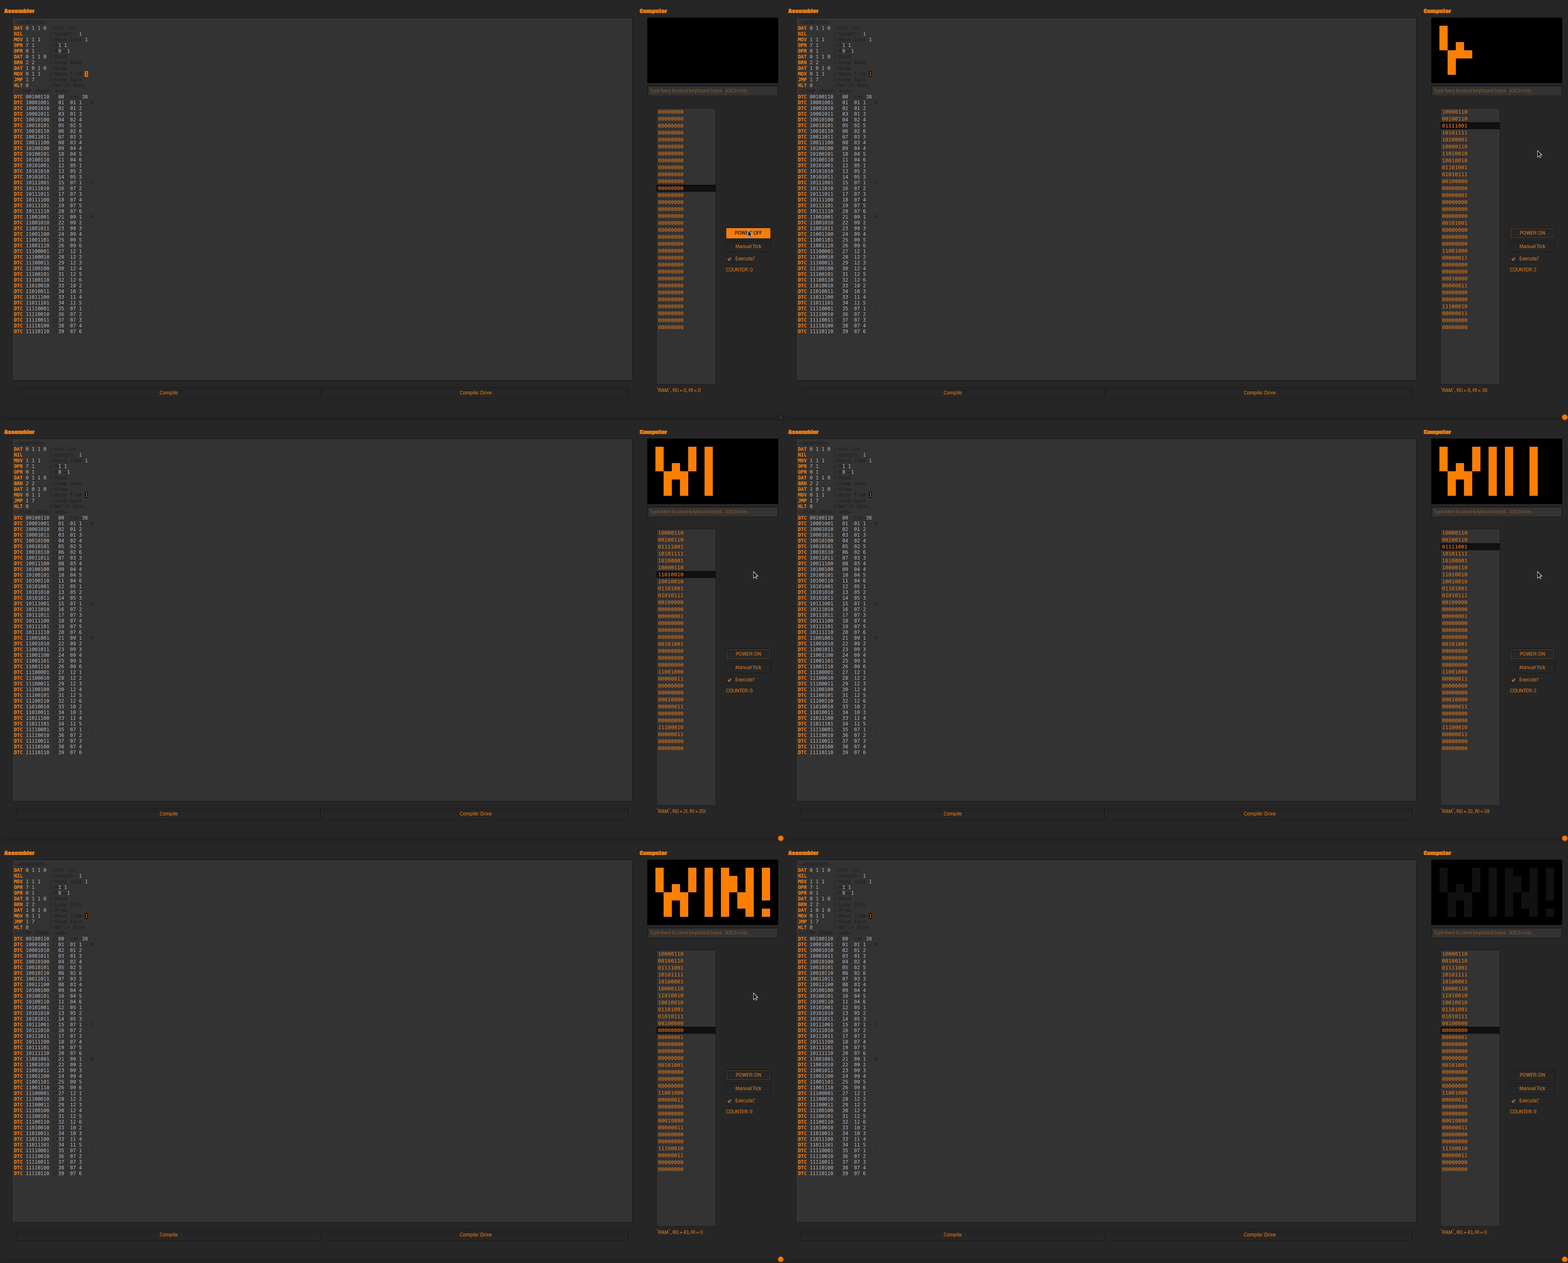
If you've toyed with the RISC-06 IDE (now available on the main page), you're probably wondering "well, where do I share my code?" - here's the answer.  A special thread, dedicated just to RISC-06 coding!  I don't yet have anything fancy to share that's not already included with the IDE itself as a sample program (see DefaultDrawer.rasm and WinData.rasm), so it's up to you to populate this thread with cool stuff.

RISC-06 In Action

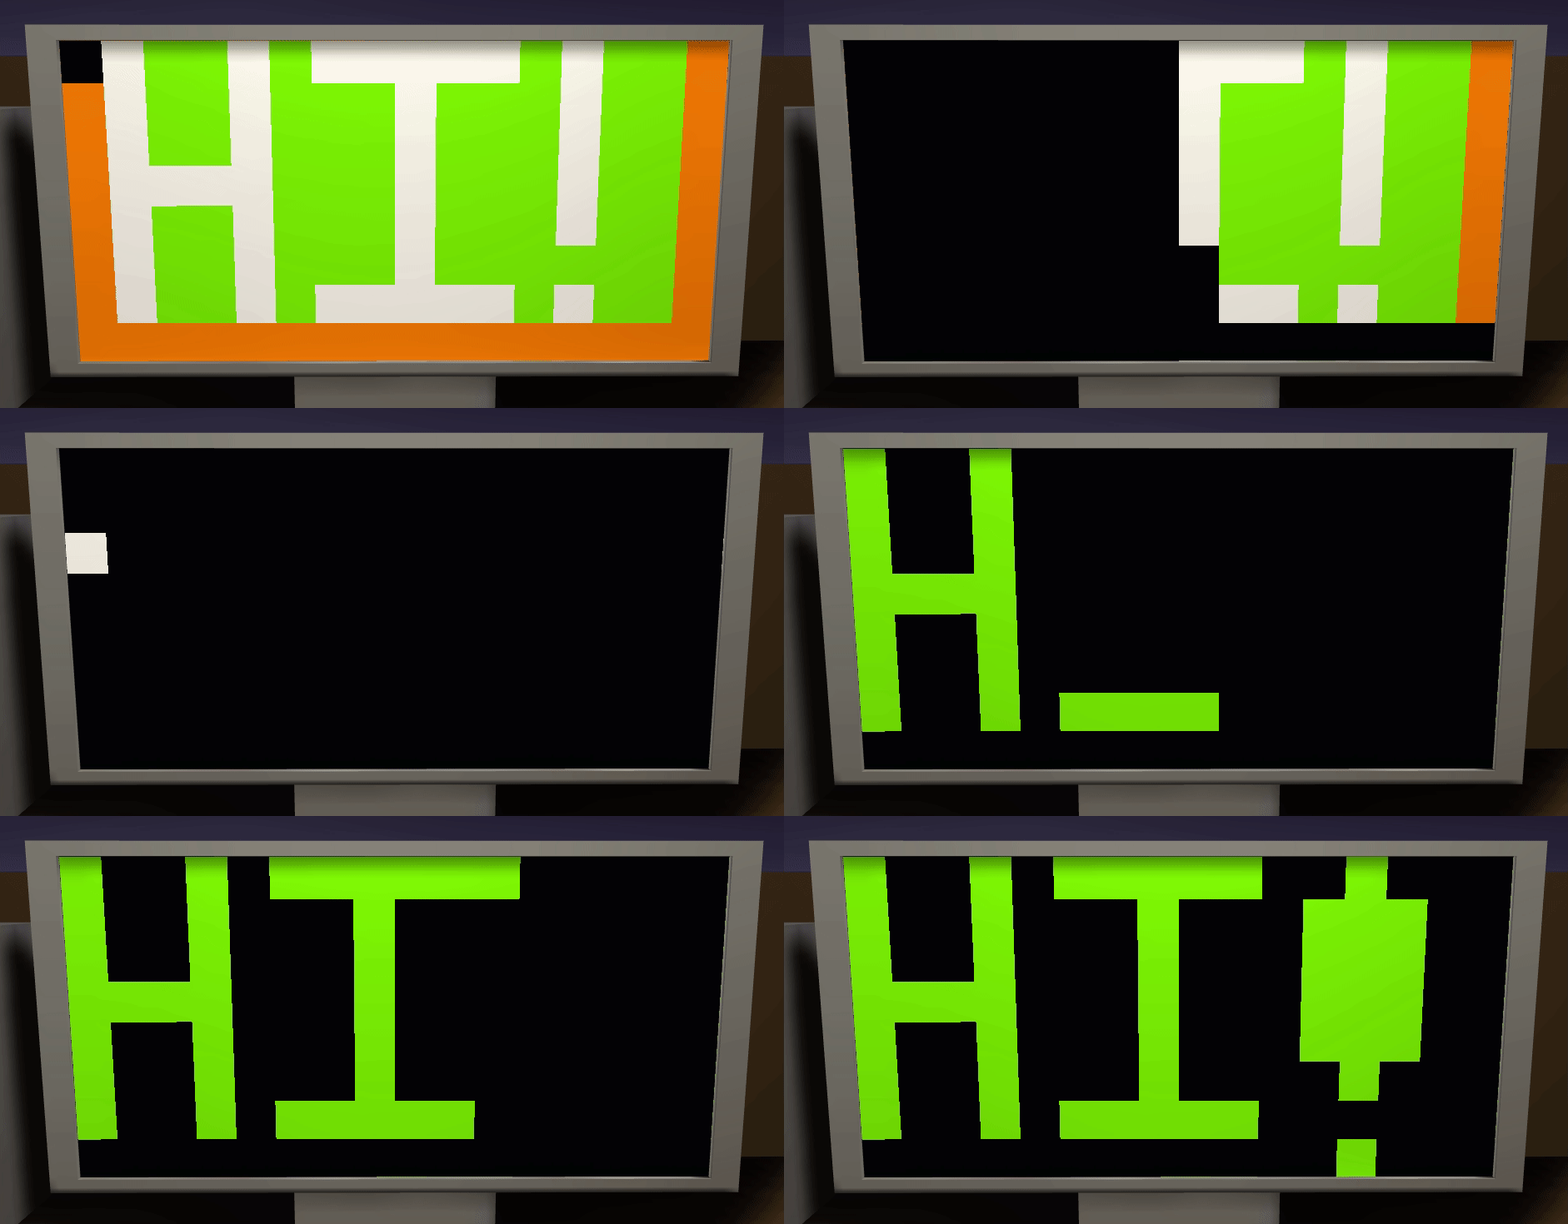
A simplified win screen renderer!  The code to the left isn't meant to be compiled all at once; just put it in there so it'd be visible.
In that case - perfect time to show it off/talk about it!  The RISC-06 is sort of built around the same fundamental ideas as the TC-06 (e.g, instructions & arguments all get stuffed into one memory address, you have versatile-ish registers, self-modifying code is going to be fairly commonplace), but designed to be even more ridiculously minimal.  Each memory address is 1 byte, the first 3 bits of which are the op-code, and the last 5 of which are arguments.  That means we have 7 main op-codes (8, if you count NIL) - not a whole lot to work with!  Most data is byte-based, too - registers, memory addresses, even the data used for the various peripherals.  The current default setup is 32 bytes of RAM, a 16x8 1-color monitor, a 256-address (the maximum without making one that needs two GETDATA equivalent ops run to read, or three to write!) drive, and at some point, a keyboard.

-=OVERALL INFO=-
 * 32 bytes of RAM.  One byte = one address.
 * All data in bytes.  ALL DATA.  Even the program counter, meaning a hard max of 256 bytes of RAM and drive space.
 * Two 1-byte registers.  Used by MOV, DAT, OPR, BRN, and more - see op-code documentation for specifics.
 * Runs at 30 Hz.
 * First 3 bits are op-code, meaning there are 8 code slots, with 5 bits of argument space.
 * 256-byte "drive" on port 0.  (literal max because byte-based)
   * Run DAT 1 twice to write to it - first to specify the output address, then the data itself.
   * DAT 0 expects its argument to be the requested address, and returns its contents.
 * 2-color 16x8 monitor on port 1.  (1 bit color, 4 bit X, 3 bit Y)
   * DAT 1 expects first a color bit, then the 4 X bits, then the 3 Y bits, and will draw immediately.
   * DAT 0 expects first a 1-bit flag for COMMAND or COLOR.  If flag is 0, it returns the status of the selected pixel, otherwise the full command, then 4 X bits, then 3 Y bits.
 * This is a "reduced instruction"/simplified version of the TC-06 architecture, potentially to be implemented with homebrew IRL hardware.
 * In theory, it is, like the original TC-06, a TURING COMPLETE system.
 * SAMPLE CODE - WRITE BLINKENLIGHTS POSITIONS TO DRIVE, FLASH:
DAT 1 1 0 0  //ADR00
DAT 1 1 0 1  //ADR01
JMP 0 2      //ADR03
DTC 10001001 //ADR04
OPR 6 1      //ADR05
DAT 1 1 0 0  //ADR06
DAT 1 1 0 1  //ADR07
JMP 0 2      //ADR08
DTC 00001001 //ADR09
OPR 6 0      //ADR10-LOOPS
DAT 0 1 1 0  //ADR11
DAT 1 0 1 0  //ADR12
OPR 6 1      //ADR13
DAT 0 1 1 0  //ADR14
DAT 1 0 1 0  //ADR15
JMP 1 6      //ADR16-LOOPE
//RAM[4] & [9] are pixel data.
//4 is 1,1=ON, and 9 is OFF.
//Write them to drive[0,1].
//Loop loads them to Reg1...
//...and draws 'em. -=OP-CODE: NLS (N/A)=-
 * The equivalent to Senbir's NILLIST.
 * NILLIST.
-=OP-CODE: NIL (000)=-
 * Null space.  Skipped past, though it takes a cycle.  Assumed to be empty.
 * NIL.
-=OP-CODE: HLT <5-bit timer> (001)=-
 * If timer==0, halts until reboot.
 * Otherwise, halts for specified number of clock cycles, meaning halts of up to ~1.06 seconds.
 * HLT.
-=OP-CODE: JMP <1-bit flag> <4-bit dest. addr.> (010)=-
 * Jumps the program counter forwards or backwards the specified number of addresses.  Will wrap around RAM if need-be.
 * Flag 0 = forwards
 * Flag 1 = backwards
 * JMP, but localized.
-=OP-CODE: MOV <1-bit flag> <1-bit register> <3-bit addr.> (011)=-
 * If flag is 0, loads something from the first 8 bytes of RAM into register 0/1.
 * If flag is 1, does the opposite, loading from register 0/1 into RAM.
 * If an offset is done with OPR, it adds that to the specified address.
 * MOVI and MOVO combined into one, more limited function.
-=OP-CODE: DAT <1-bit flag> <2-bit peripheral id> <bit argument 1> <bit argument 2> (100)=-
 * If flag is 0, is GETDATA.
   * Argument 1 specifies the return register, either 0 or 1.
   * Argument 2 specifies where to get the command data from, either the opposite register (false), or RAM, 2 addresses ahead (true).
 * If flag is 1, is SETDATA.
   * Argument 1 specifies which register to use, if registers are to be used.
   * Argument 2 specifies where to get the command data from, either the specified register (false), or RAM, 2 addresses ahead (true).
 * GETDATA and SETDATA combined into one, more limited function.
-=OP-CODE: OPR <4-bit op> <1-bit optional flag> (101)=-
 * Operation 0: Addition & Subtraction.
   * Flag 0: Subtraction.  Registers[0] = Registers[0]-Registers[1];
   * Flag 1: Addition.  Registers[0] = Registers[0]+Registers[1];
 * Operation 1: Multiplication & Division.
   * Flag 0: Division.  Registers[0] = Registers[0]/Registers[1];
   * Flag 1: Multiplication.  Registers[0] = Registers[0]*Registers[1];
 * Operation 2: Copy
   * Flag 0: Registers[1] = Registers[0];
   * Flag 1: Registers[0] = Registers[1];
 * Operation 3: Modulo & Exponent
   * Flag 0: Modulo.  Registers[0] = Registers[0]%Registers[1];
   * Flag 1: Exponent.  Registers[0] = Registers[0]^Registers[1];
 * Operation 4: Jump Proper
   * Flag 0: Jump directly to the memory address with ID equal to the contents of register 0.
   * Flag 1: The same, but for register 1.
   * Wraps around if there's an overflow (e.g, if addr 48 is requested when there's only 32 addresses, it goes to addr 16)
 * Operation 5: Offset
   * Flag 0: Sets the current offset to the contents of register 0.
   * Flag 1: Sets the current offset to the current program counter.
   * Like the proper jump, will wrap on overflow in the case of flag 0.
 * Operation 6: Set01[0]
   * Flag 0: Registers[0] = 0;
   * Flag 1: Registers[0] = 1;
 * Operation 7: Set01[1]
   * Flag 0: Registers[1] = 0;
   * Flag 1: Registers[1] = 1;
 * Operation 8: Set23[0]
   * Flag 0: Registers[0] = 2;
   * Flag 1: Registers[0] = 3;
 * Operation 9: Set23[1]
   * Flag 0: Registers[1] = 2;
   * Flag 1: Registers[1] = 3;
 * Operation 10: Shift
   * Flag 0: Shift Registers[0] forwards by the number of bits specified in Registers[1].
   * Flag 1: Shift Registers[1] forwards by the number of bits specified in Registers[0].
 * A mix of MATH and UTL.
-=OP-CODE: BRN <2-bit op> <3-bit dest. addr> (110)=-
 * Operation is either == (0), != (1), 1>2 (2), or 1<2 (3).  Compares registers 1 and 2.
 * Jumps forwards up to 9 addresses (pointer = pointer + 2 + destAddr (0-7)) if the comparison is true.
 * Otherwise, ticks forwards once like normal.
-=OP-CODE: SPC <3-bit start point> <1-bit length (length=(arg+1)*2)> <1-bit offset>=-
 * Splices 2 or 4 bits from register 0 and pastes them into the same position (or the same position+1, wrapping cleanly if need-be) in register 1.
 * A simplified, even more finnicky PMOV.

Despite its limitations, I feel like it's actually more usable than the standard TC-06 assembly.  It seems a bit less reliant on self-modifying code (SPC/"Splice", the PMOV equivalent, and OPR 10, the PMOV offset equivalent, haven't been implemented under the hood yet, and I still wrote that image renderer!), and the register setup feels somehow less overwhelming than Senbir, even though it's far more limited.  I'm loving working with it so far.

Of exciting note, the actual VM for it is written using C++, in such a way that I can hook the simulation function up to Unity down the line and make it work in Senbir.  Getting an ingame RISC-06 computer up and running will be good practice for porting the TC-06 architecture itself to C++ - I've already learned a good bit about compiling it all, linking, dealing with data types, etc.  The visual/UX frontend here is QT-powered, and themes itself depending on your OS theme settings.  I plan to change some of it (at least the Assembler portion) to use some color choosers in the Options menu so it'll look good & be easy to tweak no matter what OS you're running on.


Your RISC-y setup looks good!  I'll admit I'm having a little bit of trouble wrapping my head around parts of it - like immediate-mode numbers in ADD/SUB/etc, how do they work, both on the Assembler level (e.g, would ADD 1 5 jump the pointer forwards five?), and the processor level (how does it decide between using registers & immediate-mode numbers?); the latter is why there's not much of that in Senbir, I couldn't figure out a good way of using immediate-mode numbers without making them an argument (say, a bit), which removes from the number of bits you have available for other arguments.

(I was...a bit one-track-minded about trying to maximize the number of available memory addresses, originally; the max was originally bound by the limitation of MOVI/MOVO, though you can now skirt past that to 2^32 addresses via the power of OFST.  This was especially noticable in the ye-olden TC-06 prototype I shared the gif of a while back - both my rather slipshod attempts to counter the storage issues, and the issues themselves having pretty big numerical impacts.)


Should definitely add an MMU as an optional addition at some point, though I'm not sure if it should be a custom addition to the assembly language itself (e.g, a new op-code for memory management), or a custom device of some sort you ping with GET/SETDATA - they sound way too handy for just about any situation one could imagine not to have around in some form.  ...Hm, maybe an OFST expansion?  Like something you could enable/disable in Custom mode, "MMU OFST" - it would rework the op-code in some shape or form to emulate an MMU.


I understand, now.  Thought there was an undocumented/unintended feature that would enable a monitor that technically uses more than 32 bits, but can function normally via the Extended SETDATA offset feature.

Not too sure what to say about that storage quandry, though.  If I were designing it, I'd probably choose to store emulated monitor commands in some chunk of memory set aside for that purpose, even if it means suffering a performance/storage hit.  Maximum compatibility is important, and as something of a security freak, I'd say that having little VM-specific quirks like that is...dangerous.  Someone looking to write a TC-06 virus (why anyone would is beyond me, but...thinking through these things anyway!) could intentionally check the behavior of that operation to deduce if their program is in a VM or not.  Generally tend to think that providing that sort of info can be a dangerous security hole.

I figured it was only a matter of time before some sort of emulation/virtual machine was made in Senbir.  But...I'd basically figured the first would be a glorified bootloader, sorta like what I set up in the multitasking kernel.  This is...stupidly impressive, to vastly understate it.

(I really need to just get around to releasing the current update.  Been horrendously sidetracked by Warframe & working on/off on Astronaut Plus Skateboard lately.  Well, that, and also the RISC-06 system...did I post about that yet?)


If functionality breaks in Default mode, I'd say it's probably not compatible/doesn't fit.  Especially if that entails Unity blowing up - it'll almost certainly throw a fit about the array being out of bounds if one tries to copy the emulator onto the Default mode disk.


Makes me wonder how feasible it would be to make swap a thing; it could potentially get around the issue of RAM being nigh-on useless if you used RAM solely to hold a swap system that can use part of a disk (or a whole disk, when/if I get around to adding multi-disk setups to Custom Mode) - programs would suffer a performance hit, sure, but on the flip side, you get more RAM to work with, dynamic address remapping (means your programs don't need to sit sequentially in ram, which would make memory management so much easier), and maybe marginally less self-modifying everything.


I can't say as that I have anything smart to say about the slowdown, so just: whoa.  That's impressive levels of performance drop.


I'm not entirely clear on the finer details of multithreading/multitasking, but I can see how this would make for a decent multitasking system.

(Also: if "secret higher-resolution" mode on the monitors is extended SETDATA ops; those were absolutely not intended to provide a max resolution increase.  If the game doesn't explode violently when you go above 32 bits for color+width+height?  I have no intention of changing that - unintentional cool features are still features!)


(Also, once again, pre-emptive apologies for loopiness & lateness and such.  I really, really need to go to bed at more sane hours.  And, like, not procrastinate until going to bed at insane hours is necessary >.<)

While I can understand the allure of using registers, especially for simple operations (int X = int Y, for instance), I figured RAM might be better overall since it means you can have as many "arguments" as you need, especially if you get into custom datatypes (like a struct) that could easily balloon past 7 or 8 registers being required for even a simple X=Y op.  That is, however, coming from my own implicit biases, and lack of optimization skill, so I don't see it as being HUGELY unlikely that I'm wayyy off the mark in how best to do that.  (Also - you almost certainly know way more about what goes on under the hood of modern computers than I do.  Knowing how computers work is probably the more important factor for compiler development than having a tiny bit of research into how compilers work.  :P)


MOVR basically seems like a one-off to get out of needing to write a bunch of self-modifying code just to move one memory address' contents through RAM - while it can be used for some small improvements here and there, it's not necessarily worth taking up a whole sub-code slot for.  Your suggestion for alternate MOVI/MOVO modes is probably the more practical thing to add, even if it means an extra clock cycle or two.


OFST is definitely worth keeping - it's all-around useful, and in the case of the multitasking kernel I wrote a while back, mandatory for functionality.  Far as I can tell, there's no way to make a program that'll live at an offset without OFST - you can't just self-modify the MOVI/MOVO ops to splice the offset in, because self-modifying code would need that offset in the first place.

(Also, now I'm tempted to make an OFST variant for Custom Mode that lets you set up your own MMUs.  The code-creep is getting out of hand, there're just too many cool things to add!)


My thinking for using that separate mode is that it means the current feel (and perhaps charm) of the TC-06 can be preserved with ease, while also easily enabling access to a more practical processor (or less practical, if you so desire - experimenting with an online circuit simulator & making a byte of RAM inspired me to make a byte-based lower-fi TC-06 derivative, the specs for which will go up on the Gitlab at some point soon) for doing fancy stuff.

I'm aware Senbir is my game, but I also feel like it has a certain charm to its terribleness, and I'm worried adding a new-opcode (e.g, "RAMC <4-bit sub-code for practical RAM-based variants of all the main codes> <24 bits of arguments for that sub-code>") would potentially mess that charm up, or disturb the overall feel of the TC-06 & how it works, hence asking about it - don't wanna ruin it for my playerbase!  I do definitely want to look into making a more practical RAM-based architecture with less reliance on registers (maybe use them more as op-code arguments/variables than they are now?) down the line, just to explore what it'd be like.


(Also: no, TC-06 isn't really an acronym for anything.  It's sorta loosely based around "The 006 Cooperative", but mostly just serves as a cool abbreviation-sounding processor name.  :P

Also, sorry if this post is a bit discombobulated, it's six in the morning.  Am not as smart as I should be/could be.)

So, this is less of the usual "share a cool thing" post, and more a general question about how to make the TC-06 more...well, usable.

I'm toying with ideas on how to implement a C compiler for it (likely either an LLVM extension, or GCC extension), because being able to write in a higher-level language and then compile to the TC-06 would make programming advanced things way easier, not to mention just being a huge achievement.  As I understand it, most compiler implementations are going to want machine-code/assembly implementations of various functions (e.g, the function for the + operand), so in-between google searches and delves into manuals, I decided to start prototyping some of those basic functions.

I don't think the extent of how utterly useless the RAM is had hit me until now.  I decided to start with = and +, as they're arguably the most basic (and most commonly used) operands - for instance, you can represent subtraction & multiplication with +.  Here're my notes on the two.

-=SET OPERATION (=)=-
 * x = y;
 * I don't think you can build a programming language without this.
 * Assumes register 0 is a pointer to the start of the arguments, and register 15 is the integer 1.
 * Assumes OFST <N> is run, where N is the first address of the SET op.
 * ASM, V1:
MOVI 2 4            //Addr 00.  Move the command to be modified into register 2.
PMOV 0 2 7 31 0 0   //Addr 01.  Splice the pointer/address from register 0 into register 2.
MOVO 2 4            //Addr 02.  Move the modified MOVI back into RAM.
PCSR 2 0            //Addr 03.  Temporarily disable the current offset.
MOVI 4 0            //Addr 04.  Acquire the source address for MOV and put it in register 4.
PCSR 2 1            //Addr 05.  Re-enable the offset.
MATH 15 0 0         //Addr 06.  Increment the pointer by one.
MOVI 2 10           //Addr 07.  Move the command to be modified into register 2.
PMOV 0 2 7 31 0 0   //Addr 08.  Splice the pointer/address from register 0 into register 2.
MOVO 2 4            //Addr 09.  Move the modified MOVI back into RAM.
PCSR 2 0            //Addr 10.  Temporarily disable the current offset.
MOVI 5 0            //Addr 11.  Move the destination address for MOV into register 5.
PCSR 2 1            //Addr 12.  Re-enable the offset.
MOVR 0 5 4          //Addr 13.  Actually set X (register 4 pointer) to Y (register 5 pointer). Function finished.
 * Version 2 assumptions?
 * It assumes that register 15==int 1, and that OFST<N> is run, where N is the pointer for variable X (target), N+1 is the pointer for variable Y (destination), and N+2 is the code.
 * ASM, V2:
DATAC <X>           //Addr 0.  Variable X.
DATAC <Y>           //Addr 1.  Variable Y.
MOVI 0 0            //Addr 2.  Set registers[0] == the pointer for X.
MOVI 1 1            //Addr 3.  Set registers[1] == the pointer for Y.
MOVR 0 0 1          //Addr 4.  Set ram[x]=ram[y]. Function finished. -=ADD OPERATION (+)=-
 * x = y+z;
 * Assumes OFST<N> is run, where N is the pointer for variable X (target), N+1 is the pointer for variable Y (first number), N+2 is the pointer for variable Z (num 2), and N+3 is the code.
 * ASM:
DATAC <X>           //Addr 00.  Variable X.
DATAC <Y>           //Addr 01.  Variable Y.
DATAC <Z>           //Addr 02.  Variable Z.
MOVI 0 0            //Addr 03.  Set registers[0] == the pointer for X.
MOVI 1 1            //Addr 04.  Set registers[1] == the pointer for Y.
MOVI 2 2            //Addr 05.  Set registers[2] == the pointer for Z.
MOVI 3 10           //Addr 06.  Move a MOVI command into register 3 for modification.
PMOV 1 3 7 31 0 0   //Addr 07.  Splice the pointer for Y into the MOVI command.
MOVO 3 10           //Addr 08.  Move it back into RAM.
PCSR 2 0            //Addr 09.  Disable the offset.
MOVI 1 0            //Addr 10.  Go ahead and actually load the contents of variable Y into register 1, overwriting the pointer.
PCSR 2 1            //Addr 11.  Re-enable the offset.
MOVI 3 16           //Addr 12.  Move a MOVI command into register 3 for modification.
PMOV 2 3 7 31 0 0   //Addr 13.  Splice the pointer for Z into the MOVI command.
MOVO 3 16           //Addr 14.  Move it back into RAM.
PCSR 2 0            //Addr 15.  Disable the offset.
MOVI 2 0            //Addr 16.  Load the actual contents of variable Z into register 2, overwriting the pointer.
PCSR 2 1            //Addr 17.  Re-enable the offset.
MATH 2 1 0          //Addr 18.  Add the contents of register 2 (variable Z) to register 1.
MOVI 3 22           //Addr 19.  Move a MOVO command into register 3 for modification.
PMOV 0 3 7 31 0 0   //Addr 20.  Splice the pointer for X into the MOVI command.
MOVO 3 22           //Addr 21.  Move the command back into RAM.
PCSR 2 0            //Addr 22.  Disable the offset.
MOVO 1 0            //Addr 23.  Set X to the result, by moving the value into the RAM location specified by its pointer.
PCSR 2 1            //Addr 24.  Re-enable the offset.  Function finished.

Yikes.  Had to draft some new codes just to make them possible with any degree of ease.  From the current documentation file:

OP-CODE: UTL (0x1011) <sub-code = 4b> <arguments = 24b>

  • Gives 16 new sub-op-codes, primarily utility functions, like enabling an offset to Absolute operations (e.g, MOVI 1 0 becomes MOVI 1 0+offset)
  • If a sub-code is given a title, then you can refer to it by name directly in the Assembler - i.e, UTL 0 0 has the same result as OFST 0 in the compiled bytecode.
  • Operation 0x0 - OFST <24-bit address>: Sets an OFFSET (from address 0) for all ABSOLUTE ADDRESSING. Affects MOVI, MOVO, SETDATA flag 2, and GETDATA flag 2. Uses the full 24 bits given to it.
    • OFST 5 sets a 5-address offset to all absolute address references - save for those in IFJMP & JMP with Flag 1 or Flag 3.
    • This means OFST 5 followed by MOVI 1 0 will result in MOVI moving the contents of address 5 (0 + 5) into register 1.
    • But JMP 1 0 will still jump to & execute the contents of RAM address 0. Since flags 0 and 2 provide relative addressing, it's not necessary.
    • OFST 0 will also reset it so things work as expected.
  • Operation 0x1 - PCSR <4-bit sub-sub code> <20-bit argument>: Subcodes upon subcodes! This lets you interact with the processor somewhat.
    • PCSR 0 <arguments ignored>: Get CURRENT COUNTER POSITION. Similar to a GETDATA op, but for processor info instead. Returns the current counter position in Register 1.
    • PCSR 1 <arguments ignored>: Get CURRENT OFFSET. Same as PCSR 0, but for the offset instead.
    • PCSR 2 <1-bit flag>: Temporarily ENABLE or DISABLE the offset.
  • Operation 0x2 - TIMR <2-bit OFF, START, PAUSE, GET value> <22-bit TIMER ID>: Times the number of cycles run by the processor.
    • TIMR OFF <id> (argument 0x0): The default state. Sets the # of cycles to 0, and won't increment them.
    • TIMR START <id> (argument 0x1): Sets the # of cycles to 0, and starts incrementing it with each clock cycle run.
    • TIMR PAUSE <id> (arguiment 0x2): Pauses incrementation, but leaves the # of cycles alone. If run while paused, resumes cycling.
    • TIMR GET <id> (argument 0x3): Sets the contents of Register 1 to be the number of clock cycles run since the last call of TIMR SET.
    • The ID is useful if you're working in, say, a multi-tasked environment, and you want your program to time itself so it won't run over a requested number of cycles.
  • Operation 0x3 - MOVR <1-bit flag> <4-bit source-addr register> <4-bit dest-addr register> <remaining bits ignored>: Like MOVI and MOVO, but lets you MOV directly from one RAM location to another.
    • MOVR 0 <x> <y>: When the flag is 0, it uses ABSOLUTE ADDRESSING, no matter what. If registers[x]==4, then the source address will always be 4.
    • MOVR 1 <x> <y>: When the flag is 1, it will use RELATIVE ADDRESSING only if OFST is active. In that case, the source address would be registers[x]+OFST; say an offset of 5, and [x]=4, that gives 4+5 for a source address of 9.
  • Operation 0x4 - TBD
  • Further operations: TBD

I'm not sure about MOVR - it basically compresses a bunch of operations down into one, and serves only a very specific edge-case purpose, to my knowledge.  It's not even implemented or anything, just wrote it up to use in simplifying the = function.

So, that leads me to the question of the hour - how do I render the TC-06's RAM practical for storing more than just code, and should I?  Part of Senbir's charm at this point might be that its instruction set is unusual, and that programming for it is a challenge, even when you have lots of RAM, disk space, and processor speed available, simply due to that unusual set - adding, say, a "RAMC" op-code that does sub-codes for most major functions, but solely in RAM (e.g, an actual MOV comparable to that of Redcode or similar) would probably circumvent some of that challenge, and that charm.

If making it more practical were to potentially be detrimental to the spirit of the game, should I then consider just doing a proper spinoff with that alternate instruction set?  Something you could select in, say, Custom mode - same peripherals, world, underlying "hardware", etc, just a new instruction set/processor.

The disk space and low computation speeds are both major issues, especially for the Default mode (I think you've probably made a program as fancy as is possible with your text echoer), but would probably be easier to handle with, say, the stats I have set up for working on SenbOS.

One major way I see to potentially improve the ability to make fancy stuff (like OSes, games, etc), would be to replace the current IO stream's binary representation with one pixel on an 8-bit-color monitor.  You'd have to choose between an 8-bit RGB palette (with 3 bits of R & G and 2 B, or similar), or an 8-bit grayscale, BUT, the payoff would be that actual output would likely be faster, and you can actually draw on a pixel-by-pixel basis with relative ease - the main challenge becomes picking where the pixel actually gets drawn (e.g, where in the 1-dimensional array of currentPixels is the output pointer), and I'm not sure if there's a way TO pick that.  Need to poke through the interpreter code more.

If that is possible, then the main issue remaining is that getting mouse input is impossible, and as such your OS probably has to be either command-line, or you control the mouse cursor with arrow keys or something.  Also, no first person shooters, but that's kind of a given with the super-low processor speed :P

FYI: The processed code is big enough, that in my install at least, Unity outright stops rendering text beyond a certain point in the code editor because of how long the string is.  "String too long for TextMeshGenerator. Cutting off characters."  Still functions normally, far as I can tell - the rendering's just messed up.

I can't say as that I've been able to test it yet, something's going wrong in my install that's preventing the processor from ticking as it should (probably just at low clockspeeds, like Default Mode's) - will update this when I fix whatever's broken.

All that being said: whoa.  This is a super neat idea, and I'm curious to know what one could actually pull off with it.  Given the proclivity of programmers to occasionally do utterly insane things (see also: Senbir itself, this interpreter, etc), there are tools for compiling/processing code from other languages into BF code, like this C compiler.  Though it's in a roundabout way, this does officially mean it's possible to write things in higher-level (?) languages, like C, and then run them in Senbir.  Would an OS or game made in Senbir-BF be usable?  Not in Default mode, or even Extended - I cannot begin to comprehend how slow it'd be with the base clockspeed of 60Hz.  Would it be a fun experiment?  Hell yeah, it would be!

(Also, sorry about kinda disappearing on everyone - I'm still working on the next update, but been sidetracked by playing Warframe, and working on Astronaut Plus Skateboard as of the past few weeks.)

While I haven't actually written the Assembly code for it yet, I am working on a sprite rendering system test of some variety, to use in making games down the line.  Mostly posting this here as a to-do, and to share the design docs I have so far.  I'm (currently) targeting a 300kHz Custom setup with a 256x128 (8-bit by 7-bit) 512-color (9-bit) monitor, with 64kB of RAM and a 4MB harddrive.

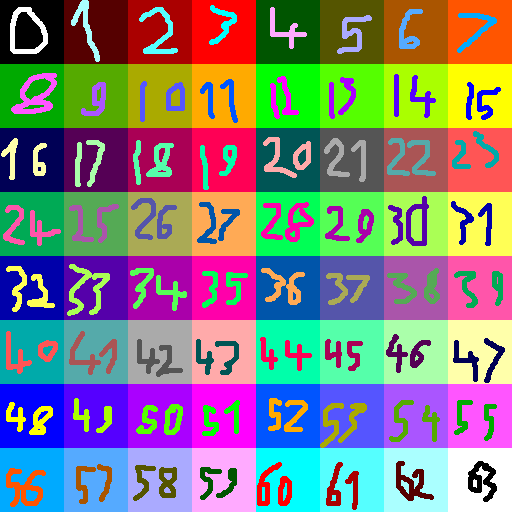
A table of all the colors, as well as an easy means of finding their IDs.

The actual sprite format is as follows, fairly simple:

  • Number of addresses used for sprite (on the disk - they're always going to be hotloaded, for memory efficiency reasons)
  • Image metadata: first 8 bits are width, next 7 are height, next 8 are how many color IDs the image uses, while the last 9 are just ignored
  • List of color IDs, one per line, with each line being the actual 9-bit monitor color ID
  • List of pixel data, 4 pixels per line in a 1-dimensional array, each pixel being an 8-bit color ID.  Color ID 0 is transparent.

The pseudocode I wrote - of no particular language, it's just to articulate to myself what I would actually need to implement - for the actual render loop itself is as follows:

* Loop through in some form: estimated 21 cycles per loop tick that DOES NOT DRAW, otherwise 24
 *   Store both X and Y, use them in the loop.
 *   X *must* be a power of 2.  As must Y.
 *   That way, it's possible to evenly divide things & whatnot.
 *   Need to have a variable for "currentItem", a 0-3 int.  Used in figuring out which part of the current line it's on.
 *   Every time currentItem rises above 3, it increments the main counter, going down to the next line.
 *   -=LOOP LAYOUT=-
 *   PRE-LOOP: line = getdata(disk, registers, counter) //X=0, Y=0, counter=beginningOfImage, currentItem=0, registers[0:]=0, registers[4] = X,Y offset for extended SETDATA
 *   splice(line, registers[2], (currentItem*8), ((currentItem+1)*8)-1, (3-currentItem)*8, 1) //put the color ID into register 2 for comparison
 *   color = getdata(disk, global, id+1+registers[2])
 *   if color != 0 //make sure the pixel isn't transparent
 *   splice(color, registers[0], 22, 31, 9, 1) //splice the new 9-bit color in that we got from the color ID list.  goes from last 9 bits to first 9 bits.
 *   splice(X, registers[0], 23, 31, 17, 1) //splice the 8-bit X position in that we got from the incrementation.  goes from last 8 bits to bits[9:17].
 *   splice(Y, registers[0], 24, 31, 24, 1) //splice the 7-bit Y position in that we got from the incrementation.  goes from last 
 *   setdata(monitor, registers, 0, true, 4) //draw the pixel, with an X/Y offset in register 4 (the actual position the sprite was requested to be drawn at)
 *   endif
 *   currentItem += 1
 *   if currentItem >= 4
 *   currentItem = 0
 *   counter += 1
 *   line = getdata(disk, registers, counter)
 *   endif
 *   x += 1
 *   if x>= width
 *   y += 1
 *   x = 0
 *   endif
 *   if y>= height
 *   breakFunc
 *   endif

Next off, an example image's code, plus the image itself.  The formatting isn't...quite right for use in-game, but it gives a rough idea of what an image file looks like.

44 //# of addresses.  Equal to 1 + numCols + ((X*Y)/4).  ADDR 0
0b00001000_0010000_00001011_000000000 //X = 8, Y = 16, C = 11.  ADDR 1
019 //Colors[01] = 019, dark orange (30).  ADDR 2
030 //Colors[02] = 030, orange (30).  ADDR 3
093 //Colors[03] = 093, orange-grey (30).  ADDR 4
163 //Colors[04] = 163, dark lime-grey (90).  ADDR 5
236 //Colors[05] = 236, lime-grey (90).  ADDR 6
027 //Colors[06] = 027, black-yellow (60).  ADDR 7
100 //Colors[07] = 100, dark yellow (60).  ADDR 8
109 //Colors[08] = 109, mild yellow (60).  ADDR 9
054 //Colors[09] = 054, yellow (60).  ADDR 10
124 //Colors[10] = 124, lime (90).  ADDR 11
180 //Colors[11] = 180, lighter lime (90).  ADDR 12
0b00000000_00000000_00000000_00000000 //00, 00, 00, 00: 00,00 to 03,00 all transparent.  ADDR 13
0b00000000_00000000_00000000_00000000 //00, 00, 00, 00: 04,00 to 07,00 all transparent.  ADDR 14
0b00000000_00000000_00000111_00000111 //00, 00, 07, 07: 00,01 to 03,01 have helmet.  ADDR 150
0b00000000_00000000_00000000_00000000 //00, 00, 00, 00: 04,01 to 07,01 all transparent.  ADDR 16
0b00000000_00000110_00001001_00000111 //00, 06, 09, 07: 00,02 to 03,02 have helmet.  ADDR 17
0b00000111_00000000_00000000_00000000 //07, 00, 00, 00: 04,02 to 07,02 have helmet.  ADDR 18
0b00000000_00000110_00001000_00001011 //00, 06, 08, 11: 00,03 to 03,03 have helmet.  ADDR 19
0b00001010_00000000_00000000_00000000 //10, 00, 00, 00: 04,03 to 07,03 have helmet.  ADDR 20
0b00000000_00000110_00000001_00001000 //00, 06, 01, 10: 00,04 to 03,04 have helmet & arm.  ADDR 21
0b00001010_00000000_00000000_00000000 //10, 00, 00, 00: 04,04 to 07,04 have helmet.  ADDR 22
0b00000000_00000001_00000010_00000001 //00, 01, 02, 01: 00,05 to 03,05 have arm.  ADDR 23
0b00000001_00000000_00000000_00000000 //01, 00, 00, 00: 04,05 to 07,05 have arm.  ADDR 24
0b00000000_00000001_00000011_00000011 //00, 01, 03, 03: 00,06 to 03,06 have arm.  ADDR 25
0b00000100_00000101_00000100_00000101 //04, 05, 04, 05: 04,06 to 07,06 have cannon.  ADDR 26
0b00000000_00000001_00000001_00000001 //00, 01, 01, 01: 00,07 to 03,07 have arm.  ADDR 27
0b00000100_00000100_00000100_00000100 //04, 04, 04, 04: 04,07 to 07,07 have cannon.  ADDR 28
0b00000000_00000001_00000010_00000010 //00, 01, 02, 02: 00,08 to 03,08 have body.  ADDR 29
0b00000001_00000000_00000000_00000000 //01, 00, 00, 00: 04,08 to 07,08 have body.  ADDR 30
0b00000000_00000001_00000011_00000001 //00, 01, 03, 01: 00,09 to 03,09 have leg.  ADDR 31
0b00000001_00000000_00000000_00000000 //01, 00, 00, 00: 04,09 to 07,09 have leg.  ADDR 32
0b00000000_00000001_00000010_00000001 //00, 01, 02, 01: 00,10 to 03,10 have leg.  ADDR 33
0b00000010_00000001_00000000_00000000 //02, 01, 00, 00: 04,10 to 07,10 have leg.  ADDR 34
0b00000000_00000001_00000010_00000001 //00, 01, 02, 01: 00,11 to 03,11 have leg.  ADDR 35
0b00000010_00000001_00000000_00000000 //02, 01, 00, 00: 04,11 to 07,11 have leg.  ADDR 36
0b00000000_00000001_00000010_00000001 //00, 01, 02, 01: 00,12 to 03,12 have leg.  ADDR 37
0b00000010_00000001_00000000_00000000 //02, 01, 00, 00: 04,12 to 07,12 have leg.  ADDR 38
0b00000001_00000011_00000001_00000001 //01, 03, 01, 01: 00,13 to 03,13 have foot.  ADDR 39
0b00000010_00000001_00000000_00000000 //02, 01, 00, 00: 04,13 to 07,13 have foot.  ADDR 40.
0b00000001_00000011_00000001_00000011 //01, 03, 01, 03: 00,14 to 03,14 have foot.  ADDR 41.
0b00000001_00000000_00000000_00000000 //01, 00, 00, 00: 04,14 to 07,14 have foot.  ADDR 42.
0b00000001_00000001_00000001_00000001 //01, 01, 01, 01: 00,15 to 03,15 have foot.  ADDR 43.
0b00000001_00000001_00000000_00000000 //01, 01, 00, 00: 04,15 to 07,15 have foot.  ADDR 44.

Senbus.  Yes, I know, that's a terrible name.  I'm a programmer, ok?!

It's not a terribly efficient system - my estimates show the example character taking ~2.5k cycles to render, which at 60 FPS is already half the frame, or even at 20 FPS, roughly 1/6th the frame.  Even if a "room" was always 256x128 pixels, it could still easily take several seconds to render in all the entities, terrain, etc, to speak nothing of the time it might take to render large motile objects.  Go bigger than that (ah-la old Metroid games, Super Mario Bros, etc), and your performance simply disappears as soon as the room needs to scroll.  I KNOW there has to be a way to improve its efficiency, I'm just...currently a bit too daft to find it.  >.<

Some other ideas I can think of off the top of my head would be to use a list of individual pixels, if I had a max sprite size limit of 16x16, it would be feasible to make one that supports 2 pixels per line, in the form of CCCCCCCCXXXXYYYYCCCCCCCCXXXXYYYY, only rendering those individual pixels.  It'd cut down on some of the performance issues, since it outright skips transparent pixels, as well as the need to increment X and Y.  It'd be (in some cases) more space efficient (my math says the test character would take up only 38 addresses instead of the current 45), though it might lose out on some speed per loop cycle, it just compensates with having less cycles overall.  Image files would also likely read nicer.

Will update in replies if I make any breakthroughs.

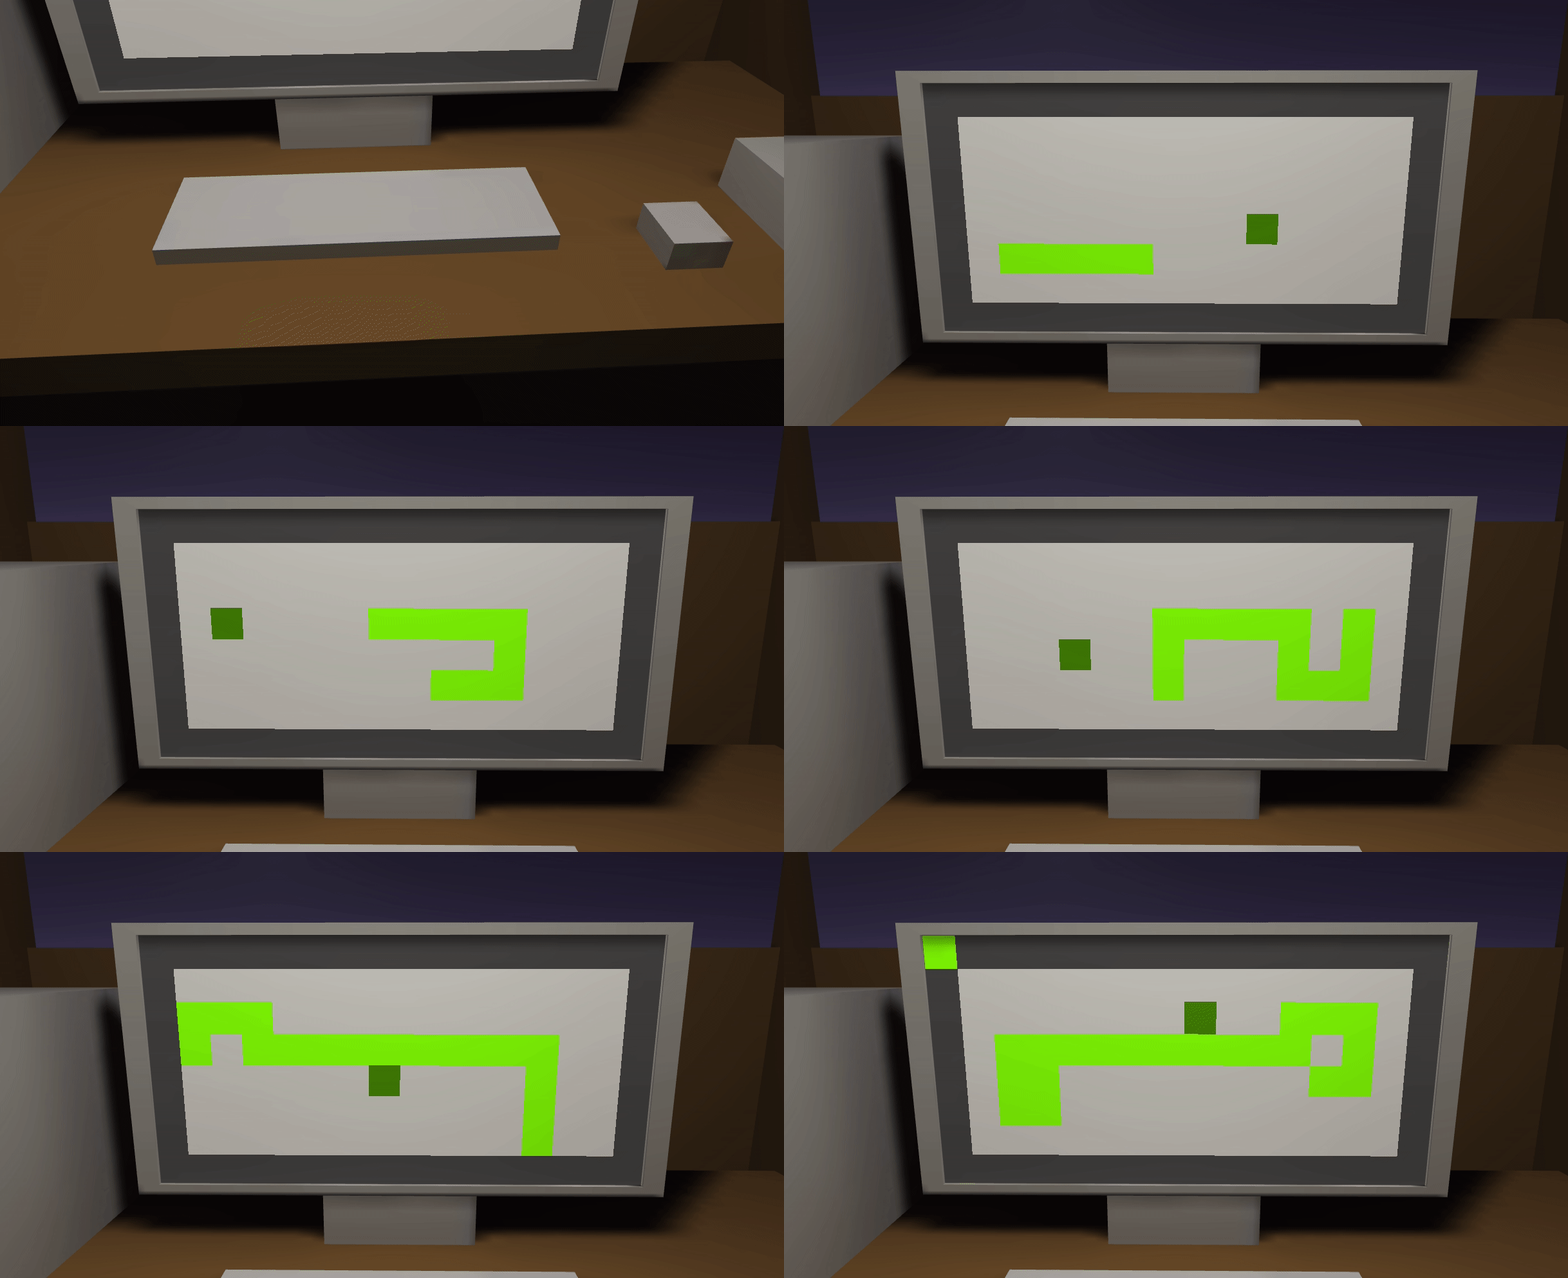
This is incredible - the first full-featured game made for not just the TC-06 architecture, but the default mode version that has 128 bytes of RAM and a 1kB drive?  Mind blowingly cool.  Played in a Custom mode preset with some different colors, and a 1kHz clockspeed to have more than 0.15 frames per second?  It's a proper Snake game, complete with the real tension of needing to make decisions on the fly.  I do not have words for the levels of cool.  Also, naturally, I'm absolutely terrible at it.  >.<

I found what I initially thought was a bug while trying to do some fancy maneuvering around a food item, but I think it might just be that I ran into myself.  I don't think there's anything to stop you from turning in the direction you came from - e.g, going left to right, trying to change direction to be right to left functions just fine, and in a buttonmash panic, it's very easy to do this and get a game over.

Snake?  SNAAAAAAKE!

1kHz clock, custom colorpalette specially for Snake, otherwise just the Snake program in Default Mode. SUPER COOL OMG

I think you officially qualify as being better with the TC-06 than I am.  I haven't done anything nearly as cool as this, my main specialty seems to be planning out grand ideas that I'll never actually get around to implementing.  >_<

Reminds me of a simplified vector graphics renderer of some sort.  The speediness sounds really handy for, say, game development - every cycle counts when you're rendering a game, even in 2d!  IFJMP is instant now (fixed that bug), so, yes, it takes 2 cycles per pixel, which is...frankly, I didn't even know you could optimize the code that much.  Very impressive!


Your preprocessor is really cool.  The base source file for the line-renderer/pixel-pusher looks like real Assembly, like the sort I often see in, say, online 6502 development tutorials.  It's quite a bit easier to understand, and omg the use of underscores in the binary sections is a huge improvement to readability.

The only major comment I have is that it might be worth adding the estimated/intended address of every word in the comments for that line - makes it easier to debug when something (inevitably) goes catastrophically wrong.  Combined with the comments for, say, "label here", or "overlay here", it should be fairly easy to figure out where the problem is in the original pre-preprocessing source file.  One of the latest updates (dunno if it's the one I released last, or the one that's WIP w/ the code for the cycle timer & such) has a built-in way to check the current address in the Debug screen, meaning that being able to search for said address in your code can help you find what blew up faster than manually trawling through the RAM viewer, looking for the highlighted entry.


(Also, my apologies for taking so long to reply to this.  Internet blew up.  Again.  I feel like such an unprofessional developer >.<)

300kHz is what I'm opting to toy with for OSdev (lets me set a nice benchmark of 5k cycles/"tick", so the OS will run at 60 FPS), and definitely fits the theme of low-fi computing.  To that end, I'm working on a new sub-code for the UTL set - TIMR, which does exactly what it says on the tin.  Lets you time the number of cycles that've passed since a specific TIMR call, putting it into Register 1, and means both the programs, and operating system, can try to ensure they'll always fit into that 5k timeslot so as not to disrupt the user input & whatnot.  600kHz would make for a SLIGHTLY less complicated experience (especially for, say, filling in windows - those'll take a few OS ticks to draw in, at least!), but isn't a hugely groundbreaking increase.


I assume platform-endian; it's just Convert.ToString(disk[indexToSave])+"\n" being written to the file.   The thing that would make saving in binary cool is then it's like an actual disk image - it's the raw sequence of 1s and 0s that make it up, and by extension, it means it should take up exactly the amount of space on your RL harddrive as it has storage space within.  Saving to ELF is certainly a neat idea, but it's not always necessarily raw executable data - if I get, say, a basic text editor working in the windowed SenbOS project, it'll be saving text files to disk that could certainly LOOK like code, but decidedly aren't.


You're pretty much spot-on with what I'm thinking - the peripheral is essentially supposed to be a literal cable that plugs into one physical network port, giving a bi-directional I/O system.  You can use SETDATA to send one 32-bit packet (e.g, reading from a register or memory address, like it is with monitors) to the device on the other end, and you can use GETDATA to read any packets that device has sent you - the peripheral keeps a buffer, so you pop 'em off like key inputs.  I'm trying to figure out how many ports should be the default - 2 is what I'm thinking, maybe going up to a max of 4 for the default computer you could use in Custom mode.  Beyond that, I'm considering having a few alternate computers available to spawn in (as an and/or thing) for Custom mode, such as a router with a more limited peripheral set (e.g, small monitor capable of any resolution, drive, keyboard), but with a ton more network ports available.  You could link a bunch of 'em together to start making something that resembles anything from the internet, to a simple LAN.

The idea of writing a custom networking system to go with this is cool - like you said, simple two-person networking doesn't need much, but you could very feasibly work on writing a TCP/IP style system that'd let you hook up a bunch of different computers.  It'd probably require some cooperation between players to get it configured nicely, but could be a really neat way to share in the nerdiness of TC-06 development.  Thinking about packet ideas, there should maybe be a "I AM IP <32-bit IP>" packet (sets a cached IP address for the network port it came in on), a "WHAT IS THE IP STATUS OF <4-bit port ID>" packet (IDs 1-16 are actual ports, and shares their cached IP if applicable, ID 0 is "how many ports do you have", and should be blacklistable on certain ports so you can, say, keep a LAN from being shared to the outside world that's on the last actual network port of the device), a "SET DESTINATION IP <32-bit IP>" packet used for preparing to send data, and a "SEND DATA <32 bits of data>" packet that does exactly what it says on the tin.  To get around the 32-bit limitation, maybe assume all packets are sent in twos - first a "function ID" packet, and then an "arguments" packet?  Oh, there also definitely needs to be a "RECEIVE DATA" packet, so it won't just think someone's calling a function on it.

The networking "BIOS" could easily route something if the requested IP was connected to it, but if it doesn't know that IP, then it would probably run through and pass the "SET DESTINATION; SEND DATA" function along to all of the device it's connected to, in the hopes one of them will successfully route it.  Would definitely need to add some IP blacklisting so it won't cause a feedback loop that'd eventually end in a device trying to send that data back to its source or something like that - e.g, "BLACKLIST ME" temporarily disables the output of "WHAT IS STATUS" or similar.  Yikes, things get complicated fast.


I know very little about classic IRC, just that exists, used to be a huge deal, and that it'd be a decent idea to implement an IRC system if the Senbirnet can be a thing one day, because chatting about Senbir from within Senbir is just...so cool.  As I understand it, the protocol is high-quality and versatile - friend of mine said he was toying with writing a virtual CCG (think Hearthstone, Scrolls/Caller's Bane, etc) that used IRC under the hood to handle the networked aspects of the game, a while back.

My head's spinning just trying to imagine that setup!  I can't really imagine what it was like before the days of universal TCP/IP, ethernet, wi-fi, and so on - I've grown up in this era, and talking about the ye-olden days of internetting with family is always pretty mind-blowing and alien.  Save for the part about terrible connection speeds - those're all too familiar where I live.  Not often dialup-tier terrible, but often fairly bad - if I have internet at all, that is!  Depending on when you started playing Senbir, you might've seen the big warning I had up about potentially game-breaking bugs and an inability to patch them - I got the original LD-ready build uploaded about an hour before a storm blew out my local ISP for about a week.  That wasn't fun.

(1 edit)

Using 125Hz as the ratio-maker works nicely - tried at 1kHz, 10kHz, 100kHz, and 1MHz.  Up to 100kHz, at least, performance is well within acceptable levels for the end-user - Unity's profiler estimates the game runs at 100 frames per second at 100kHz.  1MHz takes it down to ~8-10 FPS.  Mind, there's nothing fancy put in to make it more efficient - it might be possible to get better performance than that in C#.


It doesn't particularly show in the gif, I don't think, but the paint program feels MUCH smoother at 1kHz - the redraw function when moving the cursor often doesn't even end up showing because it's just running *that fast*.  If 100kHz is acceptable, I'm quite confident some low-fi games should be possible with acceptable levels of performance.  Running at the default-mode resolution of 16x9, a full self-modified screen redraw function would take ~576 cycles, which would let the in-game game run at ~174 FPS.  The same for the Compy6c preset is a bit less optimistic - 3 FPS in 32768 cycles per full redraw.  That said, most games aren't likely to need to re-draw the entire screen at once, and they might run at lower resolutions anyway.

(EDIT: To clarify, by "full self-modified cycle", I mean one where there's at least 4 operations to modify, say, a SETDATA function.  Any sort of basic self-modifying code that relies on data already in the registers (like a loop's counter) tends to need 4 ops: MOVI the data being, well, modified, PMOV it or similar, use MOVO to replace it in RAM, and then actually execute it.  Any sort of fancy redraw function would probably need a lot more than that.)


The Senbir file format is painfully simple, it's literally just plaintext, one address' bits on each line, with the first line being the number of addresses to load.  Meant to add a "save to bytes" function of some sort that'll save it in proper binary, but...never found the right functions for it.  I have seen the pixel-blinker in the default emulator state - I was just trying to recreate my old one from the original TC-06 prototype for the fun of it.  ^_^


I'm thinking binding to a specific IP (and more importantly, specific port) is the way to go about things for the networking system, which means you can have multiple network ports open on your computer at once (as well as maybe an alternate computer you can spawn in that's mostly network ports, to act as a router & enable some larger networks to be built) - port-forwarding might be kind of a pain at times, but it'd be worth it for the ability to let a bunch of people connect to the same computer via different in-game network devices.

I'd like to do predetermined point-to-point connections - it makes them simple to understand, and it adds the possibility of getting to write a custom networking system (like TCP/IP) - which would be SUPER cool.  Far as I'm aware, ethernet cables & whatnot are basically just big connections between computers that funnels data from one device to another - the computers' OS actually handles figuring out where the data goes.  I don't think it'd be too hard to write a simple TCP/IP style networking API that can handle automatic packet forwarding and such, so it'd be possible to make a router computer (or several) that can act as LANs, or on a larger scale, potentially even a miniature internet.

An ingame IRC system is definitely among my programming end-goals - who needs Discord when you can just connect to the Senbirnet, fire up your IRC client, and connect to the official server to chat with people?

(1 edit)

I, also not a lawyer, concur with your thoughts on all the legal jargon.

Really solid JS implementation!  I've spent a bit of time toying around with it, trying to write a basic Blinkenlights program - I have to admit, having an assembler has spoiled me.  Before Senbir, I was toying with an older prototype of the TC-06 architecture, and made a Blinkenlights program with naught but my documentation, and manually writing out the binary code for it.  I'm having a bad time of trying to do the same in the JS version, and I'm not willing to pin that on, say, unfinished debug tools or what-have-you.  >.<

Classic Terminal
(Context for the surroundings: I just hijacked a previous test/doodle project that had a basic first-person controller, so it was possible to walk around and turn the computer on/off)
I've done some maths for the formula being /100 instead of /180, and the numbers come out to something like needing to run the actual clock cycle function ~10k times per call from InvokeRepeating at 100Hz to run the computer at 1MHz, and...My Unity experience tells me it'd probably just lock up if you asked it to crunch like that.  With a native C++ library, it might be able to handle it, though - even in a low-power VM, I can do some heavy crunching with minimal slowdown.  The XScreensaver Galaxy program can be modified to be a proper N-body simulation, without MUCH lag even when there's several galaxies with 1000+ bodies each, and still manage ~45 FPS - in a VM.

I think that's probably gonna be my next development project, just trying to optimize things so it's possible to run at even a meagre 1kHz.  Well, that, and toying with a networking peripheral.  I have an idea for the actual hardware side (i.e, what you have to work with as a programmer), but I'm not sure how to go about letting players actually connect to one another, from a UX standpoint.  Do you pick a peripheral in-game, go to the debug screen, type in a real-world IP, and connect to it?  Does it automatically host things, or do you have to be a host/connector?  Stuff like that.

(1 edit)

I know the feels - I'm prone to "doodling" in Unity and making little projects, just because they seem like an interesting challenge.

Senbir, and by extension, the TC-06 architecture, are LGPL-licensed.  You're 100% free to redistribute mods, updates, reimplementations, etc - I believe they just have to be LGPL themselves.  I'm not sure how it affects something based on the architecture (maybe I should explicitly define that as Creative Commons or something?  dunno), but far as I'm concerned/can tell, you're good to go for sharing the JS version.  You'd need to include a link (I think) to here, and/or the Gitlab page, but that should be the extent of extra garbage you need to do for sharing it.

I'd be interested in seeing the catch-up/timer code you've got - even if it's not perfect, it'd probably be useful in figuring out how to give Senbir better support for clockrates >180Hz.  My current ideas vaguely revolve around getting some sort of average (e.g, the InvokeRepeating speed is 1f/(clockSpeed/numberOfCyclesPerInvocation), and numberOfCyclesPerInvocation=clockSpeed//180f, assuming // is a "divide and round to integer" function of some variety), but I'm not quite sure what formula would be best, and it could still cap out around some relatively low number, like 324kHz.

EDIT: *fixing derp wording because sleepy*

(1 edit)

RedCode and RISC/CISC (as described by my dad, a C64 vet.  can never remember which, though >.<) have been my main inspirations for developing the TC-06 process set.  While many of the functions already support sub-codes of their own, the main purpose of adding a dedicated sub-code function would be for utilities, mainly - which is what the current UTL code does.  UTL 0 is the offset function used in the kernel, and the assembler will just directly accept OFST [starting address] to output the equivalent of UTL 0 [address].

The max clock speed seems to be a limitation specifically of the Unity function I'm using to execute the actual function that does a clock cycle, MonoBehaviour.InvokeRepeating(string methodName, float time, float repeatRate).  If I could get past that, I have a feeling the clock speed limitation would disappear.  Your idea about having it run multiple ticks per call of the function from InvokeRepeating is a good one - it wouldn't be hard to amp it up to at least 1.8kHz, maybe further!  Unity can be a bit badly-optimized, in my experience, so even a 1kHz max would be a big deal to me - getting up to, say, 1MHz would be huge (and I'm genuinely not sure it's possible without using an external library.)  I would LIKE to keep it trying to run at a specific clock speed (e.g, keep a timer, rather than just "execute as many cycles per frame as possible"), because the limitations in processor speed are a fun part of the challenge for TC-06 development.

You made a JS implementation of the TC-06?  That's mind-blowingly cool!  Do you plan to share it anywhere?  Also, 500kHz really isn't half-bad, especially when you compare it to the current max speed of ~1/2778th that in Unity - I'm not sure that 500kHz could be topped in Unity with just raw C# stuff, but handling it with a native C++ library or similar should pretty much guarantee much higher speeds.

PSA: There is an edit button, so in the future, if you post something and go "aw crap, I should've remembered to add [insert thing here]!" - you have a way out without double-posting.  I know I've done that before - it happens to the best of us!  At least this isn't Twitter or something, right?  :P

I am inclined to agree with pretty much all your conclusions on efficiency analysis - the tables are pretty much only good for human sanity when developing without an IDE or similar.  Having to search & replace for address changes is an absolute pain.  I don't have much in the way of comments beyond that - brain is a bit numb from it being late where I am, and from programming a kernel for the past several hours.  Will re-read everything in the morning when I'm less zombified.  >.<

I've completed what is, I think, my most complicated Senbir project yet tonight.  A multitask-capable kernel of sorts.  It's pretty jury-rigged, and suffers from some major technical limitations (not to mention performance issues, due to the 180Hz max speed), but serves as a decent proof of concept for a functional OS core.  It also relies on a new update that I just released, containing a new op-code and some minor bugfixes here & there.  It's also meant to run on the Compy6c preset I provided in the OP of this thread - it needs 1024 addresses of RAM to run, though it should be possible to port to larger systems.

So, the numbers.

  • Supports 8 simultaneous processes, though speed cannot be guaranteed, especially beyond one or two.
  • Each process gets 96 addresses (384 bytes) of RAM to do with as it pleases, the first address of which will always be executed for the program's clock cycle.
  • The first 32 addresses of RAM are JMPs that go to various system functions.  Currently, only 0 does anything (tells the kernel it can let the next program start a clock cycle), but I plan to include some other ones down the line (e.g, #1 will wipe a program's chunk of RAM and mark it as no longer executing, leaving the slot open for another process)
  • Addresses 800-1015 are the kernel itself, only going up to address 865 at the moment.
  • Addresses 1016-1023 are used to store the starting address/state of each of the 8 process slots.  If it's not zero, then it's a pointer to where a given process wants execution started (at the moment, this is just where it starts getting written into RAM, and is equal to 32+(programID*96))
  • Register 0 is the active program ID.
  • Registers 1, 2, and 3 are all used by various TC-06 functions, and thusly are going to be used by both the kernel and programs it runs.
  • Registers 4 & 5 are currently unassigned, and generally safe for programs to use - just make sure to put their values in RAM if they're not serving as temporary variables.
  • Registers 6, 7, 8, and 9 are use for temporary math operations & self-modifying code.
  • Register 10 is the integer 1024 - the length of RAM.
  • Register 11 is the integer 96 - the number of addresses a program will get.
  • Register 12 is the integer 32 - the offset from the start of RAM where programs get put.
  • Register 13 is the integer 8 - the number of process slots there are.
  • Register 14 is the integer 1 - used for basic addition & whatnot in loops.
  • Register 15 is the integer 0 - used in some cases for IFJMP.

Multitasked Blinkenlights

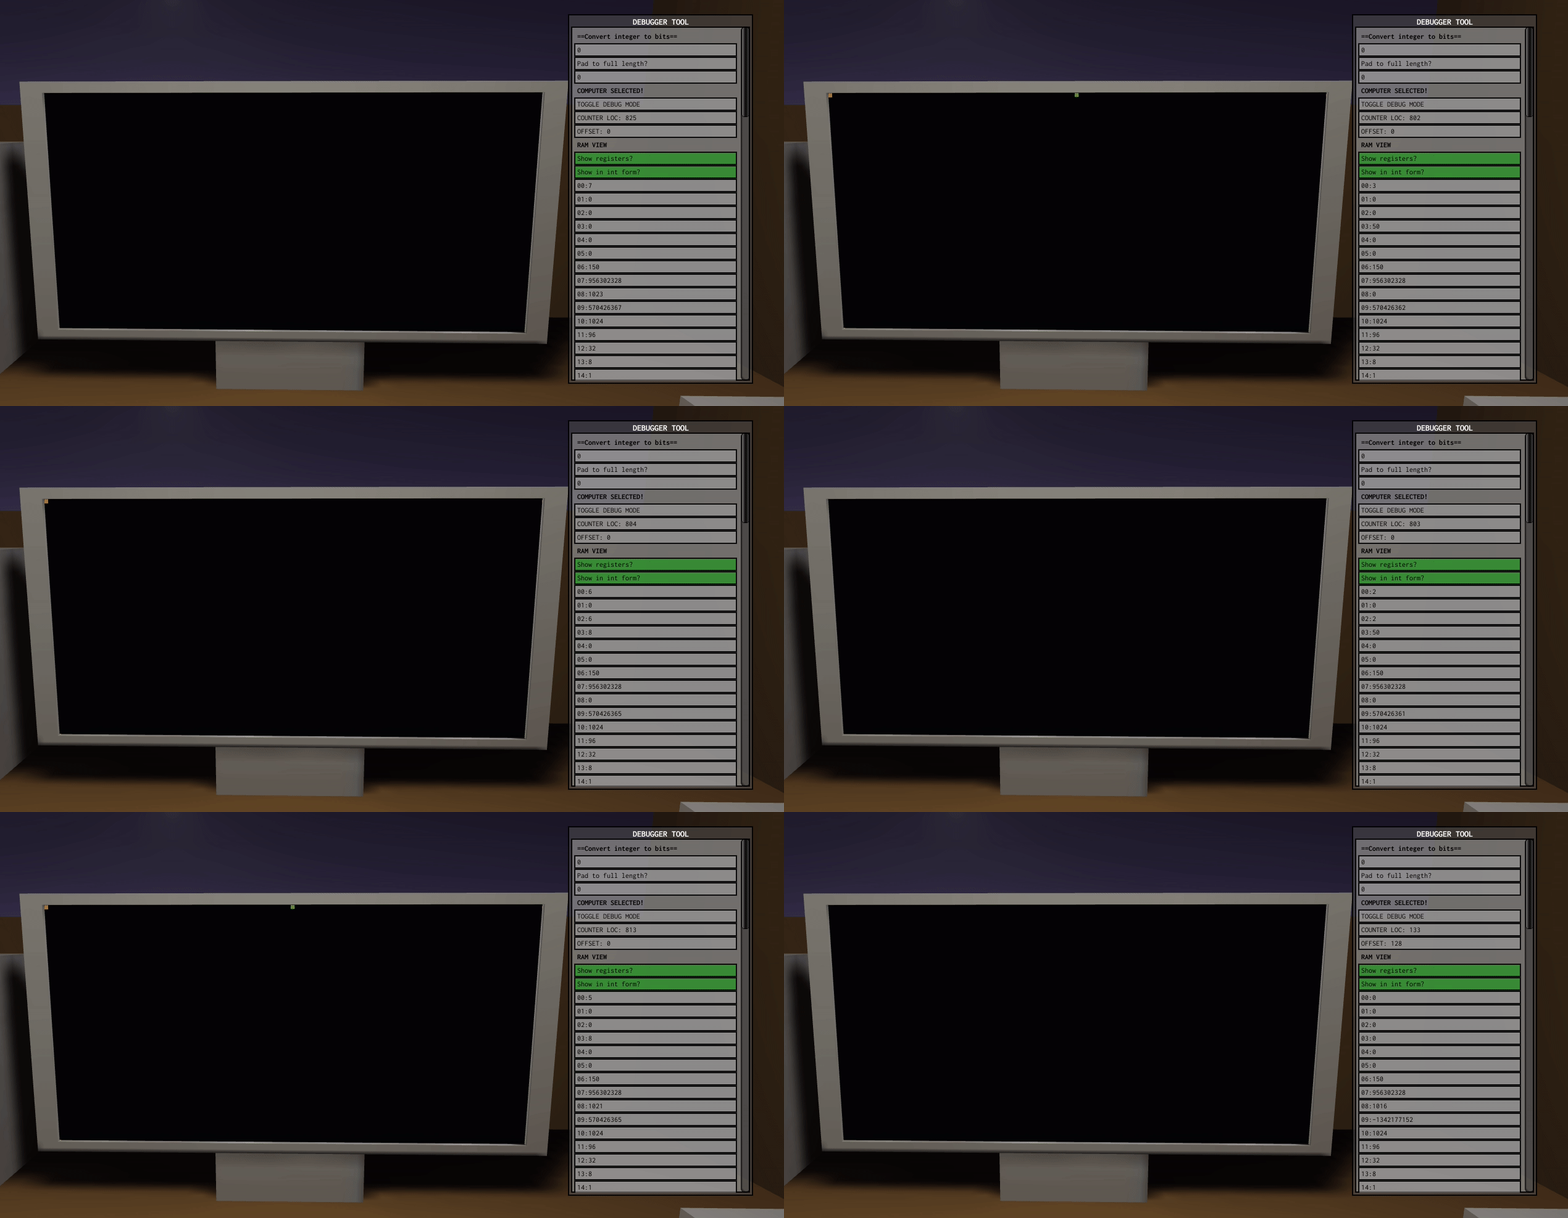
Debugger register view visible on the side.
It also requires a custom bootloader program to be put in ROM, which loads in the function calls for addresses 0-31, and then the actual OS at the end of RAM.

NILLIST 32 //Addr 0-31.  Ignore so the program won't get overwritten.
DATAC 00000000000000000000010000000000 //Addr 32.  Integer 1024.
MOVI 10 32 //Addr 33.  Move 1024 into register 10, initializing it for the OS.
SET 11 3 96 //Addr 34.  Initialize register 11.
SET 12 3 32 //Addr 35.  Initialize register 12.
SET 13 3 8 //Addr 36.  Initialize register 13.
SET 14 3 1 //Addr 37.  Initialize register 14.  Register 15 is already zero - no worries there.
SET 3 3 31 //Addr 38.  Set register 3 for loading in the function calls that live at the start of RAM.
GETDATA 1 3 2 //Addr 39.  Beginning of load loop 1.
MOVI 9 43 //Addr 40.  Move the MOVO to modify into register 9.
PMOV 2 9 23 31 0 1 //Addr 41.  Splice the updated address into the MOVO op.
MOVO 9 43 //Addr 42.  Splice it in!
MOVO 1 0 //Addr 43.  Move the loaded data into RAM.
MATH 14 2 0 //Addr 44.  Increment the counter.
IFJMP 0 2 0 //Addr 45.  If we're done loading, jump ahead.
JMP 2 7 //Addr 46.  Otherwise, continue the loop.
DATAC 00000000000000000000001100100000 //Addr 47.  Int 818.
MOVI 2 47 //Addr 48.  Put 818 into register 2.
MATH 10 3 5 //Addr 49.  Set register 3 to the number 1024.
MATH 14 3 1 //Addr 50.  Subtract 1 from it, so we get 1023.
GETDATA 1 3 2 //Addr 51.  Beginning of load loop 2.
MOVI 9 55 //Addr 52.  Move the MOVO to modify into register 9.
PMOV 2 9 15 31 0 1 //Addr 53.  Splice the updated address into the MOVO op.
MOVO 9 55 //Addr 54.  Splice it in!
MOVO 1 0 //Addr 55.  Move the loaded data into RAM.
MATH 14 2 0 //Addr 56.  Increment the counter.
IFJMP 1 800 0 //Addr 57.  If we're done loading, jump to the OS.
JMP 2 7 //Addr 58.  Otherwise, continue the loop.

This version only supports loading 2 programs, two different Blinkenlights (one in light orange, color ID 27, in the upper-left, and one in light lime, color ID 30, in the upper-middle), using the keys 1 and 2.  There's no way to terminate the processes, and if you load in more than one copy of either, odd side-effects may arise.

This is a WIP and likely to have bugs.  I plan to update it with support for loading up to 8 programs (as well as having it automatically pick an empty slot to load in, instead of the haphazard way it works now), but here - the kernel itself, along with the two blinkenlights.  Compile & install to the harddrive, rather than ROM.

//-=BEGINNING OF SYSTEM FUNCTION CALLS=-
JMP 1 800 //Addr 0: Function ID 0 - Jump to the END PROCESSING function, which indicates a given program is finished with its cycle.
JMP 1 869 //Addr 1: Function ID 1 - Jump to the HALT PROGRAM function in the operating system.
NILLIST 30 //Addrs 2-31: Blank space.  Other system operations are not yet implemented.
//-=END OF SYSTEM FUNCTION CALLS=-
//-=BEGINNING OF PROGRAM SPACE=-
NILLIST 768 //Addrs 32-800: Blank space.
//-=END OF PROGRAM SPACE=-
//-=BEGINNING OF PROCESS LOOP=-
MATH 14 0 0 //Addr 800.  Begins process of, well, ticking a process.
OFST 0 //Addr 801.  Reset offset.
MATH 0 2 5 //Addr 802.  Part one of checking if we've gone out of bounds.
MATH 13 3 5 //Addr 803.  Part two of checking if we've gone out of bounds.
IFJMP 0 2 1 //Addr 804.  If we're NOT out of bounds, jump ahead to the next part.
MATH 0 0 1 //Addr 805.  We ARE out of bounds, so let's jump back to program 0.  Subtract the process counter from itself.
MATH 10 8 5 //Addr 806.  Move the max RAM length into register 8.
MATH 13 8 1 //Addr 807.  Subtract the max number of processes.
MATH 0 8 0 //Addr 808.  Add the current process.
MOVI 9 812 //Addr 809.  Load in the MOVI function to modify.
PMOV 8 9 15 31 0 1 //Addr 810.  Splice the new address in.
MOVO 9 812 //Addr 811.  Load the modified MOVI into RAM.
MOVI 2 1015 //Addr 812.  Copy the value of the appropriate process status into register 2.
MATH 3 3 1 //Addr 813.  Set register 3 to zero.
IFJMP 0 9 0 //Addr 814.  If this process slot is NOT ACTIVE, jump to the loader test.
MOVI 9 822 //Addr 815.  Load the JMP to modify into register 9.
PMOV 2 9 15 31 2 0 //Addr 816.  Splice the new address in.
MOVO 9 822 //Addr 817.  Load the modified JMP back into RAM.
MOVI 9 821 //Addr 818.  Move the OFST operation to modify into register 9.
PMOV 2 9 15 31 0 1 //Addr 819.  Splice the new address in.
MOVO 9 821 //Addr 820.  Load the modified OFST operation back into RAM.
OFST 32 //Addr 821.  Set the offset.
JMP 1 32 //Addr 822.  Jump to the program.
//-=END OF PROCESS LOOP=-
//-=BEGINNING OF BASIC LOAD SUBROUTINE=-
GETDATA 2 3 15 //Addr 823.  Get whatever the last key was.
MATH 3 3 1 //Addr 824.  Set register 3 to zero.
MATH 3 2 5 //Addr 825.  Set register 2 to zero.
MATH 1 2 5 //Addr 826.  Set register 2 to the last keypress.
MATH 8 8 1 //Addr 827.  Set math temp register 8 to zero.
SET 3 3 00110001 //Addr 828.  Set register 3 to the key id for the number 1.
IFJMP 1 833 0 //Addr 829.  If lastKey==numeralOne, then jump to the code to load things.
SET 3 3 00110010 //Addr 830.  Set register 3 to the key id for the number 2.
IFJMP 1 836 0 //Addr 831.  If lastKey==numberalTwo, then jump to the code to load things.
JMP 1 800 //Addr 832.  Otherwise, jump back to the start of the process function.
//-=END OF THE BASIC LOAD SUBROUTINE=-
//-=BEGINNING OF THE KEY SET=-
SET 8 2 00000100 //Addr 833.  Set the drive position.  1024.  ----KEY: 1----
SET 8 3 00000000 //Addr 834.  See above.  1024.
JMP 0 3 //Addr 835.  Jump to the loading portion.
SET 8 2 00000100 //Addr 836.  Set the drive position.  1025.  ----KEY: 1----
SET 8 3 00000001 //Addr 837.  See above.  1025.
JMP 0 1 //Addr 838.  Jump to the loading portion.
//-=END OF THE KEY SET=-
//-=BEGINNING OF THE ACTUAL LOADER=-
JMP 0 1 //Addr 839.  SKIP IT YO
GETDATA 1 3 8 //Addr 840.  Load the thing.
MATH 1 2 5 //Addr 841.  Transfer the starting position into register 2.
GETDATA 1 3 2 //Addr 842.  Load the ending address.
MATH 1 3 5 //Addr 843.  Put the requested ending address in register 3.
MATH 11 9 5 //Addr 844.  Put the integer 96 in reg9.
MATH 0 9 2 //Addr 845.  Multiply 96 by the current program ID.
MATH 12 9 0 //Addr 846.  Add 32 to register 9.
MATH 9 6 5 //Addr 847.  Clone reg 9's contents to reg 6.
MATH 14 2 0 //Addr 848.  --BEGIN LOAD LOOP--  Add 1 to the thing.
IFJMP 0 10 1 //Addr 849.  Check to see if we're done loading.  If we aren't, continue the load process.
MATH 10 8 5 //Addr 850.  Move 1024 into register 8.
MATH 13 8 1 //Addr 851.  Subtract 8 from register 8.
MATH 14 8 1 //Addr 852.  Subtract 1 from register 8.  (==1015)
MATH 0 8 0 //Addr 853.  Add the current program ID to it.
MOVI 7 857 //Addr 854.  Move the MOVO op into register 7.
PMOV 8 7 15 31 0 1 //Addr 855.  Splice the address in.
MOVO 7 857 //Addr 856.  Move it back into RAM.
MOVO 9 1015 //Addr 857.  Move the load address into RAM.
JMP 1 806 //Addr 858.  Jump to the loaded program.  --PROGRAM LOAD COMPLETE--
GETDATA 1 3 2 //Addr 859.  Load things.  --IFJMP DESTINATION--
MOVI 7 863 //Addr 860.  Move the MOVO operation to modify into register 7.
PMOV 6 7 15 31 0 1 //Addr 861.  Splice the new address into the MOVO op.
MOVO 7 863 //Addr 862.  Move the modified MOVO operation back into RAM.
MOVO 1 32 //Addr 863.  Move the loaded data into RAM.
MATH 14 6 0 //Addr 864.  Add 1 to reg 6, incrementing the write location.
JMP 1 848 //Addr 865.  Jump back to the beginning of the loop.
//-=END OF THE ACTUAL LOADER=-
//-=BEGINNING OF FUNCTION 0: HALT PROGRAM=-
JMP 1 0 //Addr 866.  HALT IS UNFINISHED.
NILLIST 157 //Addr 867-1023.  Fill in the blank space for the unused portions of the operating system.
DATAC 00000000000000000000010000000010 //Addr 1024.  Position of BLINKENLIGHT 1. (1026)
DATAC 00000000000000000000010000011001 //Addr 1025.  Position of BLINKENLIGHT 2. (1049)
//-=BEGINNING OF BLINKENLIGHT 1=-
DATAC 00000000000000000000010000011000 //Addr 1026.  LAddr -1.  End address of BLINKENLIGHT 1 (1048)
MOVI 2 1 //Addr 1027.  LAddr 0.  Move the current counter state into register 2 for comparison.
NIL //Addr 1028.  LAddr 1.  RAM position for the counter variable.
MATH 15 3 5 //Addr 1029.  LAddr 2.  Move 0 into register 3 for comparison.
IFJMP 0 4 0 //Addr 1030.  LAddr 3.  If the counter is 0, jump to the "toggle pixel" function.  Otherwise, increment the counter.
MATH 14 2 1 //Addr 1031.  LAddr 4.  Count down.
MOVO 2 1 //Addr 1032.  LAddr 5.  Move the counter back into RAM so it won't be lost when the next process starts.
JMP 1 0 //Addr 1033.  LAddr 6.  Tell the OS that we're done here and it can go ahead and start the next process now.
MOVI 2 8 //Addr 1034.  LAddr 7.  IFJMP TARGET.  Move the current pixel state into register 2.
NIL //Addr 1035.  LAddr 8.  Current pixel state in RAM.  0 or 1.
IFJMP 0 4 1 //Addr 1036.  LAddr 9.  If the pixel is currently ON...
SETDATA 0 1 10 //Addr 1037.  LAddr 10.  Turn the pixel ON to color 27 - light orange.
MATH 14 2 5 //Addr 1038.  LAddr 11.  Set pixel state to ON in register.
JMP 0 3 //Addr 1039.  LAddr 12.  Jump to the end of the toggle function.
SETDATA 0 1 8 //Addr 1040.  LAddr 13.  IFJMP TARGET.  Turn the pixel OFF.
MATH 15 2 5 //Addr 1041.  LAddr 14.  Set pixel state to OFF in register.
MOVO 2 8 //Addr 1042.  LAddr 15.  Put the pixel state back into RAM.
MOVI 2 1 //Addr 1043.  LAddr 16.  Put the counter state back into register 2.
MATH 14 2 5 //Addr 1044.  LAddr 17.  Set the counter state to 1 tick.
MOVO 2 1 //Addr 1045.  LAddr 18.  Move the counter back into RAM so it won't be lost when the next process starts.
JMP 1 0 //Addr 1046.  LAddr 19.  Tell the OS that we're done here and it can go ahead and start the next process now.
DATAC 01101100000000000000000000000000 //Addr 1047.  LAddr 20.  COL: 27, X: 0, Y: 0
DATAC 00000000000000000000000000000000 //Addr 1048.  LAddr 21.  COL: 00, X: 0, Y: 0
//-=END OF BLINKENLIGHT 1=-
//-=BEGINNING OF BLINKENLIGHT 2=-
DATAC 00000000000000000000010000110000 //Addr 1049.  LAddr -1.  End address of BLINKENLIGHT 2 (1071)
MOVI 2 1 //Addr 1050.  LAddr 0.  Move the current counter state into register 2 for comparison.
NIL //Addr 1051.  LAddr 1.  RAM position for the counter variable.
MATH 15 3 5 //Addr 1052.  LAddr 2.  Move 0 into register 3 for comparison.
IFJMP 0 4 0 //Addr 1053.  LAddr 3.  If the counter is 0, jump to the "toggle pixel" function.  Otherwise, increment the counter.
MATH 14 2 1 //Addr 1054.  LAddr 4.  Count down.
MOVO 2 1 //Addr 1055.  LAddr 5.  Move the counter back into RAM so it won't be lost when the next process starts.
JMP 1 0 //Addr 1056.  LAddr 6.  Tell the OS that we're done here and it can go ahead and start the next process now.
MOVI 2 8 //Addr 1057.  LAddr 7.  IFJMP TARGET.  Move the current pixel state into register 2.
NIL //Addr 1058.  LAddr 8.  Current pixel state in RAM.  0 or 1.
IFJMP 0 4 1 //Addr 1059.  LAddr 9.  If the pixel is currently ON...
SETDATA 0 1 10 //Addr 1060.  LAddr 10.  Turn the pixel ON to color 30 - light lime.
MATH 14 2 5 //Addr 1061.  LAddr 11.  Set pixel state to ON in register.
JMP 0 3 //Addr 1062.  LAddr 12.  Jump to the end of the toggle function.
SETDATA 0 1 8 //Addr 1063.  LAddr 13.  IFJMP TARGET.  Turn the pixel OFF.
MATH 15 2 5 //Addr 1064.  LAddr 14.  Set pixel state to OFF in register.
MOVO 2 8 //Addr 1065.  LAddr 15.  Put the pixel state back into RAM.
MOVI 2 1 //Addr 1066.  LAddr 16.  Put the counter state back into register 2.
MATH 14 2 5 //Addr 1067.  LAddr 17.  Set the counter state to 1 tick.
MOVO 2 1 //Addr 1068.  LAddr 18.  Move the counter back into RAM so it won't be lost when the next process starts.
JMP 1 0 //Addr 1069.  LAddr 19.  Tell the OS that we're done here and it can go ahead and start the next process now.
DATAC 01111010000000000000000000000000 //Addr 1070.  LAddr 20.  COL: 27, X: ???, Y: 0
DATAC 00000010000000000000000000000000 //Addr 1071.  LAddr 21.  COL: 00, X: ???, Y: 0
//-=END OF BLINKENLIGHT 2=-

This has taken several days to put together, and no small amount of "AAAAAAARRRRGH" directed towards my computer (both virtual or otherwise) when it inevitably failed.  The comments aren't great.  I think.  Either that, or I spend so long working on it my brain just goes numb.  Dunno.

Goals

I think I can work with this kernel to start building my actual OS idea.  Making, say, the first two processes basically be OS daemons, and then leaving the remaining six to be things a user can launch?  I think it'd work well.  Overlays would be mandatory, of course, but that is in-and-of-itself a neat challenge; writing an OS designed to run a chunk at a time, without disrupting other programs.

I also don't think it'd be that hard to expand into a WINDOWED operating system, especially if I can eventually manage an implementation of the TC-06 in C++ to get a performance boost (and enable a processor speed like, say, 180 kilohertz instead of the 180 hertz speed I'm stuck with right now) - that's definitely an end-game goal, though.  For now, terminals are probably easier to work with.

(1 edit)

Using the indexed start-of-disk system would be really handy for writing functions in a more efficient manner, and for making a program that can easily generate an Overlay-ready file with functions inside of it - being able to consistently refer to a function by ID sounds like an absolute lifesaver!

My idea for the IDE would, at first, basically just be a preprocessor.  All code is still written purely in TC-06 assembly, but you have some special "codes" the IDE knows how to use (i.e, "FUNC <function_name>" automatically inserts the code to jump to a function - the names are for human purposes only, it'll automatically pick an integer id for 'em at generation time), and it lets you work on individual functions easier.  That alone would probably make my life way easier when making games, OSes, etc.

Actually building up to a proper C/C++/C#/Java/etc compiler/parser of some sort that can output TC-06 assembly code would be INCREDIBLY COOL and definitely stands as a goal for sometime in the future, but I do have a feeling it's going to require some additions to the TC-06 language itself.  There's space for 5 more op-codes (plus, those codes could end up being some sort of "sub-code" thing - e.g, SUBONE [4-bit op-code from the sub-code #1 list] [24 bits of arguments] could be a new "command" to allow 15 more commands with less argument data), which I should hope would be enough!

I'm definitely gonna poke around in QT and see what tools I have available for making an IDE/preprocessor, and if I can wrap my brain around it, I definitely wanna try making a basic test of the preprocessor tool, because I really do think having some basic built-in function/memory location management could be a lifesaver while programming bigger things.

Unrelated-ish, but I'm actually kinda tempted now to run some sort of Senbir Game Jam where the goal is just to make a game that runs in Senbir, in, say, a week.  Not many people are likely to participate, I suspect, and there are some limitations in Senbir itself at the moment (like the apparent lack of support for holding down a key?), but I know I for one would have fun trying (and probably failing) to make a proper game in it.  The one major caveat I see there is the fact that the (apparent) maximum clock speed of 180 Hz is definitely a major limiting factor that could mess up people's entries, and having to deal with the gameified render layer could annoy potential players of said games.

EDIT: Also, possible thing of interest - I've set up an official Senbir Discord server!  Link/join widget is in the main Itch page.

(1 edit)

I'd say you shared a program, and the compiler/runtime to make it run.  Very fancy!

I've thought about writing something similar to this independent of having ever actually seen something like it in action before, but it makes sense that the idea's been around for a while.

If you wanted to be thrifty with your space usage, I'd say to make the start of the drive a list of starting addresses for each function, and then make the actual first address of said function contain the length of it/the ending address.  That would (in theory) cut down on space usage, especially when you're not dealing with too many small functions where the 8-byte overhead could take up a large part of the overall space requirements.

(Also: I'm super happy to see flag 3 for JMP in use.  I knew it would come in handy someday!)

(EDIT: OMG, I'm blind, you already had the end address at the start of each function!)

Seeing the actual code for your testing win screen (and the associated walls of addresses) frankly makes me want to work on some kind of custom out-of-game code editor.  Having a tool where you could write functions & such in their own screens, easily reference other functions (even pass arguments to them!), etc, would be SUPER cool, and probably make life a ton easier for high-level programmers who can't get their heads out of OOP-land (like me >.<)

Very impressive work, in any case!

So it wouldn't blow your COMPUTER up, but your fans might fly to pieces trying to cool it down.  :p

I'll include a documentation update with the next update - JMP and IFJMP should definitely have some more detailing, both on the running functions/explodey aspect, and just in general, considering they're both heavily influenced by Redcode and thusly likely to confuse folks.

I know it's not immediately related to the JMP discussion, but should I think about adding an auto-save whenever you compile a program?  E.G, to [ProgramName].autosave.casm?  That way if your game explodes, you're not gonna lose your code.  Same for the drive, maybe do an autosave of it at regular intervals?

An in-game flame-out animation might be kinda fun - if it detects the loop, the halt light comes on and steam comes outta the box.

--

public List<int> runAddresses; //assume it's initialized elsewhere
public int currentCounter; //self-evident
public int[] RAM; //self-evident
void TimedUpdate() //this runs at the computer's clockrate to execute code and such
{
    //code surrounding halts and such goes here
    runAddresses.Clear();
    DoProcess();
}
void DoProcess() //this actually executes op-codes & whatnot
{
    runAddresses.Add(currentCounter);
    int data,opCode,arguments; //data is the memory data at RAM[currentCounter], and arguments is the last 28 bits of said data
    //insert all the other functions and such
    if(opCode==4) //JMP
    {
        int destAddress; //assume this is set by reading the arguments & whatnot
        if(runAddresses.Contains(destAddress))
        {
            DoFlameout();
        }
    }
}

Rough pseudocode for how to integrate the recursive loop prevention as you suggested it.  Clear the list of run addresses before running op-codes, and add the current program counter to the list of run addresses at the beginning of the op-code-runner function.  If the list of run addresses contains whatever JMP is supposed to be jumping to, cause a flame-out animation & halt the processor, rather than running it.

This SHOULD catch all possible recursive JMP loops that'd cause a stack overflow, without breaking things like the Blinkenlights loop.  Only situation I can think of would be something with self-modifying code looping, but...that shouldn't even be an issue (since a non-JMP call will reset the list of addresses) in the current version of the game.  A multithreaded two-core version of the TC-06 could encounter problems with that, if your modification was happening on the other processor, though.  :/

I do appreciate the suggestions & bug reports - thank you for providing them!

(As for halting and catching fire - I think that should literally just be "run JMP 0 0 for a special surprise" or something :P)

Huh, maybe IFJMP doesn't auto-run what it jumps to after all?  I'll have a look at that later.

As for the crash - that's...odd.  I understand why it's crashing (function recursion and all), but I'd expect it to just lock up and stop responding, rather than have a segmentation fault.  Best idea I've got would probably be to have it automatically halt and stop execution if a given clock cycle for the TC-06 takes more than a certain amount of time, or maybe if a certain function runs more than a certain number of times per tick.  I'm loathe to add an op-code limiter, considering it would, well, limit possible programs, but...it might be necessary.  Or I just say it's a feature, not a bug?  Putting in stuff that will obviously blow up the computer should, well, blow up the computer.

I have a feeling why it crashes is that it makes temporary variables (a lot, actually) in each function, and when that function's getting run recursively, the data piles up fast, so fast the garbage collector can't catch up, and thusly, the program segfaults a moment later when it runs out of memory to put stuff in.

I wish it was an easter egg!  I'm still learning my way around Assembly, and that was genuinely the best win screen I could think of at the time.  One thing worth noting about IFJMP and JMP - they will immediately run whatever they jump to, essentially meaning they take no clock cycles.  Realistic?  Probably not.  But an important quality of life feature?  Definitely.  At the low speeds the TC-06 runs at, every IFJMP requiring a full clock cycle just to get to whatever it's supposed to run would have a drastic performance impact.

As for image format sizing, honestly, I'd just say to have a giggle about it.  Everyone does goofy stuff when they're still learning their way around computers - I know I did!  Took an embarrassingly long time for me to learn that file formats are more than their extension - I got started with modding Morrowind waaaaay back in the day, and I, on several occasions, tried to make "models" by renaming various image files and such.  Wasn't till a bit later that I found Blender and got started actually modeling.

On modded peripherals?  I'd love to.  Adding new 3d ones might be harder, but I think it'd be doable.  I KNOW I want to ship a functioning network peripheral (or several) for use in the base game, and then work on making some kind of internet system go with it (like TCP/IP) - making the grand finale of the built-in levels be an actual hacking mission or something would be super cool.  Given my noobness at Assembly, I have a feeling it wouldn't be that hard to break, even for the average player.  As a bonus, with actual over-the-internet support for the network peripheral, you could even engage in hacking battles with other players, which would probably be tons of fun.

Very cool!  Don't undersell it - writing your own win screen that fits ENTIRELY in Default Mode's 32-address RAM?  That's no small feat!

And yeah - self-modifying code is pretty much a fact of life in world of TC-06 programming, for better and worse.  A major influencer of the assembly language here is Core Wars' Redcode, which was by nature designed to be super self-modifying.  This is definitely a way more efficient win program than mine, and I think it actually looks better, to boot!

(As for the bootloader already being present: it's not a bug, it's a feature!  I wrote it early on and just decided to leave it in as an easter egg of sorts.  ^^)

Finally, you're welcome!  It's not as gamey as I think a lot of people would've liked, being more of a proof-of-concept for the TC-06 architecture itself, but...I'm super proud of it, and seeing other people building programs for it definitely gives me the warm fuzzies.  I do plan to keep working on it, filling out the remaining op-code spaces, polishing up the ones we've got, and so on.  Among other things on the TO-DO list, I'd like to set it up so "Tutorials" can be loaded from text files, meaning it'd be possible to make levels for the game yourself!

Thanks so much for playing!

Really funny use of the theme, and surprisingly challenging!

Subtle detail I love: the color-coding.  I always like seeing good use of color palettes, and while it doesn't hit you upside the head with it, the whole thing uses the general Extra Credits palette.  Very excellent detailing.

For completed projects you want the world to see, you can share code and/or screenshots here!  Friendly reminder that Itch has a "code" format, which can prettify your posts and make things a bit more readable.

If your code was meant for a custom mode, include the CustomPreset.cps file for it, too.  To install someone else's Custom preset, go to your game folder, create a new folder with the preset name (e.g, Compy6c), and drop the CustomPreset.cps file in (or make one, filling it with the appropriate contents - Windows users, make sure you can actually change the file extension on it!), then load it up in-game.

To get started, I'd like to share something straight off.

TCPaint

My crowning achievement so far in Senbir is a paint program written for Extended mode, which I'm currently referring to by the moniker "TCPaint".  You NEED to be using the latest version, 0.43a.2 (I'll have a version text up on the main menu one day!), as there were some pretty crippling bugs (mainly in the monitor GetData function) I needed to fix in order for TCPaint to function.

TCPaint Demo

Trying TCPaint in a Custom version of Extended mode w/ a different color palette

//==PAINT==
//WASD to navigate.  Spacebar toggles if you're painting or not.  Use E and Q to shift forwards and backwards through the list of colors, respectively.
//This version was made for EXTENDED MODE, with its 16x8 resolution, and 4-color capability.
//=REGISTER USAGE=
//REGISTER 00: BRUSH DOWN?
//REGISTER 01->2: KEY PRESS THIS TICK
//REGISTER 03: USED FOR IFJMPS
//REGISTER 04: BRUSH X
//REGISTER 05: BRUSH Y
//REGISTER 06: BACKGROUND COLOR REGISTER (USED IF BRUSH IS NOT DOWN)
//REGISTER 07: BRUSH COLOR REGISTER (USED IF BRUSH IS DOWN)
//REGISTER 08: TEMPORARY MODIFICATION REGISTER
//REGISTER 12: INT 16
//REGISTER 13: INT 8
//REGISTER 14: INT 4
//REGISTER 15: INT 1
SET 15 3 00000001 //Set register 15 to the integer 01.  Addr0.
SET 14 3 00000100 //Set register 14 to the integer 04.  Addr1.
SET 13 3 00001000 //Set register 13 to the integer 08.  Addr1.  Yes, I know, there's a duplicate.
SET 12 3 00010000 //Set register 12 to the integer 16.  Addr2.
SET 6 0 00000000 //Set register 6 to have the appropriate color.  Addr3.
SET 7 0 01000000 //Set register 7 to have the appropriate color - white.  Addr4.
GETDATA 2 3 0 //Get the last keyboard input.  Addr5.
PMOV 1 2 0 31 0 0 //Move the last keyboard input into register 2.  Addr6.
IFJMP 0 15 1 //If a key was pressed, jump to the input subroutine.  Addr7.
JMP 2 3 //Otherwise, do nothing.  Addr8.
PMOV 9 2 0 31 0 0 //Put the "brush down" variable in so IFJMP'll accept it.  Addr9.
IFJMP 0 2 0 //Jump to the background restore if the brush isn't down.  Addr10.
JMP 0 2 //Otherwise, jump past it.  Addr11.
SETDATA 0 3 6 //Wipe the old one.  Addr12.
PMOV 4 7 28 31 6 1 //Splice the last 4 bits of the X register (the actual x position) into the rendering register, offset +6 (<28>XXXX -> CCXXXX<26>).  Addr13.
PMOV 5 7 29 31 9 1 //Splice the last 3 bits of the Y register (the actual y position) into the rendering register, offset +9 (<29>YYY -> CCXXXXYYY<23>).  Addr14.
PMOV 7 8 0 31 30 1 //Addr15.
GETDATA 0 3 8 //Get the monitor data.  Addr16.
MATH 1 6 5 //Paste the color in. Addr17.
JMP 0 1 //Addr18.
JMP 0 1 //Addr19.
SETDATA 0 3 7 //Render the brush.  Addr20.
JMP 2 16 //Jump back to the start of the loop.  Addr21.
SET 0 0 01011101 //START OF INPUT SUBROUTINE.  Set Register 0 to the key ID for W.  Addr22.
SET 0 1 11000000 //Set Register 0 to the key ID for W.  Addr23.
GETDATA 2 3 0 //Check the W.  Addr24.
MATH 1 2 5 //Move the result of GetData in.  Addr25.
IFJMP 0 34 1 //If W IS pressed, jump to the appropriate memory position.  Addr26.
SET 0 0 01011000 //Set Register 0 to the key ID for A.  Addr27.
SET 0 1 01000000 //Set Register 0 to the key ID for A.  Addr28.
GETDATA 2 3 0 //Check the A.  Addr29.
MATH 1 2 5 //Move the result of GetData in.  Addr30.
IFJMP 0 32 1 //If A IS pressed, jump to the appropriate memory position.  Addr31.
SET 0 0 01011100 //Set Register 0 to the key ID for S.  Addr32.
SET 0 1 11000000 //Set Register 0 to the key ID for S.  Addr33.
GETDATA 2 3 0 //Check the S.  Addr34.
MATH 1 2 5 //Move the result of GetData in.  Addr35.
IFJMP 0 30 1 //If S IS pressed, jump to the appropriate memory position.  Addr36.
SET 0 0 01011001 //Set Register 0 to the key ID for D.  Addr37.
SET 0 1 00000000 //Set Register 0 to the key ID for D.  Addr38.
GETDATA 2 3 0 //Check the D.  Addr39.
MATH 1 2 5 //Move the result of GetData in.  Addr40.
IFJMP 0 28 1 //If D IS pressed, jump to the appropriate memory position.  Addr41.
SET 0 0 01001000 //Set Register 0 to the key ID for SPACEBAR.  Addr42.
SET 0 1 00000000 //Set Register 0 to the key ID for SPACEBAR.  Addr43.
GETDATA 2 3 0 //Check the SPACEBAR.  Addr44.
MATH 1 2 5 //Move the result of GetData in.  Addr45.
IFJMP 0 26 1 //If SPACEBAR IS pressed, jump to the appropriate memory position.  Addr46.
SET 0 0 01011100 //Set Register 0 to the key ID for Q.  Addr47.
SET 0 1 01000000 //Set Register 0 to the key ID for Q.  Addr48.
GETDATA 2 3 0 //Check the Q.  Addr49.
MATH 1 2 5 //Move the result of GetData in.  Addr50.
IFJMP 0 28 1 //If Q IS pressed, jump to the appropriate memory position.  Addr51.
SET 0 0 01011001 //Set Register 0 to the key ID for E.  Addr52.
SET 0 1 01000000 //Set Register 0 to the key ID for E.  Addr53.
GETDATA 2 3 0 //Check the E.  Addr54.
MATH 1 2 5 //Move the result of GetData in.  Addr55.
IFJMP 0 33 1 //If E IS pressed, jump to the appropriate memory position.  Addr56.
SET 0 0 00000000 //Unset 0.  Addr57.
SET 0 1 00000000 //Unset 0.  Addr58.
JMP 2 50 //Jump back to the render loop.  Addr59.
MATH 15 5 1 //W WAS PRESSED.  Increment Y down by one.  Addr60.
MATH 13 5 4 //Modulo Y just in case.  Addr61.
JMP 2 5 //Jump back to the render loop.  Addr62.
MATH 15 4 1 //A WAS PRESSED.  Increment X down by one.  Addr63.
MATH 12 4 4 //Modulo Y just in case.  Addr64.
JMP 2 3 //Jump back to the render loop.  Addr65.
MATH 15 5 0 //S WAS PRESSED.  Increment Y up by one.  Addr66.
MATH 13 5 4 //Modulo Y just in case.  Addr67.
JMP 2 3 //Jump back to the render loop.  Addr68.
MATH 15 4 0 //D WAS PRESSED.  Increment X up by one.  Addr69.
MATH 12 4 4 //Modulo Y just in case.  Addr70.
JMP 2 3 //Jump back to the render loop.  Addr71.
MATH 9 2 5 //Move the contents of Address 9 (the brush toggle) into 2 for IFJMP use.  Addr72.
IFJMP 0 2 0 //Is the brush up?  Addr73.
JMP 0 3 //Nope.  Addr74.
SET 9 3 00000001 //Turn the brush on.  Addr75.
JMP 0 2 //Skip past turning it off.  Addr76.
SET 9 3 00000000 //Turn the brush off.  Addr77.
JMP 2 7 //Jump back to the render loop.  Addr78.
SET 8 0 00000000 //Addr79.
SET 8 1 00000000 //Addr80.
SET 8 2 00000000 //Addr81.
SET 8 3 00000000 //Addr82.
MATH 7 8 5 //Splice the color in.  Addr83.
PMOV 7 8 0 1 30 1 //THING.  Addr84.
MATH 15 8 1 //Q WAS PRESSED.  Increment COL down by one.  Addr85.
MATH 14 8 4 //Modulo COL just in case.  Addr86.
PMOV 8 7 28 31 30 0 //Splice it back into the renderer.  Addr87.
JMP 2 10 //Jump back to the render loop.  Addr88.
SET 8 0 00000000 //Addr89.
SET 8 1 00000000 //Addr90.
SET 8 2 00000000 //Addr91.
SET 8 3 00000000 //Addr92.
MATH 7 8 5 //Splice the color in.  Addr93.
PMOV 7 8 0 1 30 1 //THING.  Addr94.
MATH 15 8 0 //E WAS PRESSED.  Increment COL up by one.  Addr95.
MATH 14 8 4 //Modulo COL just in case.  Addr96.
PMOV 8 7 28 31 30 0 //Splice it back into the renderer.  Addr97.
JMP 2 10 //Jump back to the render loop.  Addr98.

I'm really quite proud of it, and I think it's a good proof-of-concept to show that you legitimately can build anything in Senbir.

Use F to turn the computer on, then select the keyboard, then WASD to move your cursor, Q/E to cycle through the colors, and spacebar to toggle if your brush is "down" or not (effects whether or not it, well, paints, when you move the cursor) - it's simple, but it'll let you doodle some basic text messages or pixel art.

TCPaint (Extended Edition)

I've also been toying with a Custom preset for a much fancier computer (4kB of RAM, 32 kB drive, 6-bit 128x64 monitor with a proper RGB color palette, clockspeed 180hZ, the apparent maximum on my computer) and made an updated version of TCPaint for it.

CUSTOM PRESET (Compy6c/CustomPreset.cps)

1024
30000
6
7
0
0
0
0.3333333
0
0
0.6666667
0
0
1
0
0
0
0.3333333
0
0.3333333
0.3333333
0
0.6666667
0.3333333
0
1
0.3333333
0
0
0.6666667
0
0.2470588
0.6666667
0
0.6666667
0.6666667
0
1
0.6666667
0
0
1
0
0.3333333
1
0
0.6666667
1
0
1
1
0
0
0
0.3333333
0.3333333
0
0.3333333
0.6666667
0
0.3333333
1
0
0.3333333
0
0.3333333
0.3333333
0.3333333
0.3333333
0.3333333
0.6666667
0.3333333
0.3333333
1
0.3333333
0.3333333
0
0.6666667
0.3333333
0.3333333
0.6666667
0.3333333
0.6666667
0.6666667
0.3333333
1
0.6666667
0.3333333
0
1
0.3333333
0.3333333
1
0.3333333
0.6666667
1
0.3333333
1
1
0.3333333
0
0
0.6666667
0.3333333
0
0.6666667
0.6666667
0
0.6666667
1
0
0.6666667
0
0.3333333
0.6666667
0.3333333
0.3333333
0.6666667
0.6666667
0.3333333
0.6666667
1
0.3333333
0.6666667
0
0.6666667
0.6666667
0.3333333
0.6666667
0.6666667
0.6666667
0.6666667
0.6666667
1
0.6666667
0.6666667
0
1
0.6666667
0.3333333
1
0.6666667
0.6666667
1
0.6666667
1
1
0.6666667
0
0
1
0.3333333
0
1
0.6666667
0
1
1
0
1
0
0.3333333
1
0.3333333
0.3333333
1
0.6666667
0.3333333
1
1
0.3333333
1
0
0.6666667
1
0.3333333
0.6666667
1
0.6666667
0.6666667
1
1
0.6666667
1
0
1
1
0.3333333
1
1
0.6666667
1
1
1
1
1
False
8192

TCPAINT ITSELF (Paint.casm)

//==PAINT==
//WASD to navigate.  Spacebar toggles if you're painting or not.  Use E and Q to shift forwards and backwards through the list of colors, respectively.
//This version was made for the COMPY-6C, with its 128x64 resolution, and 64-color capability.
//=REGISTER USAGE=
//REGISTER 00: BRUSH DOWN?
//REGISTER 01->2: KEY PRESS THIS TICK
//REGISTER 03: USED FOR IFJMPS
//REGISTER 04: BRUSH X
//REGISTER 05: BRUSH Y
//REGISTER 06: BACKGROUND COLOR REGISTER (USED IF BRUSH IS NOT DOWN)
//REGISTER 07: BRUSH COLOR REGISTER (USED IF BRUSH IS DOWN)
//REGISTER 08: TEMPORARY MODIFICATION REGISTER
//REGISTER 12: INT 128
//REGISTER 13: INT 64
//REGISTER 14: INT 64
//REGISTER 15: INT 1
SET 15 3 00000001 //Set register 15 to the integer 01.  Addr0.
SET 14 3 01000000 //Set register 14 to the integer 64.  Addr1.
SET 13 3 01000000 //Set register 13 to the integer 64.  Addr1.
SET 12 3 10000000 //Set register 12 to the integer 128.  Addr2.
SET 6 0 00000000 //Set register 6 to have the appropriate color.  Addr3.
SET 7 0 11111100 //Set register 7 to have the appropriate color - white.  Addr4.
GETDATA 2 3 0 //Get the last keyboard input.  Addr5.
PMOV 1 2 0 31 0 0 //Move the last keyboard input into register 2.  Addr6.
IFJMP 0 15 1 //If a key was pressed, jump to the input subroutine.  Addr7.
JMP 2 3 //Otherwise, do nothing.  Addr8.
PMOV 9 2 0 31 0 0 //Put the "brush down" variable in so IFJMP'll accept it.  Addr9.
IFJMP 0 2 0 //Jump to the background restore if the brush isn't down.  Addr10.
JMP 0 2 //Otherwise, jump past it.  Addr11.
SETDATA 0 3 6 //Wipe the old one.  Addr12.
PMOV 4 7 25 31 13 1 //Splice the last 7 bits of the X register (the actual x position) into the rendering register, offset +6 (<28>XXXX -> CCXXXX<26>).  Addr13.
PMOV 5 7 26 31 19 1 //Splice the last 6 bits of the Y register (the actual y position) into the rendering register, offset +9 (<29>YYY -> CCXXXXYYY<23>).  Addr14.
PMOV 7 8 0 31 26 1 //Addr15.
GETDATA 0 3 8 //Get the monitor data.  Addr16.
MATH 1 6 5 //Paste the color in. Addr17.
JMP 0 1 //Addr18.
JMP 0 1 //Addr19.
SETDATA 0 3 7 //Render the brush.  Addr20.
JMP 2 16 //Jump back to the start of the loop.  Addr21.
SET 0 0 01011101 //START OF INPUT SUBROUTINE.  Set Register 0 to the key ID for W.  Addr22.
SET 0 1 11000000 //Set Register 0 to the key ID for W.  Addr23.
GETDATA 2 3 0 //Check the W.  Addr24.
MATH 1 2 5 //Move the result of GetData in.  Addr25.
IFJMP 0 34 1 //If W IS pressed, jump to the appropriate memory position.  Addr26.
SET 0 0 01011000 //Set Register 0 to the key ID for A.  Addr27.
SET 0 1 01000000 //Set Register 0 to the key ID for A.  Addr28.
GETDATA 2 3 0 //Check the A.  Addr29.
MATH 1 2 5 //Move the result of GetData in.  Addr30.
IFJMP 0 32 1 //If A IS pressed, jump to the appropriate memory position.  Addr31.
SET 0 0 01011100 //Set Register 0 to the key ID for S.  Addr32.
SET 0 1 11000000 //Set Register 0 to the key ID for S.  Addr33.
GETDATA 2 3 0 //Check the S.  Addr34.
MATH 1 2 5 //Move the result of GetData in.  Addr35.
IFJMP 0 30 1 //If S IS pressed, jump to the appropriate memory position.  Addr36.
SET 0 0 01011001 //Set Register 0 to the key ID for D.  Addr37.
SET 0 1 00000000 //Set Register 0 to the key ID for D.  Addr38.
GETDATA 2 3 0 //Check the D.  Addr39.
MATH 1 2 5 //Move the result of GetData in.  Addr40.
IFJMP 0 28 1 //If D IS pressed, jump to the appropriate memory position.  Addr41.
SET 0 0 01001000 //Set Register 0 to the key ID for SPACEBAR.  Addr42.
SET 0 1 00000000 //Set Register 0 to the key ID for SPACEBAR.  Addr43.
GETDATA 2 3 0 //Check the SPACEBAR.  Addr44.
MATH 1 2 5 //Move the result of GetData in.  Addr45.
IFJMP 0 26 1 //If SPACEBAR IS pressed, jump to the appropriate memory position.  Addr46.
SET 0 0 01011100 //Set Register 0 to the key ID for Q.  Addr47.
SET 0 1 01000000 //Set Register 0 to the key ID for Q.  Addr48.
GETDATA 2 3 0 //Check the Q.  Addr49.
MATH 1 2 5 //Move the result of GetData in.  Addr50.
IFJMP 0 28 1 //If Q IS pressed, jump to the appropriate memory position.  Addr51.
SET 0 0 01011001 //Set Register 0 to the key ID for E.  Addr52.
SET 0 1 01000000 //Set Register 0 to the key ID for E.  Addr53.
GETDATA 2 3 0 //Check the E.  Addr54.
MATH 1 2 5 //Move the result of GetData in.  Addr55.
IFJMP 0 33 1 //If E IS pressed, jump to the appropriate memory position.  Addr56.
SET 0 0 00000000 //Unset 0.  Addr57.
SET 0 1 00000000 //Unset 0.  Addr58.
JMP 2 50 //Jump back to the render loop.  Addr59.
MATH 15 5 1 //W WAS PRESSED.  Increment Y down by one.  Addr60.
MATH 13 5 4 //Modulo Y just in case.  Addr61.
JMP 2 5 //Jump back to the render loop.  Addr62.
MATH 15 4 1 //A WAS PRESSED.  Increment X down by one.  Addr63.
MATH 12 4 4 //Modulo Y just in case.  Addr64.
JMP 2 3 //Jump back to the render loop.  Addr65.
MATH 15 5 0 //S WAS PRESSED.  Increment Y up by one.  Addr66.
MATH 13 5 4 //Modulo Y just in case.  Addr67.
JMP 2 3 //Jump back to the render loop.  Addr68.
MATH 15 4 0 //D WAS PRESSED.  Increment X up by one.  Addr69.
MATH 12 4 4 //Modulo Y just in case.  Addr70.
JMP 2 3 //Jump back to the render loop.  Addr71.
MATH 9 2 5 //Move the contents of Address 9 (the brush toggle) into 2 for IFJMP use.  Addr72.
IFJMP 0 2 0 //Is the brush up?  Addr73.
JMP 0 3 //Nope.  Addr74.
SET 9 3 00000001 //Turn the brush on.  Addr75.
JMP 0 2 //Skip past turning it off.  Addr76.
SET 9 3 00000000 //Turn the brush off.  Addr77.
JMP 2 7 //Jump back to the render loop.  Addr78.
SET 8 0 00000000 //Addr79.
SET 8 1 00000000 //Addr80.
SET 8 2 00000000 //Addr81.
SET 8 3 00000000 //Addr82.
MATH 7 8 5 //Splice the color in.  Addr83.
PMOV 7 8 0 5 26 1 //THING.  Addr84.
MATH 15 8 1 //Q WAS PRESSED.  Increment COL down by one.  Addr85.
MATH 14 8 4 //Modulo COL just in case.  Addr86.
PMOV 8 7 24 31 26 0 //Splice it back into the renderer.  Addr87.
JMP 2 10 //Jump back to the render loop.  Addr88.
SET 8 0 00000000 //Addr89.
SET 8 1 00000000 //Addr90.
SET 8 2 00000000 //Addr91.
SET 8 3 00000000 //Addr92.
MATH 7 8 5 //Splice the color in.  Addr93.
PMOV 7 8 0 5 26 1 //THING.  Addr94.
MATH 15 8 0 //E WAS PRESSED.  Increment COL up by one.  Addr95.
MATH 14 8 4 //Modulo COL just in case.  Addr96.
PMOV 8 7 24 31 26 0 //Splice it back into the renderer.  Addr97.
JMP 2 10 //Jump back to the render loop.  Addr88.

NOTES

The color palette is ordered from least blue to most blue, then least green to most green, then least red to most red.  Color slot 1 is a dim red, while 3 is bright.  Color slot 5 is a dim yellow, combining both dim red and dim green.  Etc.  Every 16 colors, the blue level increases.

Compy-6C Color Palette

The color palette used for the monitor of my Compy-6C preset.
Labeled Palette
With the color ID of each one scribbled overtop. Could be useful for development, proper.

A general-purpose thread for getting help with the TC-06 Assembly language.  Something not working as expected?  Not sure how to go about solving a specific problem?  Post in here!  I'll try to lend a hand in figuring out what's going on - though, please keep in mind, I'm still learning everything too!

By default, the TC-06 runs at around 60 Hz, or 1/60th of a second per cycle.  It's not SUPER reliable due to apparent limitations in MonoBehaviour.InvokeRepeating (and might cap out around ~120-180 Hz, not completely certain) - but unless there are active errors bogging down the game client itself, or something else to suck up your actual IRL computer's resources, the default & extended modes should reliably run at that speed.

Better tutorials are coming down the line, everything got a bit rushed, seeings as how it's a Ludum Dare entry.

The CRTs utilize RenderTextures to render text on the screens (RenderTexture.active=thing; GUI.Label(stuff); RenderTexture.active=original, basically), and I'm not sure how Unity's Linux support would react. I'll see if I can figure something out, maybe try using a different version of Unity 5 to build.

Interestingly, this isn't the first weird graphics-related bug I've gotten; the Mac version outright seems to not render *anything*, just being a grey-blue screen on launch. I've not done any bugfixing on this since Ludum Dare. I'll work on it...eventually. :P

(1 edit)

If you should encounter any bugs while playing, please post them in this thread; I'll be working on a post-jam release that should have a few more levels, balance tweaks, etc.

The ones I'm aware of right now are as follows:

  • Level 1 is absurdly hard to complete without killing, and dependent on the RNG choosing not to shoot at you the moment you walk onto Floor 3 and Floor 6.
  • You can fire during the reload animation
  • You can fire again before the firing animation is complete
  • The game shows only a grey screen on Macs