Indie game storeFree gamesFun gamesHorror games
Game developmentAssetsComics
SalesBundles
Jobs
TagsGame Engines

Using zazz 1.1 to plan other kinds of animations.

A topic by ahmwma created 59 days ago Views: 275 Replies: 8
Viewing posts 1 to 3
(1 edit) (+7)

Hey. I want to talk about the small but cool update with zazz!

Generally, zazz.flipbook[] is a handy tool for playing looping animations on your cards.

You set up your frames in one place -- in the previous version you would have the option of pointing to a whole card or to a single canvas -- and then throw a little script together to tell zazz.flipbook[] the target, source, desired speed (and, if needed, the number and order of frames). Which can look kinda like this:

on view do
 zazz.flipbook[target source 0.01 (range 6)]
 go[card]
end

The new zazz 1.1 module adds the option of using a widget to indicate the area on the card that contains your frames instead. (I'll be using buttons.)

If you haven't seen it yet, I recommend taking a good look at the example gif in the 1.50 devlog.

Some interesting things are going on, from my perspective:

  • The frames are stored directly on the card -- but they can be anywhere on the card. And you can have as many sets of frames as you can fit on screen.
  • The frames are not stored in a canvas -- so they can continue to be edited in drawing mode with the full range of tools.
  • Once your target canvas, source widget and zazz.flipbook[] are set up... you can look at how your animation is coming together at any time with no extra fuss. 
  • It is fast and painless  -- especially with toolbars or keyboard shortcuts -- to switch between making changes (drawing) and seeing what they'll look like animated (interact).

I am so excited about this, you have no idea. I love zazz as a module anyway. But I think this has a lot of potential as a tool for preparing animations that aren't intended to stay in zazz.


  • How about designing your walk animations for the path module's follower contraption?

  • Or slowly cycling through the expressions of a character's sprite to make sure they all match?

  • Want to animate something with a special flourish? Whatever you do with it later, this is a nice way to test your ideas.

In a previous project, I had a big sphinx character with separate puppeteer pieces for different moving body parts -- head, paws, wings -- and a zazz.flipbook[] loop for the tail.

But I did sometimes run into the problem of going off-model or pieces not matching when I tested them later -- much later than I should have. I'm looking at this and thinking it'll be a better way of monitoring whether or not things will continue to fit together throughout the whole process.

This little guy may not be as elegant as the Big Sphinx but he's trying to show what I mean.

This is all I've made with it for now, but I think there will be more kinds of niche circumstances that this would be useful for.

All of these examples (except big Sphinx who has a different color palette) have been shoved into a small deck.  The sprites are directly on the cards and you can doodle on them and see the animation change if you like.

I think this rocks. And I would be very happy if people gave this a try, as a new tool in their deckmaking. :)

(+3)

I've mostly used the wiggly player for small animations, but I really want to use the flipbook now with the update. Thanks for the exemples!

Developer(+3)

You can use a similar workflow with a wigglyPlayer contraption if you want; Here's an example script you could place in a button to scoop a sequence of frames out of the card background based on the boundaries of some widget and insert them in a wigglyPlayer as an animation value, preserving the original frame order:

on build_anim source target do
 fs:source.parent.image.copy[source.pos source.size]
 fc:floor source.size/target.size
 r.order:target.value.order
 r.frames:each i in range prod fc
  fs.copy[target.size*floor(fc[0]%i),(i/fc[0]) target.size]
 end
 r
end
on click do
 t:some_player
 t.value:build_anim[some_outline t]
end
(1 edit) (+3)

I'm curious about doing simple collage-esque animations, is there documentation or could you point me in the right direction?

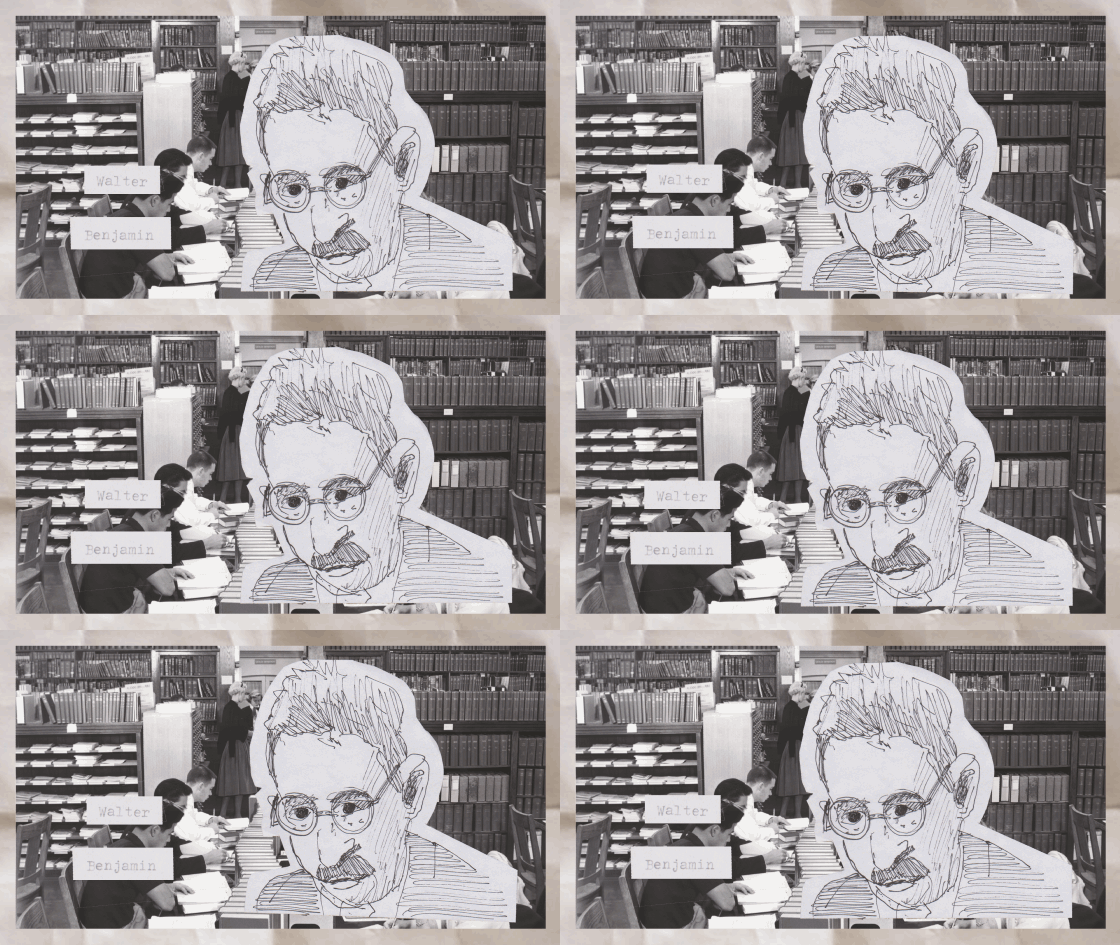
Below is an example I've made that I'd like to convert to decker format, I'm just not sure where to start or how to code it. I'm exp. as a programmer but Lil is a bit strange syntax wise esp. with the APL stuff.

(3 edits) (+2)

I love the way this looks! Wow!

Okay, I'm coming at this from the perspective of an artist who usually just uses the tools available, so someone else will have to give you an elegant example of the code solutions -- they definitely exist. I'm just the wrong person to show you.

I think the name tag should be fine to do with code but the sketch portrait that appears at slightly different tilts has a potential style issue that's jumping out of me.

You can see an example of both the visuals and the scripting involved  in making an image rotate in Decker with this post over here about the the rotor contraption and you might notice some slight digital 'crunchiness' and distortions happening with the lines in the example gif. It's not very noticeable when the image being rotated is also digital-looking but I think it might be a problem with certain other styles -- such as natural looking sketches and other paper-like assets that want to maintain that real paper feeling. This is an issue that can come up for any program working at this scale that's trying to rotate raster images without anti-aliasing or some other kind of visual smoothing.

If those small distortions don't feel right for the style of your project then I'd suggest preparing any tilted versions of your assets externally in an art program that's able to use things like anti-aliasing before importing them into Decker. 

After that you can treat them as animation frames either in existing tools like zazz (which can play a loop) or puppeteer (it's a bit more work to set up but it might be good if you have reasons to move your collage pieces around the screen) or you could definitely code your own solutions that suit your project.

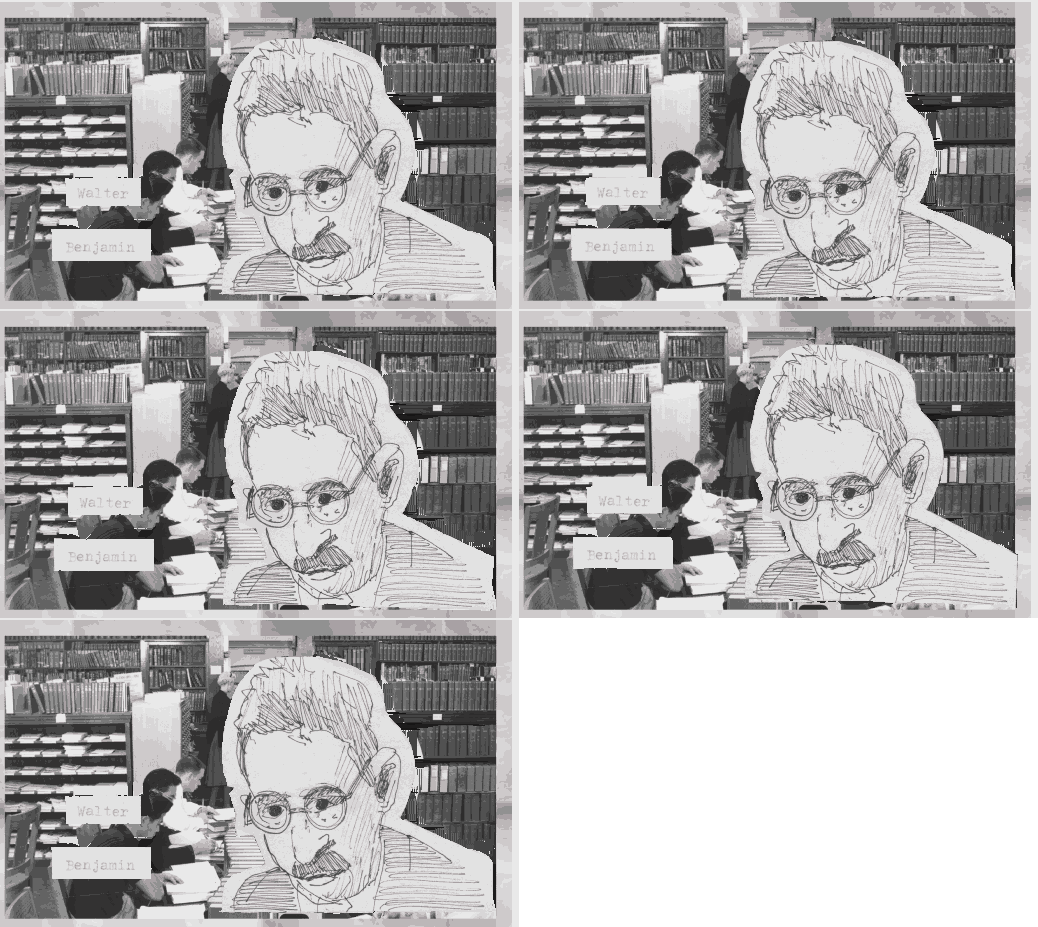
But the target style is certainly possible -- I disassembled your example gif (very roughly -- sorry for the jagged edges) and rebuilt it in Decker. I used your collage piece animation frames as they existed in the gif and zazz.flipbook[] to play them in loops -- one for the name tag, one of the sketch -- on top of the background which is an image directly on the card.

And I think it looks okay as a starting point! Not too different from the example. But there's more than one way to set things up depending on what kinds of things you want to do with your collage pieces once they're inside the deck. And I'm happy to help you figure that out if you're interested or have any other specific questions. :)

Also important to note: my reconstruction of your gif is in a 16-color Deck where the 'color' palette is a range of greyscale shades. The "All About Color" tutorial deck may be some help, for anyone unfamiliar with importing "color" (or grayscale) images into Decker.

(+2)

First, thanks for such a detailed and lengthy reply. Much appreciated.

Haha and don't worry, this might seem elegant but I'm very much a fan of the "quick and dirty" type of approach. Like if it feels like a hack, that's as legit as anything really. I see what you mean about the tilt. I kind of wanted a slight jitter to the animation, more than anything, atleast that's the sort of mentality that inspired the initial design. I think jagged edges work well too btw! or, they add a certain quality to the animation that is interesting imo.

I'm excited to give this stuff a solid try, it seems like a cool medium.

(+2)

Well, a bonus for you. I asked Internet Janitor about this because I was curious. It's his script and my cobbled-together examples.

Here is a two-card deck showing two ways of putting this together.

I'm happy to take this down once you've seen it/saved it if you prefer, but I hope it's of some use to you.

Have fun!

Developer (2 edits) (+2)

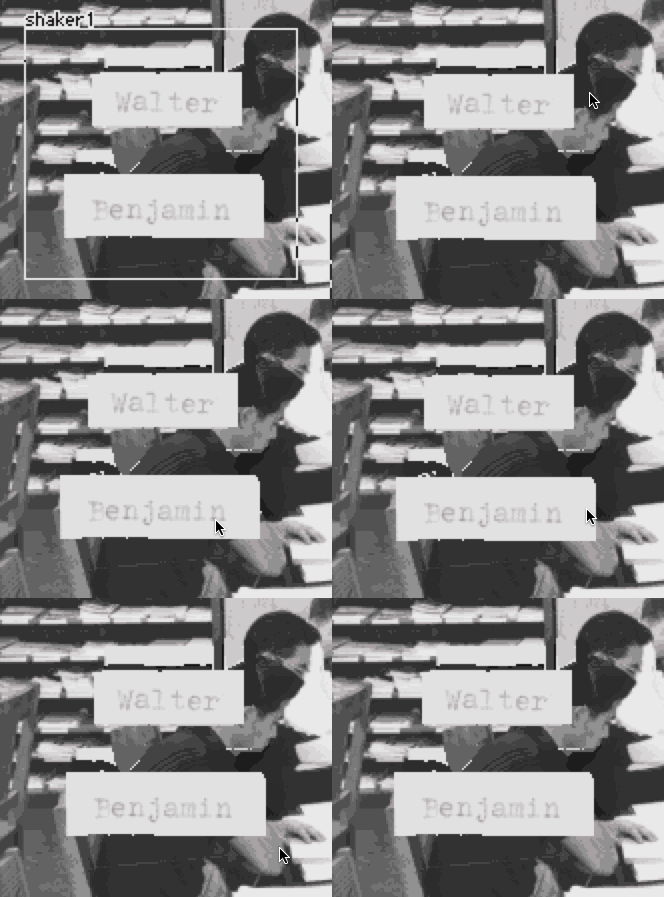
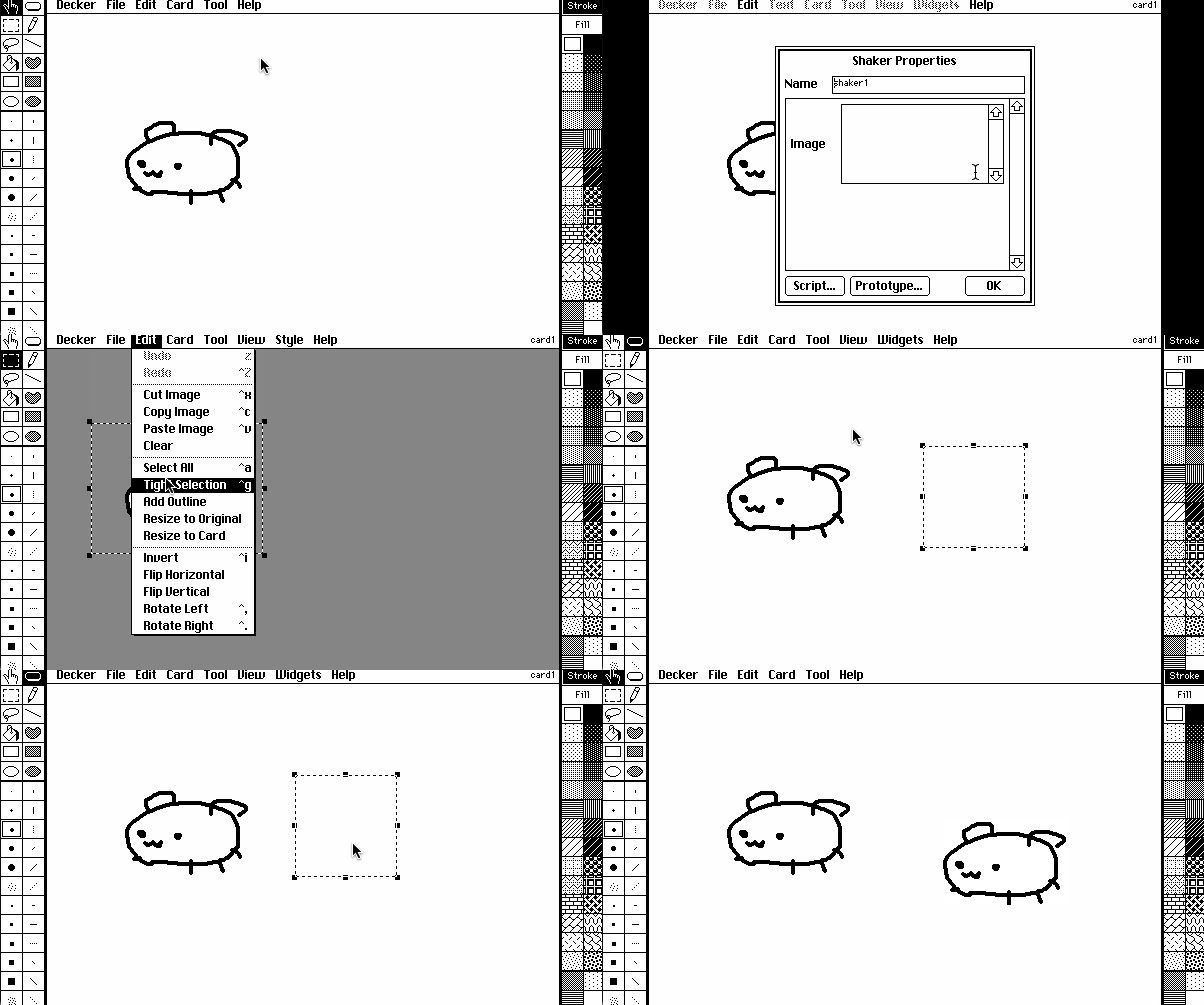
Just to showcase a somewhat different approach, I made a simple contraption that encapsulates the task of storing an image and wiggling it around a bit on screen. Contraptions are a handy way to reuse logic that appears multiple times within a deck:


%%WGT0{"w":[{"name":"shaker1","type":"contraption","size":[135,124],"pos":[45,179],"show":"transparent","def":"shaker","widgets":{"c":{"size":[135,124]},"img":{"size":[100,25],"pos":[166,1],"value":{"text":["","i"],"font":["",""],"arg":["","%%IMG2AIMAdQD/AP8A/wD/AP8A/wD/ANUuHAACLikANy0BLksANy0BLksAOC5LADguSwA4LksAOC5LADguSwA4LksAOC4dLQQuKgA4LgstASwBLQEuAy0BLAIuCSwBKwMtAS4HLAEuIQA4LgwsAS0BLgMtASsBLQEuAi0DLgcsAi4HKwEuIQA4LgwsAS0CLAEuAS0BKwEuAi0BKwMsAS0BLgUsAS0BLgQtASwCKwEtAi4FLQIuDS0BLgoAOC4MLQMrAS0CKwEuAisBLAEtAywBLgUsAS0BLgQtASsDLAItAS4DLAEqASsCLQEuAiwBKwItASwCLQEuDQA4LgwtAywBLQEsAi4CLQIuAi0BLAEuBSwBLQEuBywBLgUsASsBLQEuAS0BKwEtAS4BLQIrAiwBLQEsAi4MADguDS0CLAIrAS0BLgIsASsBLAQuBSwBLgctASwBLgUrAiwBLQIsAS0BLgMrASwBLgIrAS0BLgwAOC4NLAItASwCLgIsASsBLQEuAi0BLAEuBSwBLggsAS4FKwMsAy0BLgMrAS4RADguDC0BKwItASsCLgIsASsBLQEuAS0BLAItAS4ELQEuBy0BLAEuAi0BLgIrASwBLggrAS4RADguDSsBLAEtASsCLgMrBCwDLgEtAywBLQIuBiwBLQIsAS4CLAErAS0BLgEtASwBLgMtASsBLhEAOC4NLAEtAS4BKwEsAS4ELQIuAi0BLgItASwBLQEsAS0DLgUtAy4ELAErASwCLQEuAS0BKwQsAS0BLg4AOC4QLQEuIC0CLgQtAy4BLQEuDwA4LksAOC5LADguSwA4LksAOC5LADguSwA5LAErASwCAAIsDysFAAErBQAELAErAywVKwEsBwD/AP8A/wD/AP8A/wD/AP8A/wD/AP8A/y5iACEuYwAgLmMAIC5jLQEAHy5kAB8uZAAfLmQAHy5kAB8uZAAfLmQAHy5kAB8uAS0BLmIAHy4tLQEuNgAfLg4sAisBLAItAi4XLAErAS0BLhYrAS0BLh0AHy4OLQEsASsCLAIrAS0BLhYtASwBLhcsAS0BLh0AHy4QKwEsAS4CLQIuAiwBKwIsAS0BLgItASsBLAQtAS4ELAErASwCLgQtASwDLQEuAi0GLAEuAy0BLAIuBS0BLAEuAS0BLAIuEwAfLhAsAS0BLgItASwBLgEsASsBLAIrAi0BLgItASsCLQEuASwBLgUtAiwBLQEuAi0BKwEsAS0BLAIuAi0BKwEsAS0BLAQuAi0BLAErAS0BLgQtASsBLAQtAS4SAB8uECwDLQEsAS0BLgErASwBLQMrAS0BLgItASsBLQEuAiwBLQEuBiwBLQEuAi0BLAEuAywBLQEuAiwBLQEuASwBLQEsAi4ELAEtAS4FLAErAS0BLgEtASwBLhIAHy0BLg8sAi0FKgErBS0BLgItASsBLgMsAS4HLAEtAS4DLQEsBC0BLgIsAS4BLQEsAS4BLAIuBCwBLQEuBSwCLgItASwBLhIAHy0BLg8tAi4DLQIqASwBLQQuAy0BKwEuAywBLQEuBisBLQEuAisBLAItAiwBLQEuAiwBLgIsAS4BLAEtAS4ELAEtAS4FLAEtAS4CLQEsAS4SAB8tAS4PLQEuBC0BLgErAi0BLgItAS4DLAErAS0BLgIsAS0BLgYsAS0BLgIrAS0BLgItASwBLQEuAS0BLAEuAS0CLgEsAS0BLgQsAS0BLgUsAS0BLgItASwBLhIAHy0BLg8sAS0BLgMtAS4BLQErAiwBKwEsAS0BLgEsASoCKwEtASwBKwEsAS0BLgIsAS0BLgEsAS0BLgIrAywBKwEsAi0CLAEtAiwBLQEsAi4BLQEsAisBLAEtAi4CLAEqASsBLQIsASsBLQEuEQAfLQEuDS0BLAMtAy4ELAMuBC0DLgEtAy4CLAEqAS0BLgErAS0BLgMtASwCLQIsAS0HLAIuAiwDLQMuAiwBKwItAisCLAEuEQAfLQEuDi0BLhksASsBLQIsAS42AB8tAS4pKwEqASsBLQEuNgAfLQEuKi0CLjcAHy0BLmMAHywBLmMAHy0BLmMAHy0BLmMAHywBLmMAHy0BLgoACi4BAAsuAQAKLjgA/wD/AP8A/wD/AP8A/wD/AP8A0g=="]}}}}],"d":{"shaker":{"name":"shaker","size":[100,100],"resizable":1,"margin":[1,1,1,1],"description":"take an image and just sorta jiggle it around.","script":"on get_value   do img.value end\non set_value x do img.value:x end\n\non view do\n if !9%sys.frame\n  i:first img.images\n  c.clear[]\n  c.paste[i (.5*c.size-i.size)+(random[4 2]-2)]\n end\nend","attributes":{"name":["value"],"label":["Image"],"type":["rich"]},"widgets":{"c":{"type":"canvas","size":[100,100],"pos":[0,0],"locked":1,"animated":1,"volatile":1,"show":"transparent","border":0,"scale":1},"img":{"type":"field","size":[100,20],"pos":[131,1],"show":"none"}}}}}

(You can copy and paste the bit between %%WGT0 and the last } into Decker to try it out!)

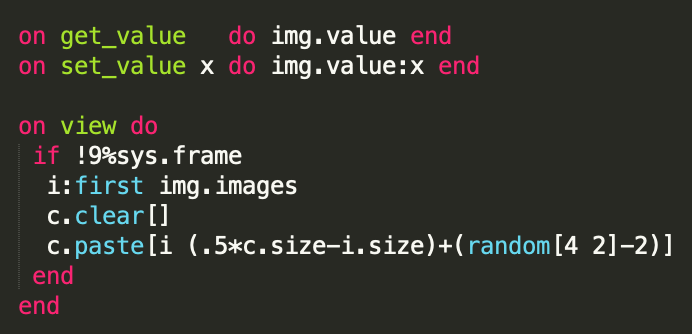
The main script of this contraption looks something like this:


(+2)

Nice, excellent work. Thank you so much!!!!