On Sale: GamesAssetsToolsTabletopComics
Indie game storeFree gamesFun gamesHorror games
Game developmentAssetsComics
SalesBundles
Jobs
TagsGame Engines
(1 edit) (+2)

Thank you for your reply.

We apologize for the delay in replying to you as notifications did not work properly.

Thank you for letting us know how to change the brightness! I did not know that and it is a great learning experience.

I didn't word it well, but my question was about whether there is a way to change the resolution of the underlying imported image, the canvas size, and whether there is a way to change the roughness of the dots.

I was able to understand the English language because you attached a machine translation. Thank you kindly.

(+3)

Hello! Thank you for coming back. 
こんにちは!また来てくれてありがとう。

I'll write about various things, but I might not have the answer you needed. I'm happy to try again if this isn't correct.
いろいろ書きますが、必要な答えではないかもしれません。間違っていたらまたもう一度試してみます。

I'm using machine translation for the Japanese sections. I'm sorry if they're inaccurate or confusing.

日本語の部分は機械翻訳を使用しています。 不正確だったりわかりにくかったりしたらごめんなさい。

-------------------------------------------------

Deck Resolution (デッキ解像度)

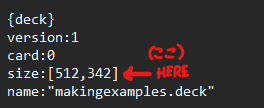
For now, the way to change the resolution of a deck is to open it in a program that can edit text.
現時点では、デッキの解像度を変更するには、テキストを編集できるプログラムでデッキを開く必要があります。

When the deck is opened in this way, near the top there will be a line that says size:[512,342].
この方法でデッキを開くと、上部近くに size:[512,342] というテキスト行が表示されます。

This is the pixel resolution of the deck. The first number is horizontal. The second number is vertical.
これはデッキのピクセル解像度です。最初の数字は水平方向です。2 番目の数字は垂直方向です。

You can edit these numbers to your preferred size. After that, save the file and open your deck again in Decker in the normal way.
これらの数字は好みのサイズに編集できます。その後、ファイルを保存し、通常の方法で Decker でデッキを再度開きます。

Because there's no ability to "zoom out" from a full sized deck at this time I recommend making sure that your deck's resolution is smaller than your screen's resolution.
現時点ではフルサイズのデッキからズームアウトする機能がないため、デッキの解像度が画面の解像度よりも小さくなるようにすることをお勧めします。

On larger deck resolutions, the Decker user interface may appear small. This is normal. Decker scales up the user interface for smaller decks. It doesn't do this on large decks.
デッキの解像度が大きい場合、Decker ユーザー インターフェイスが小さく表示されることがあります。これは正常です。Decker は、小さいデッキに合わせてユーザーインターフェイスを拡大します。大きいデッキでは、この処理は行われません。

-------------------------------------------------

A note about Image Resolution  (画像の解像度に関する注意事項)

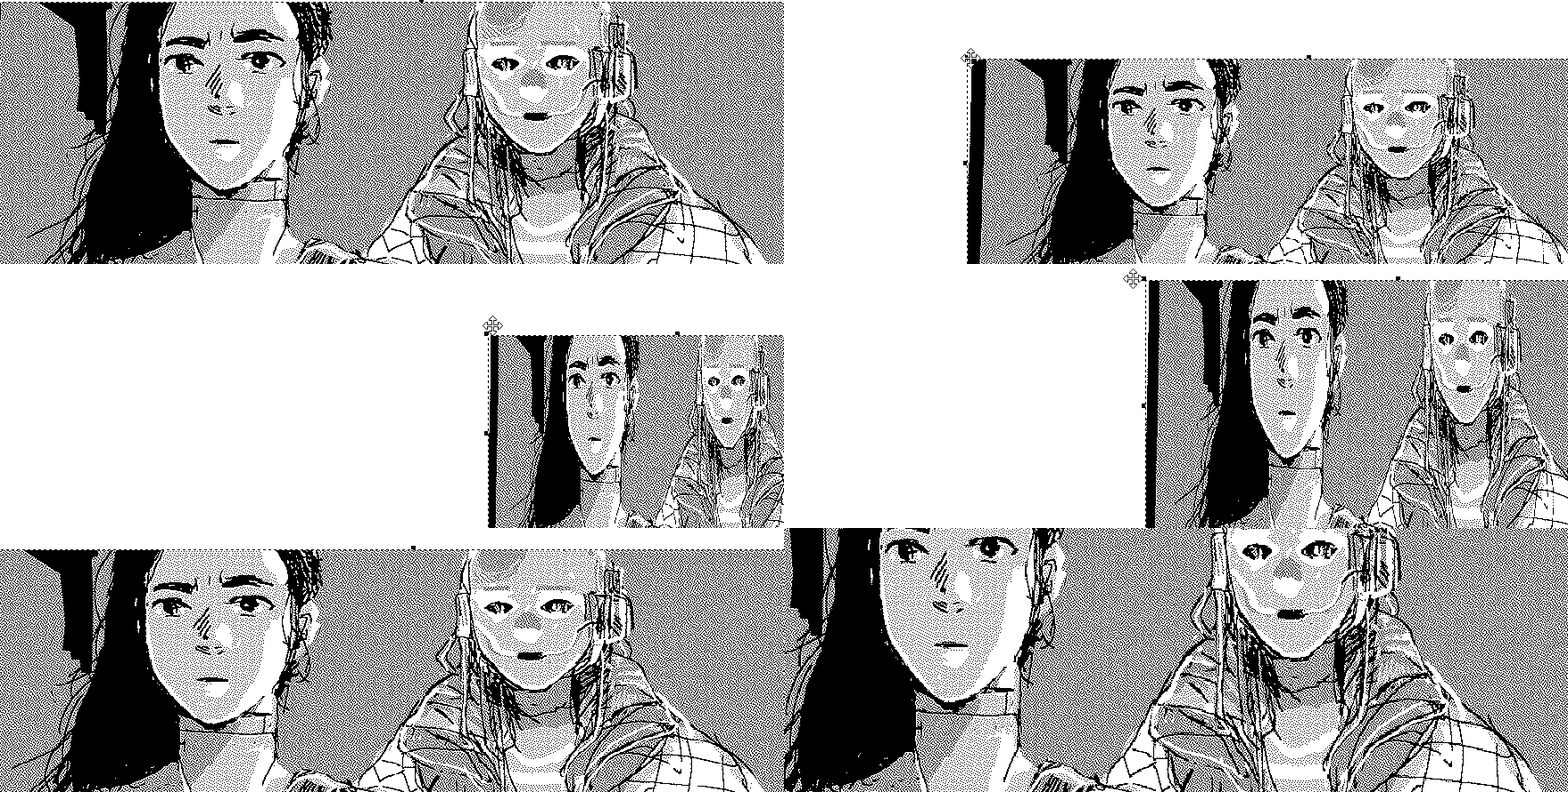
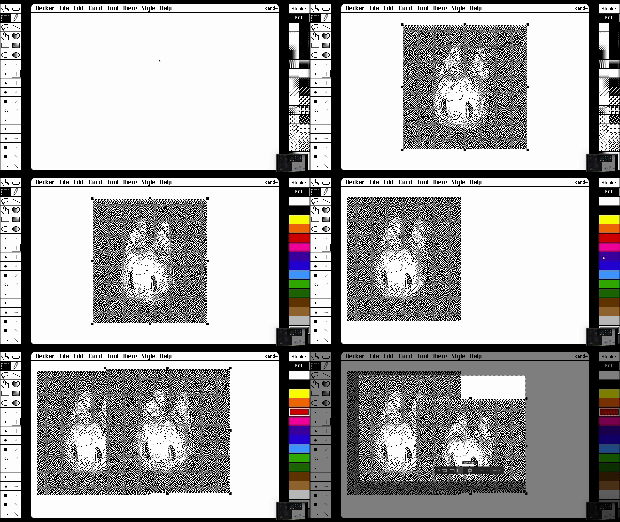
When an image is imported, there is a dotted box around it. At this time an image can be resized freely.
画像をインポートすると、画像の周囲に点線のボックスが表示されます。このとき、画像は自由にサイズを変更できます。

After it has been placed on a card, any resize action can only use the information in the image that's already inside decker so the quality will vary.
カード上に配置すると、サイズ変更アクションでは、Decker にすでに存在する画像データの情報のみを使用できます。

-------------------------------------------------

A note about Image Importing, Grayscale, and Anti-aliasing
画像のインポート、グレースケール、アンチエイリアスに関する注意事項

In the latest version of Decker (1.51) it's easier to import color images into the program.
Decker の最新バージョン (1.51) では、カラー画像をプログラムにインポートするのが簡単になりました。

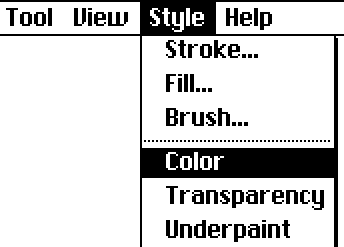
"Color" can be found in the menu under "Style".
「Color」は「Style」のメニューにあります。

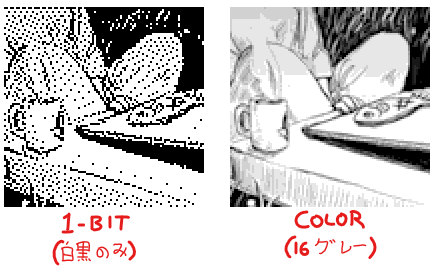
Selecting this will change the color and pattern selection tools (and the toolbars if they are visible) to a 16 color palette instead of 1-bit patterns.
これを選択すると、色とパターンの選択ツール (およびツールバーが表示されている場合はツールバー) が 1 ビット パターンではなく 16 色パレットに変更されます。

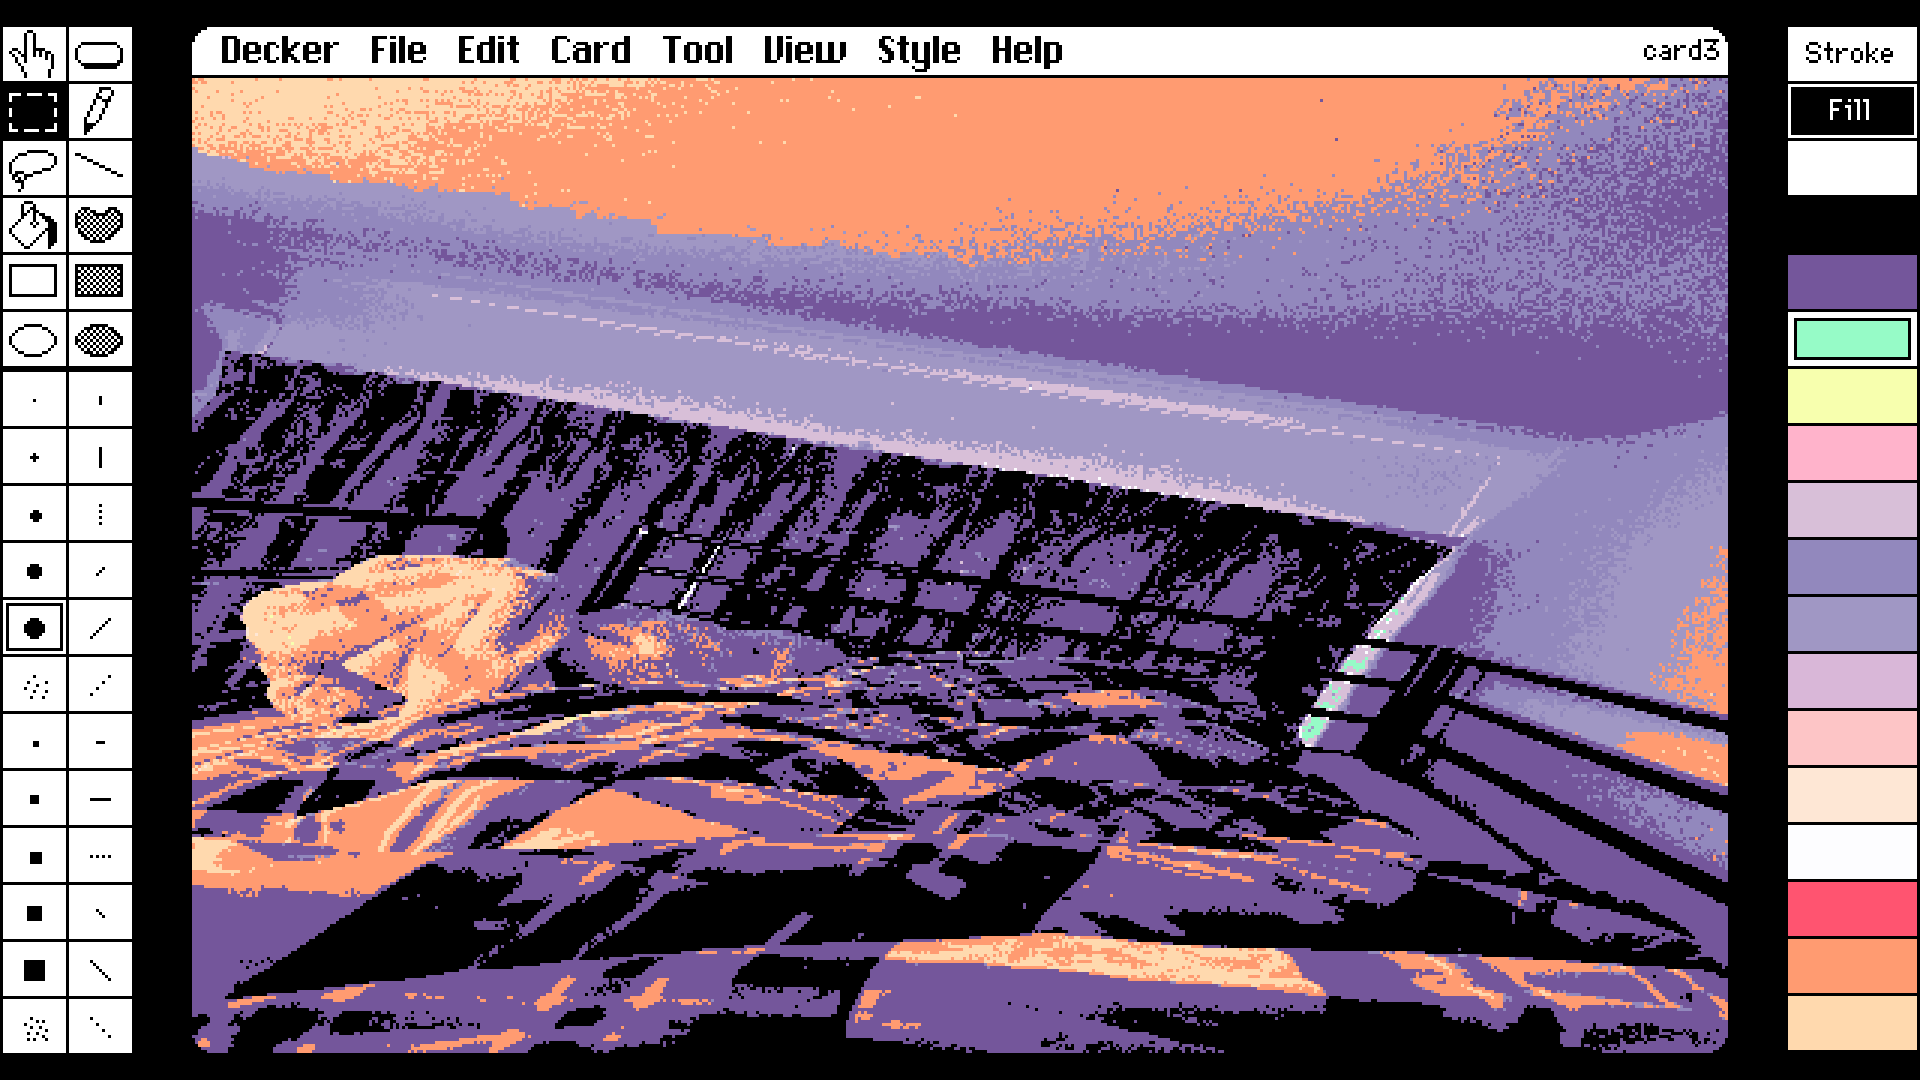
Any image you import while in "Color mode" will be imported into this palette of colors instead of black and white patterns.
「カラー モード」でインポートした画像は、白黒パターンではなく、このカラー パレットにインポートされます。

You might be thinking "Huh? Color?"
「え?カラー?」と思われるかもしれません。

If you want the effect of anti-aliasing you can prepare a color palette of grays and import as a color image.
アンチエイリアス効果が必要な場合は、グレーのカラーパレットを用意し、カラー画像としてインポートすることができます。

This kind of "softer pixels" is possible, if it would suit your project.
プロジェクトに適していれば、この種の「柔らかいピクセル」も可能です。

If changing the color palette is unfamiliar to you I'm happy to explain more using this style of post.
カラーパレットの変更方法がわからない場合は、この投稿形式で詳しく説明します。

---------

Some thoughts on "Images" and "Canvases"「画像」と「キャンバス」についての考察。

This part is probably not what's needed. But I'll explain because I think it might be useful in some cases.
この部分はおそらく必要ありません。しかし、場合によっては役立つかもしれないと思うので説明します。

A 'canvas' is a kind of container widget for 'images'. The 'image' is what you see.
「キャンバス」は「画像」用のコンテナ ウィジェットの一種です。「画像」とは、目に見えるもののことです

Canvases can be resized freely but it doesn't change the size of the image, right?
キャンバスは自由にサイズを変更できますが、画像のサイズは変わりませんよね?

In this case it can be helpful to think of the digital canvas as a physical "canvas" and the image as paint. Even if the canvas is cut or extended somehow, the 'paint'(Image) doesn't change in the same way. And image data can vanish if "cut away".
この場合、デジタル キャンバスを物理的な「キャンバス」、画像をペイントと考えると便利です。キャンバスを何らかの方法で切り取ったり、拡張したりしても、「ペイント」(画像)は同じようには変化しません。また、「切り取られる」と画像データが消えてしまうこともあります。

Code and other tools can interact with canvases in a variety of useful ways. But they do behave a bit differently than images.
コードやその他のツールは、さまざまな便利な方法でキャンバスと対話できます。しかし、それらは「画像」とは少し異なる動作をします。

Often, you'll want to prepare your image at the resolution you need it to be before putting it in a canvas.
多くの場合、キャンバスに配置する前に、必要な解像度で画像を準備する必要があります。

----

I hope this helps in some way, if your question is still not answered -- let's try again! 🙂

これが何らかの形で役立つことを願っています。質問がまだ回答されていない場合は、再度お試しいただければ幸いです。

(+4)

Thank you so much. I was very anxious as this was my first time asking a question in an overseas development community, but I am thrilled with your polite and kind response. I appreciate your explanation in Japanese.

I have confirmed the resolution change! This is exactly what I wanted to do. Thank you very much. Your additional advice was also helpful, as I lacked an understanding of Decker's fundamentals, so I learned a lot.

I also realized that what I needed for my development was a way around anti-aliasing.

I am sorry to ask this question again, but I don't get the impression that anti-aliasing is happening in my environment when I import an image with Style>Color clicked. I am having trouble with this.

I sincerely appreciate your kind reply. Sorry if my English is strange.


(+2)

I'm so glad I could help! 😊
お役に立ててとても嬉しいです!

I'll explain some general information, and then give specific directions for your question.
まず一般的な情報を説明してから、ご質問に対する具体的な指示をさせていただきます。

The default Decker color palette looks like this.
デフォルトの Decker カラーパレットは次のようになります。

(this image was rotated. この画像は回転されました。)

But in my example I changed the color palette to be full of gray tones.
しかし、私の例では、カラーパレットをグレートーンのみに変更しました。

If the only thing you need to do with color is to import images with the appearance of anti-aliasing then it's simple to replace all of them with gray.
色に関して必要なことがアンチエイリアシングの外観を持つ画像をインポートすることだけであれば、それらすべてをグレーに置き換えるのは簡単です。

You can also replace just a part of the color palette if you want to use other colors for another purpose.
別の目的で他の色を使用したい場合は、カラーパレットの一部だけを置き換えることもできます。

There are two important parts for successful color image import.
カラー画像のインポートを成功させるには、重要な部分が 2 つあります。

1. Prepare the "color palette" for your project
プロジェクトの「カラーパレット」を準備する

The color palette can be changed with a variety of tools, but the easiest way is to drop a .hex file onto Decker.
カラーパレットはさまざまなツールで変更できますが、最も簡単な方法は、.hex ファイルを Decker にドロップすることです。

(The .hex file is usually a .txt file that contains a list of color hexcodes and had it's file extension changed.)
(.hex ファイルは通常、カラー 16 進コードのリストが含まれ、ファイル拡張子が変更された .txt ファイルです。)

I apologize that I don't know a Japanese language website which has pre-prepared hex files for game development. I'll link to an English language site.
申し訳ありませんが、ゲーム開発用の 16 進ファイルがあらかじめ用意されている日本語の Web サイトを知りません。英語のサイトにリンクします。

https://lospec.com/palette-list/grayscale-16

If this list of gray tones seems acceptable to you, you can download the "HEX File" under the color preview and drag that .hex file onto decker to change the color palette.
このグレートーンのリストが適切と思われる場合は、カラープレビューの下にある「HEX File」をダウンロードし、その .hex ファイルをデッカーにドラッグしてカラーパレットを変更できます。

It's very simple to prepare your own .hex file if you know what colors you want. And also it's possible to edit the colors in different ways, such as only changing one color at a time.
必要な色がわかっていれば、独自の .hex ファイルを作成するのは非常に簡単です。また、一度に 1 つだけ変更するなど、さまざまな方法で色を編集することもできます。

But hopefully this explanation is straightforward enough to let you work on your project.
ただし、この説明がプロジェクトに取り組むのに十分なほどわかりやすいものであることを願っています。

2. Importing Color Images into Decker
カラー画像をDeckerにインポートする

The easiest way is to make sure you're using version 1.51 which came out on October 25th, 2024.
最も簡単な方法は、2024 年 10 月 25 日にリリースされたバージョン 1.51 を使用していることを確認することです。

This recent update allows for importing color images by dropping them on the program, while "Style -> Color" is active.
この最近のアップデートでは、「Style -> Color」がアクティブな状態で、カラー画像をプログラムにドロップしてインポートできるようになりました。

(There are other ways to do this but I wanted to make it as simple as possible.)
(これを行う方法は他にもありますが、できるだけ簡単にしたいと思いました。)

Other Notes:
その他のメモ:

It's important to prepare your color palette first.
最初にカラーパレットを準備することが重要です。

Like with 1-bit images, the best time to resize your image is right after import.
1 ビット画像と同様に、画像のサイズを変更する最適なタイミングは、インポート直後です。

At this time, Decker can read a larger amount of data from your original image.
この時点で、Decker は元の画像からより多くのデータを読み取ることができます。

Resizing an image or changing the palette later can only affect the image data that is already inside of Decker.
後で画像のサイズを変更したりパレットを変更したりしても、影響を受けるのは Decker 内にすでに存在する画像データのみです。

I hope this helps! Please let me know if you have any other questions.
これがお役に立てば幸いです。他にご質問がございましたらお知らせください。

(+3)

Thank you so much!

The problem I was facing was due to not updating the version. Thanks to your very clear explanation, all the problems around anti-aliasing were solved.

I was also able to edit the hex file and create my own color settings to match the image of the artwork. 

You were also very helpful in sharing your knowledge of various Decker topics with me.The Japanese-language guide helped me to improve my Decker resolution, which I had no idea what to do with.

Thank you very much!! I will try my best to deepen my knowledge of Decker, become a great creator, and give back by contributing to the community like you do!