Thank you so much. I know I got some of the more technical things wrong, but it's at least a point to get the new users started. :)
mrsjcoe
Recent community posts
Section 23: Conclusion and Thanks
Conclusion
So, there you have it. A comprehensive guide to the controls and menus of FlowScape. This should help you get a handle on using your game to its highest advantage. As a reminder, a great many of the keystroke controls can be found in the Help icon on the top toolbar.
A huge thank you to Discord member JS for allowing me to add his tips about importing. Also, I am giving my express permission for anyone who wishes to translate this guide into other languages to please do so with my gratitude.
If you do wish to translate then please send me a message, I will be happy to send you entire Guide in its markup language and the original images so that your work outside of doing the actual translation is minimal.
Mostly, however, I want to offer my thanks to Discord Channel Moderators Lavrans, Cynthia, and of course, Pixel Forest for creating a game and community that is unique, relaxing, fun, and something the world needs desperately.
Flow on, My Friends,
Jen
August 2019
Section 21: Side Toolbar - Environmental Animations and Sounds
Environmental Animations and Sounds

With this menu, you can add in some sounds and weather animations for your scene. Want a winter scene, add some snow! Storming, then thunder and lightning is but a click away!

Each one of these options has a different sound. You can mix and match to your heart’s content by turning them on and using the sliders.
Samples of animations
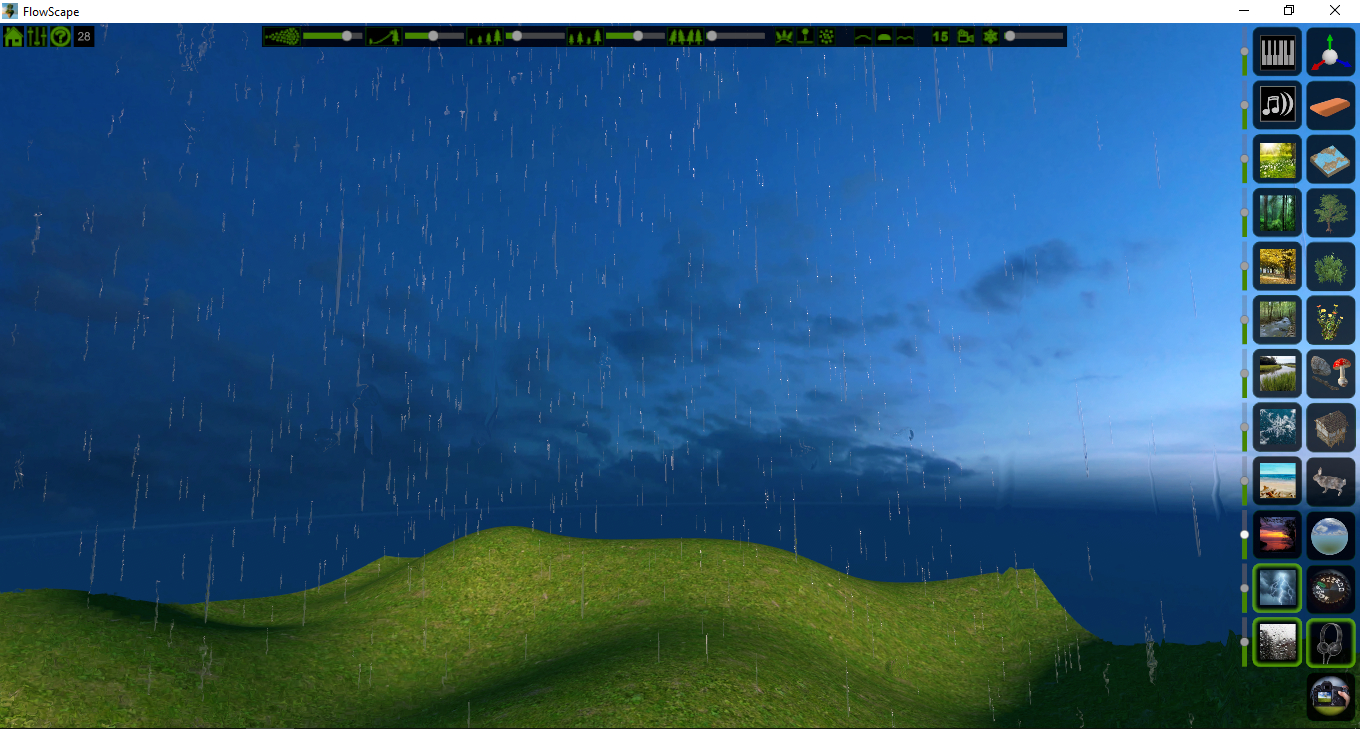
Rain… The lightning is hard to capture in a single image.
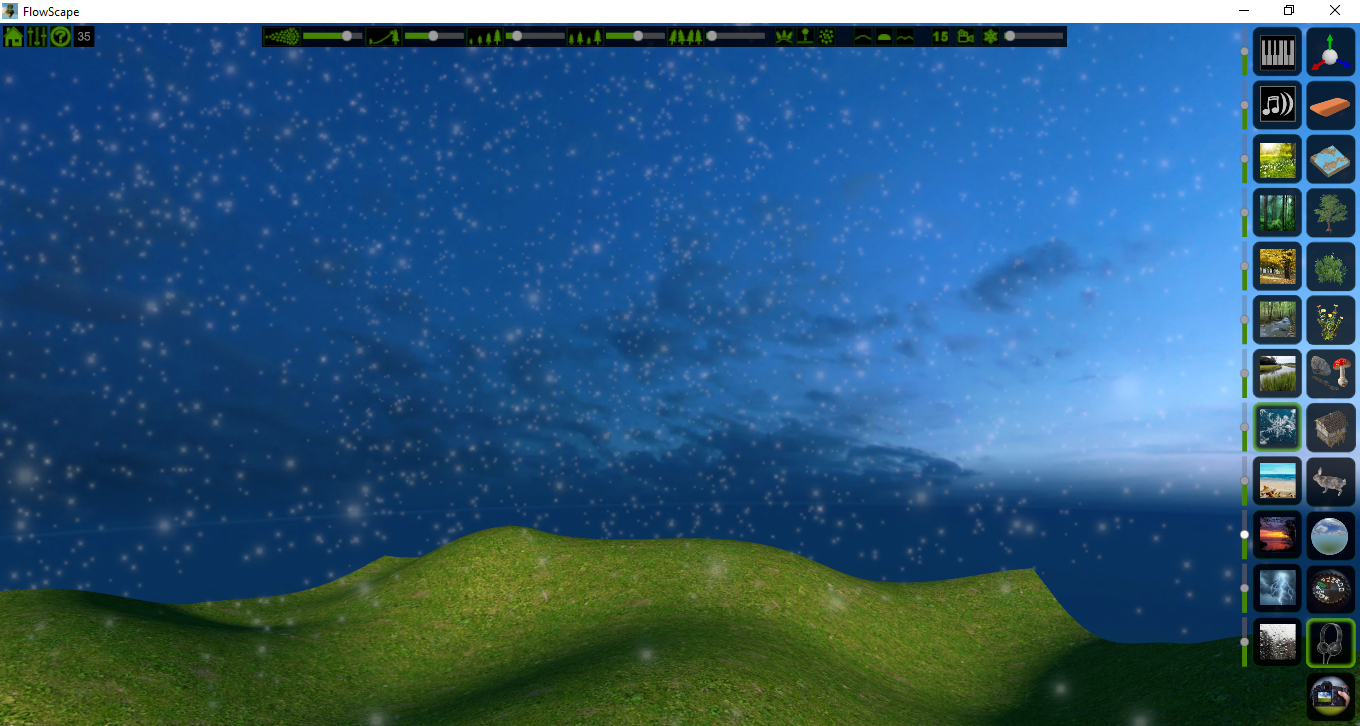
Cold snow
Section 20: Side Toolbar - Photo Controls
Photo Controls

This is where you can really start to affect the mood of your scene.

The Sun/Moon toggle gives you the opportunity to create different day and night scenes. Use the direction and height sliders to position your main light source for a variety of lighting and shadow angles. The best way to understand and learn these controls is to just play with them. You’ll start to see what works for your scene best by doing this.
Section 19: Side Toolbar – Backgrounds
Backgrounds

This menu is what lets you choose the background sky that you want to create the atmosphere of your scene.

The Toggle Sky Rotation button will turn off and on the movement of the sky in the background. If you want a particular image section of the sky, press that button and it will stop the rotation. You can also move the sky image around with the slider at the bottom.
Section 18: Side Toolbar - Animal Menu
Animal Menu

Here you will find a variety of animals, birds, and bugs to put into your scene which will help bring it to life.

Just like trees, bushes and flowers, select your animal and left mouse button will paint them into your scene.
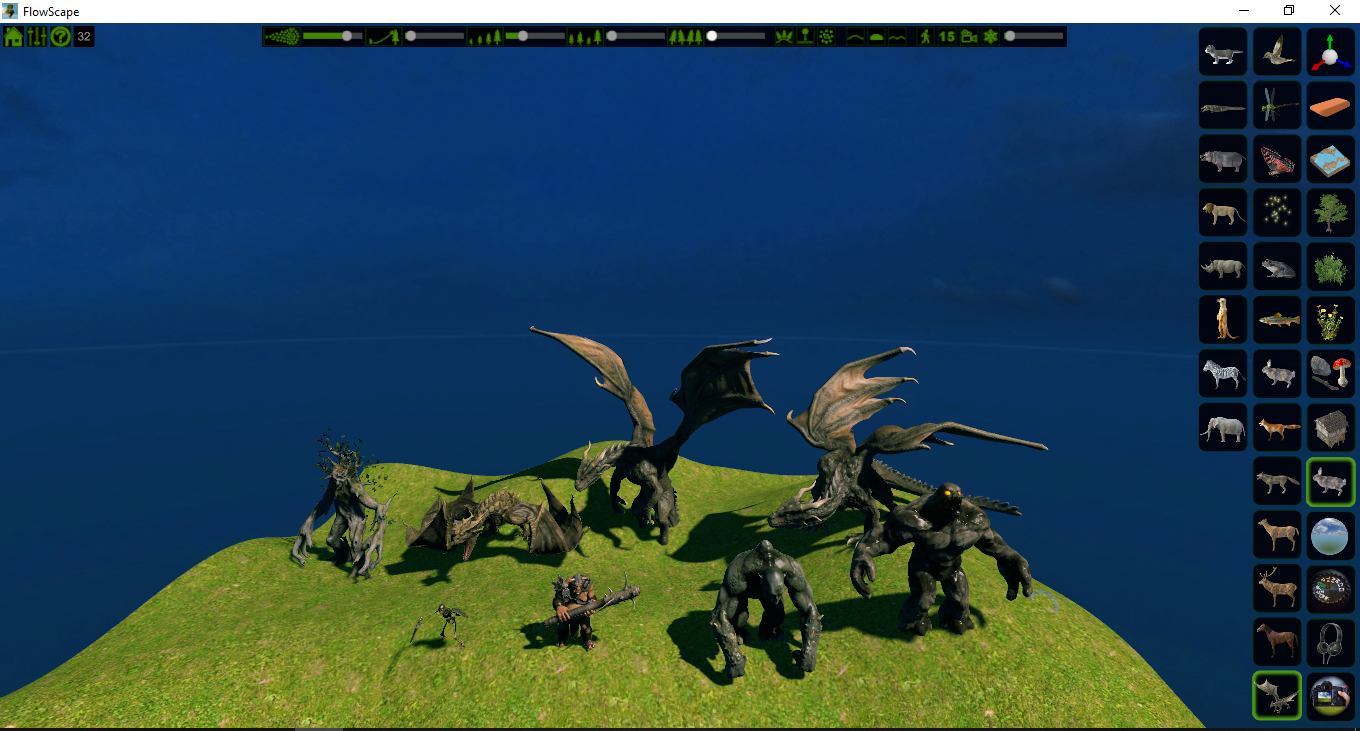
The exception to painting are the fantasy creatures. Like the houses and ships, you will find these by highlighting the fantasy creature icon, scrolling through your options, then using your left mouse button to place.
Section 17: Side Toolbar - Man-made Elements Menu
Man-made Elements Menu

Now we're going to talk about placing houses, castles, carts, etc. into your scene. As with the other painting and items, you will use your left mouse button to place.
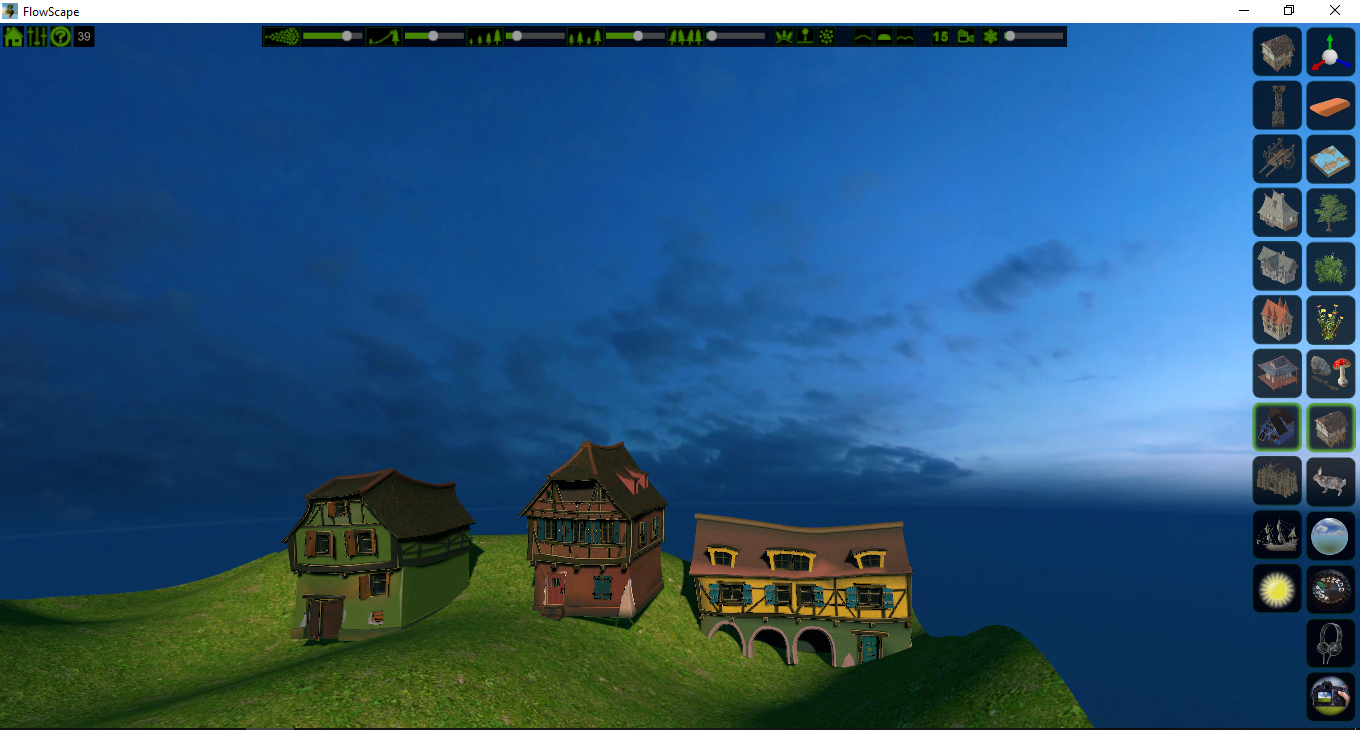
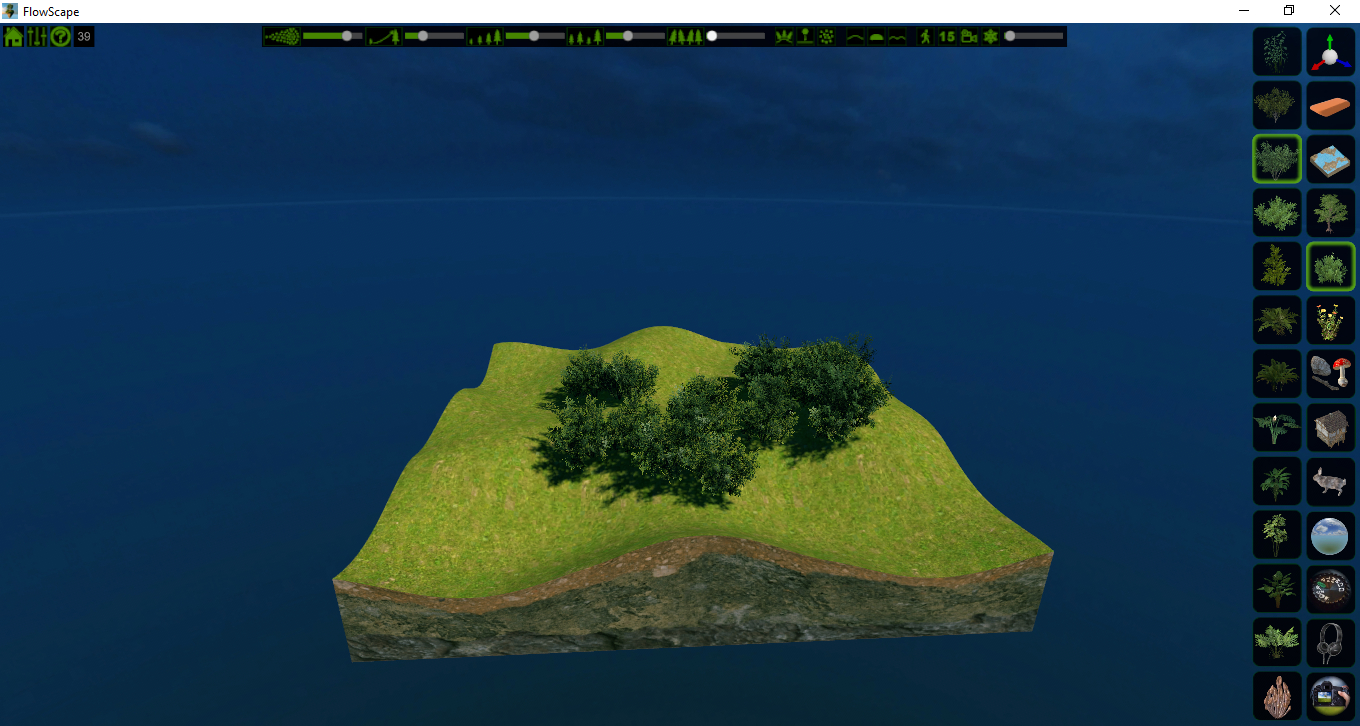
With this menu, things are a little bit different. When you select an icon, you will see a house or item pop up. Use your mouse wheel to scroll through a variety of choices. In the above image, all three houses came from the same selected icon.
Section 16: Side Toolbar - Natural Elements Menu
Natural Elements Menu
I wasn't quite sure how to differentiate labeling this menu button and the houses menu button so it made sense to call these Natural Elements because these are things that nature would put into a scene while houses and the like would be Man-Made Elements which you'll see next.

This is where placement becomes a little different. There are a few different options. First is to click and paint as normal. The next is single object placement as for the stone archway and mountains. The third is falling from the sky using physics which is how the small stones and branches will be placed in your scene. You can turn this off by toggling the drop physics button on the top menu.
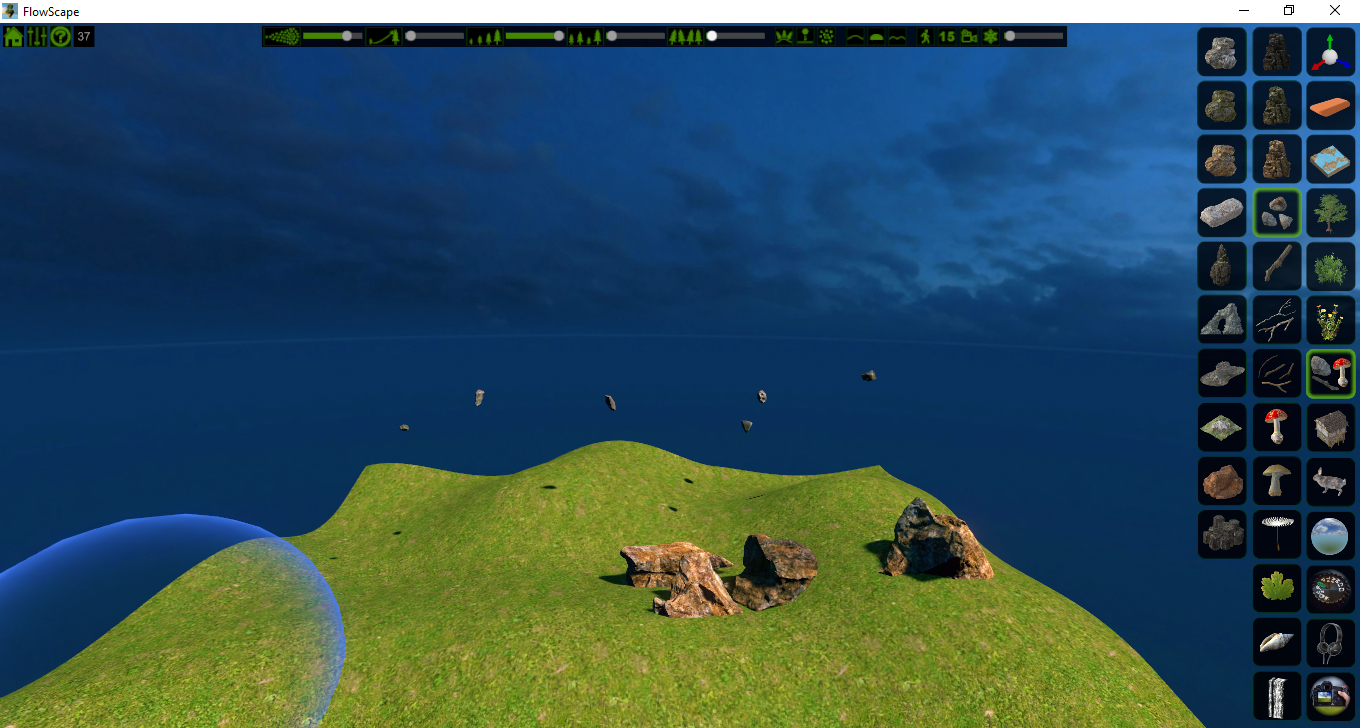
Here you can see the larger boulders were painted in while the small stones are falling using physics.
Section 15: Side Toolbar - Flower and Grass Menu
Flower and Grass Menu

By now, you should be comfortable with this control and know what to do. Select your grass or flower, hold the left mouse button down and paint where you want them to go.
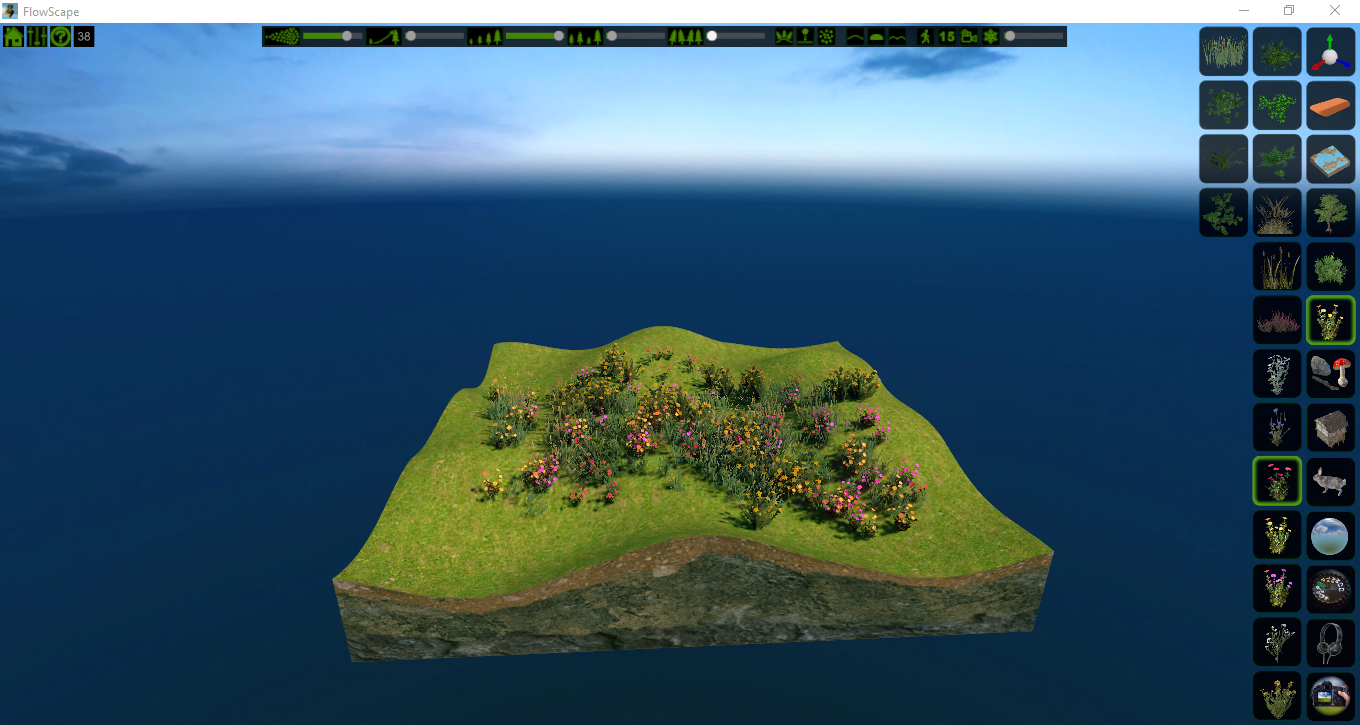
As a reminder, if you want to delete all of one type of object, select the icon and right click to remove it from your scene.
Section 13: Side Toolbar - Tree Menu
Tree Menu

This menu allows you to choose which types of trees you want in your scene. Want palms next to your fir trees? It’s completely up to you. Have fun and experiment.
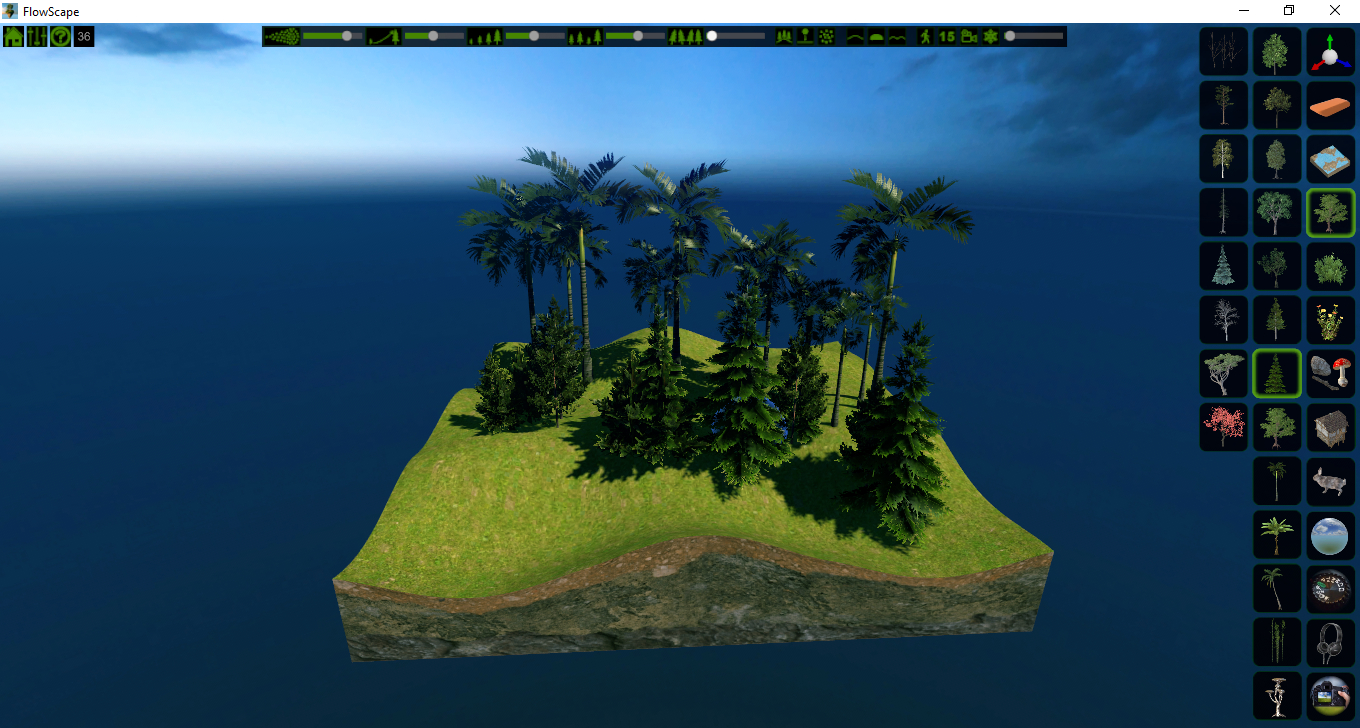
Select the tree of your choosing and then paint by holding down your left mouse button and moving your cursor where you want your trees to go.
Section 12: Side Toolbar - Terrain Sub-Menu - Paint Paths
Paint Paths
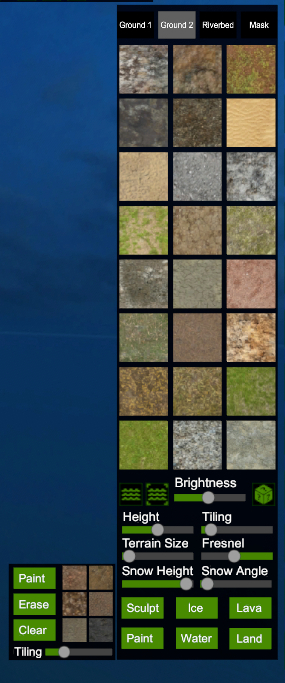
The paint option allows you to paint along the terrain, creating paths and roads into your scene. Click paint and then left click on your terrain to place your path. Erase will allow you to erase only certain parts of your path while clear deletes everything that’s been painted. You can switch to different path types by selecting one of the 6 options next to the buttons. You can only choose one path type for the entirety of your scene.
Section 11: Side Toolbar - Terrain Sub-Menu – Sculpt
Sculpt
I originally planned to put all of this information as part of the section covering the Terrain Selection, but this feels as though it should be its own thing.
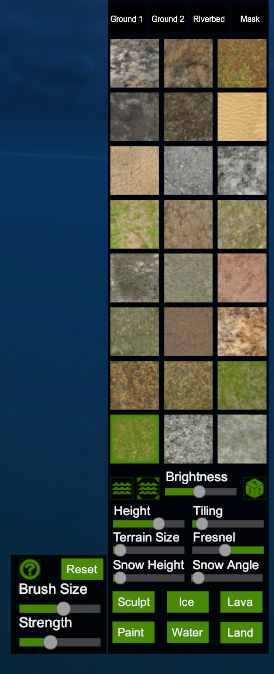
Click the Sculpt button and it will open this menu which allows you to use sliders to alter the brush size and strength of the sculpting. This can also be accomplished with a variety of mouse and keyboard options which will pop up if you hit the ? button in the circle.
They are as follows:
- Raise - Left Mouse Button
- Lower - Shift + Left Mouse Button
- Smooth - Ctrl + Left Mouse Button
- Increase Strength - Ctrl + Mouse Wheel Scroll
- Reset - Undo ALL sculpting. There is no verification pop up. Use wisely.
Section 10: Side Toolbar - Terrain Selection
Terrain Selection

This button will open the menu for terrains and options.

Pick the terrain that suits your scene. Next click on the slider control icon in the left column at the top to open the sub-menu that will let you choose ground colors, snow, paint, and sculpt options.
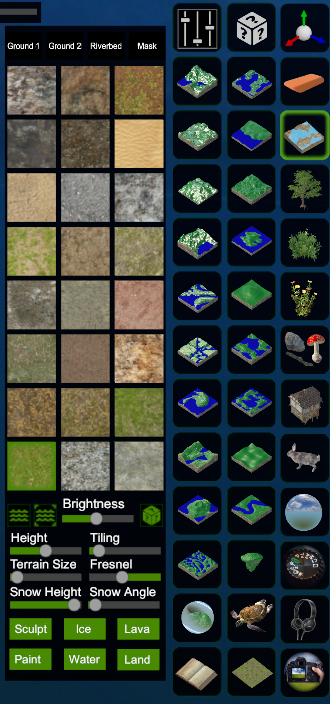
From here, you are able to select the size of your terrain, the height, whether or not it has water and if that water is just a box around the land or an endless ocean that goes off into the horizon. Fresnel will help you decide how reflective or transparent the water is. You can also choose the ground brightness, the tiling size which will give the impression of a large or small scene.
Section 9: Side Toolbar – Eraser
Eraser

Using this button allows you to erase multiple items at once. The red circle is your erase area. This can be made larger or smaller using the mouse wheel.
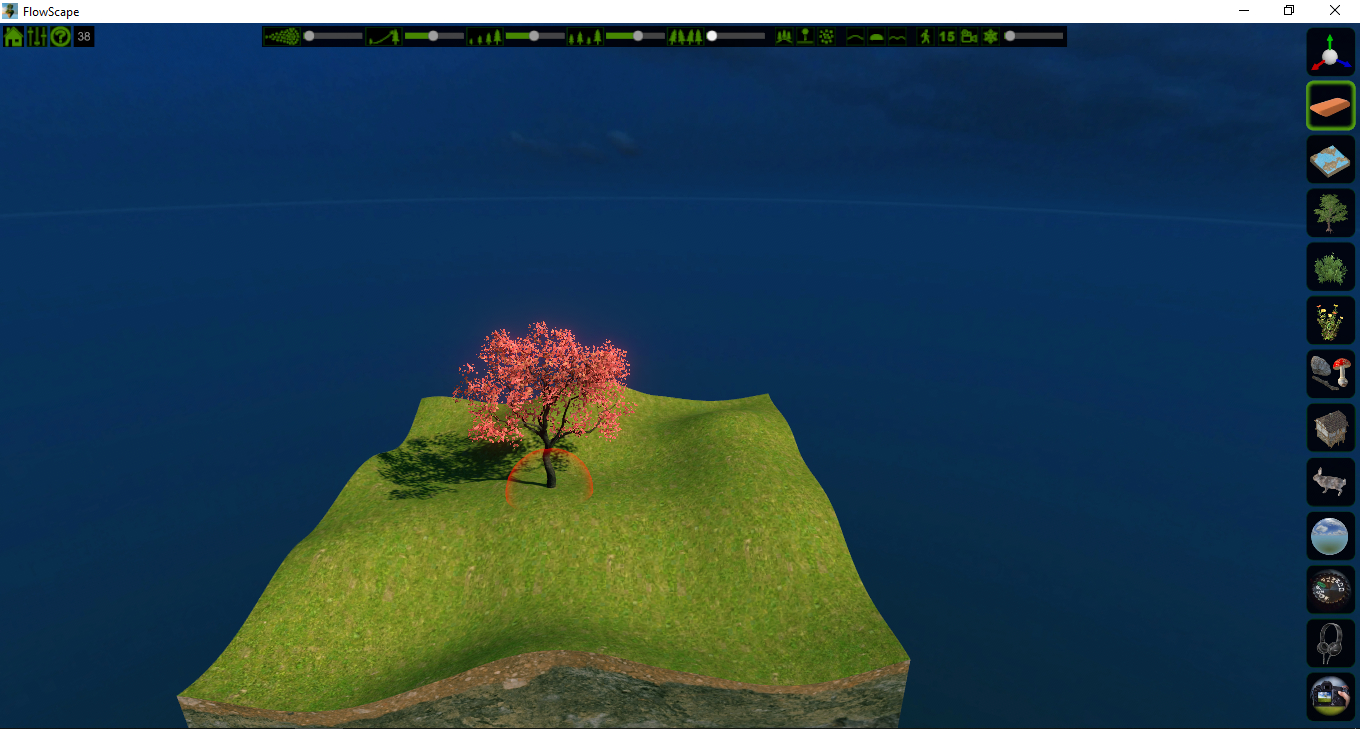
Helpful Hint: point your cursor at an object and press your L key to lock or unlock an item before you start editing with the eraser. It will save you a lot of grief later on.
Section 8: Side Toolbar - Transform Object

Transform Object

This is where you will be able to move, rotate and scale your objects. Once you’ve opened the Transform menu and selected the object you wish to change, you can quickly shift between move, rotate and scale options by pressing the 1, 2, or 3 number on your keyboard (not your number pad).
Move
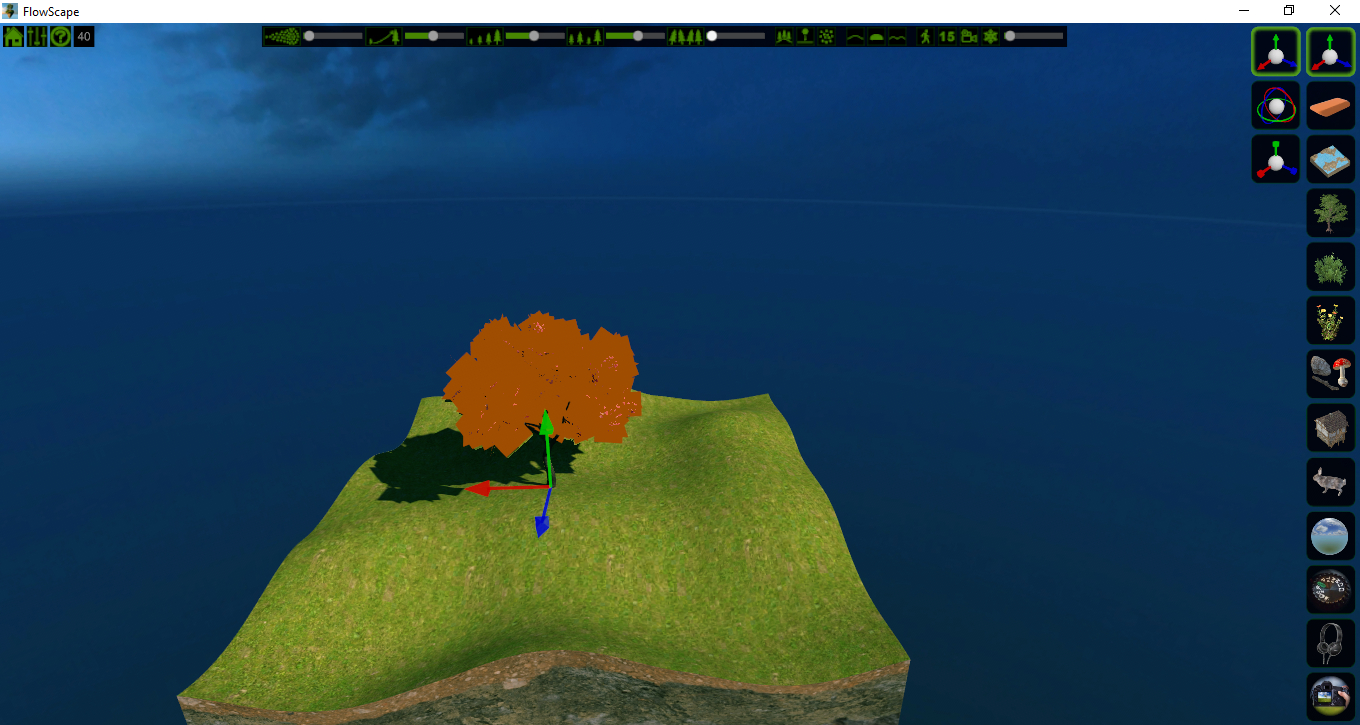
Select your object by left clicking. Then use your mouse to select the red, blue, and green arrows to move up, down, forward, back, left and right. If you want to move multiple objects at the same time, hold down the left shift key while using the left mouse button to select the items you want to move together. Use Alt and the left mouse button to deselect an item.
Rotate
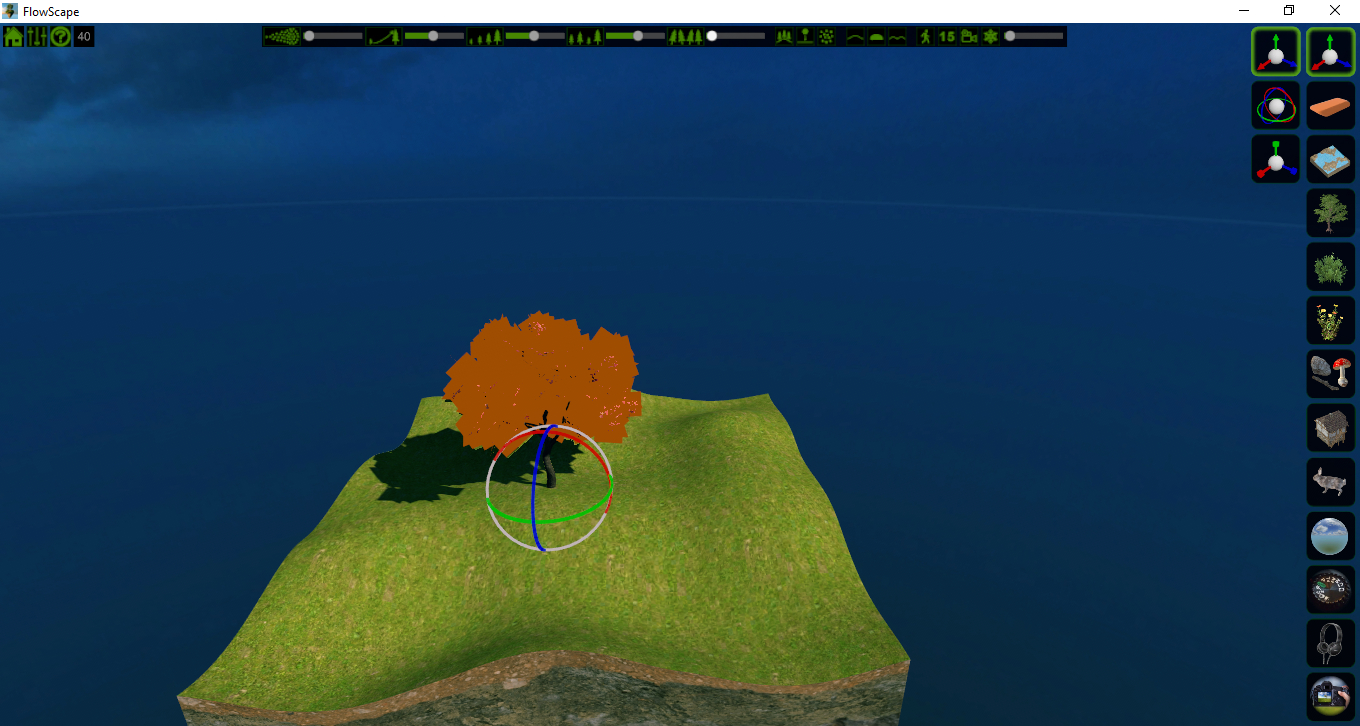
Again using your left mouse button to select your object, you can now rotate by using your mouse to manipulate the red, blue and green circles in 360 degrees.
Scaling
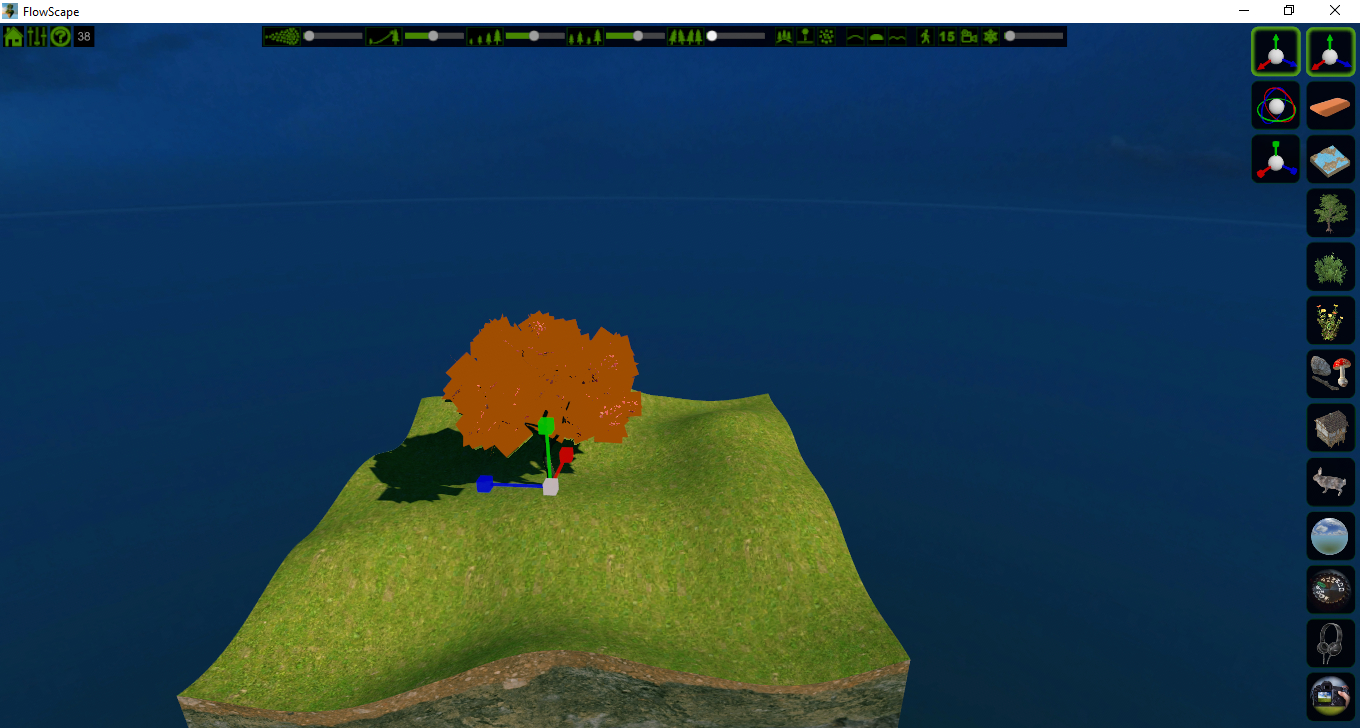
Once more, use your left mouse button to click and select your object. You can now resize the object. Use the white box to scale the entire object bigger or smaller and the red, blue and green boxes to scale only along that axis.
Section 7: Top Toolbar - Toggles and Selectors
Terrain Alignment Toggle

This toggle lets you decide if your objects grow straight up or if they follow the landscape. Trees tend to grow straight upwards while ground cover such as bushes, grasses, and flowers will follow the terrain.
Physics Drop Toggle

This toggle will allow you to choose whether certain objects (such as small stones and branches) will fall randomly using in-game physics or if you paint them on the ground the same as you do with the trees and grasses.
Procedural Generation Toggle

This toggle opens a menu that places objects randomly around your landscape. The next image shows your menu set up.
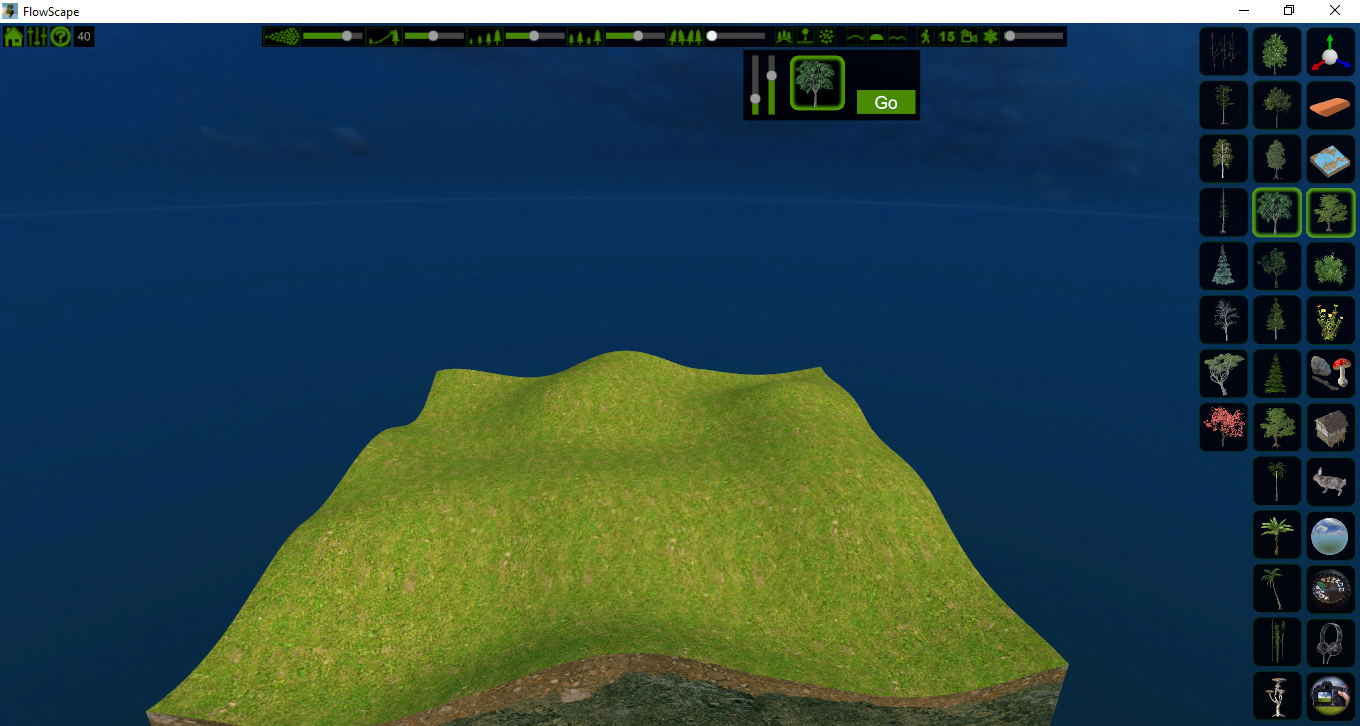
Press “Go” to start the automatic placement and “Stop” to end the process. You can switch objects by selecting them from the side menu as you normally would and this will change what is being generated in your scene. You can also use any of the other sliders at the same time to change the size and pitch of your objects while FlowScape puts them in for you.
Layer Toggles

Next we have the layer toggles. This will help you choose whether you paint on the land, rocks and water. It is helpful for when you don’t want items growing in a certain area, such as grass in the water or on the rocks. Turn any of the three on and off by simply left-clicking any of the options.
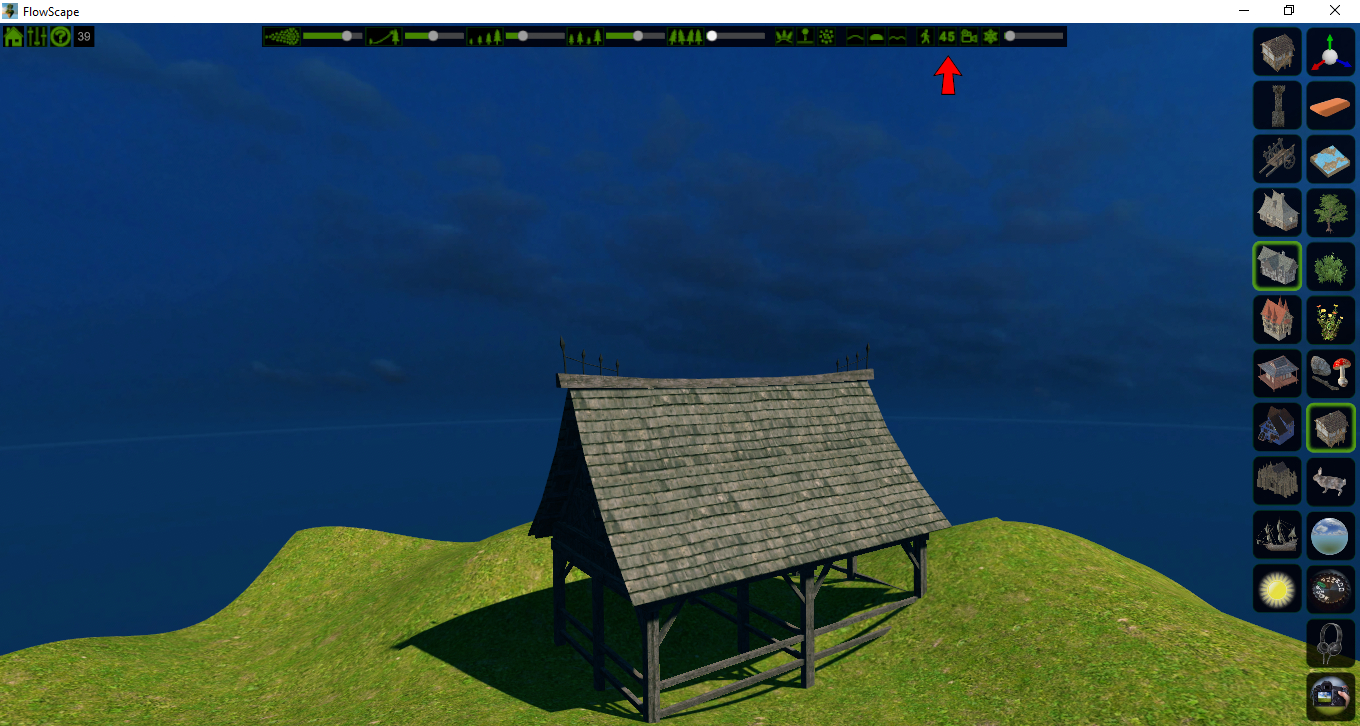
First Person View Toggle

This toggle gives you the option to look and walk around your scene using the WASD or arrow keys on your keyboard.
Angle Snap Selector
[image 7-7.jpg]

While you are placing objects in your scenes, you can use Shift + mouse wheel to rotate items before they are set down. This lets you set the angle at which the rotation happens. You can also use Alt + mouse wheel to size up or down before placing.
Video Recorder Selector

This opens your video recording menu which looks as follows.

Most of these buttons are pretty self explanatory. If you want to record a scene, press Start. Move around through your scene as you like with the WASD and other movement buttons. When you’re done, press End and if you want to play it back, press play. Speed lets you decide how fast your playback goes.
That’s it for the top toolbar. Now you know what they are and what they do!
Section 6: Top Toolbar - Control Sliders
Flow Control Slider

This slider is designed to let you choose how fast things come out of your paintbrush (mouse cursor). Slide it all the way to the left for placing single objects or all the way to the right for a max of 60 objects at a time.
Size Control Slider

This slider will help you choose how big or small you want your objects to be. Slide to the left for smaller and to the right for larger. This helps in creating illusions of distance.
Growth Control Slider

This helps you decide how fast you want your objects to become full size. Slide left for instant growth and right for slower growth.
Size Variation Control Slider

This slider helps you decide how much variation in sizes you want. Slide left for keeping things approximately the same size and slide right to offer a multitude of sizes.
Lean Variation Control Slider

Do you want your objects standing upright or should they lean a bit? This slider will help you determine that.
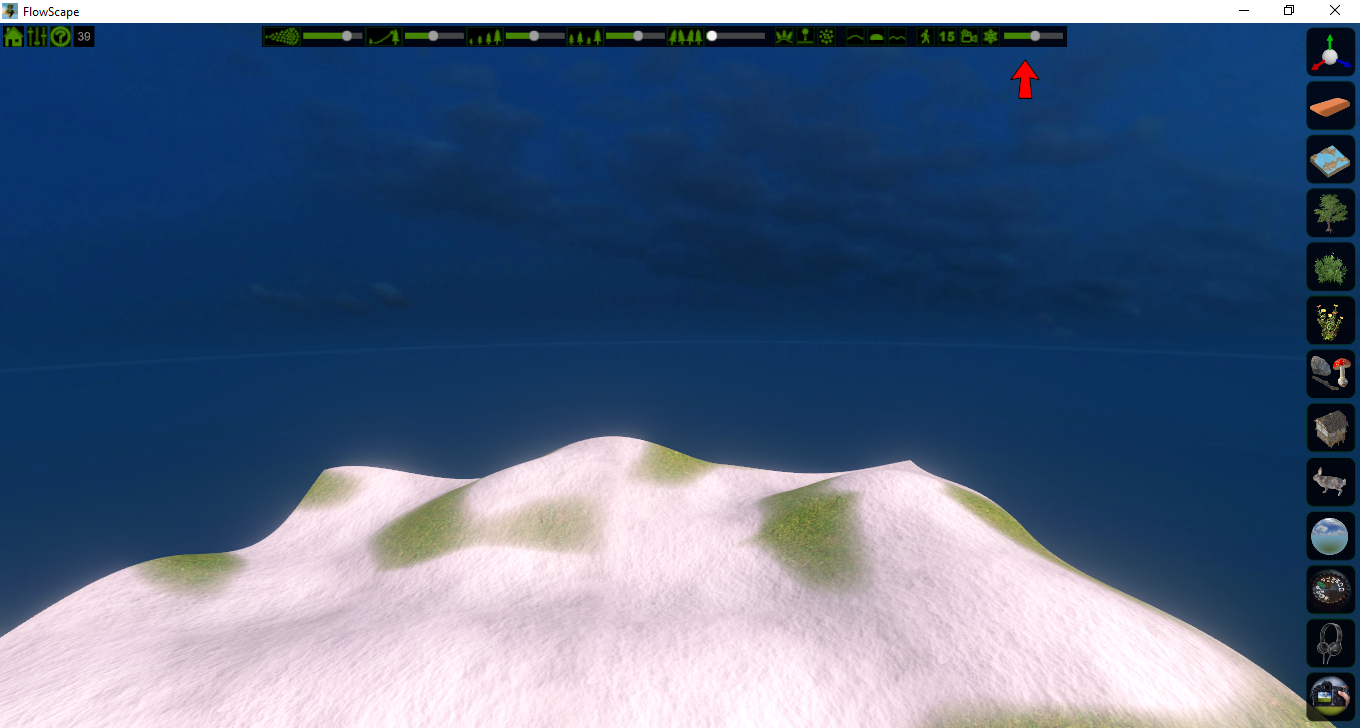
Snow Slider

This slider allows you to place snow on your terrain and how much of it you want. There are additional snow controls on the side toolbar under the Terrain options. We’ll talk about those in a bit.
Section 5: Top Toolbar – Help
Help

Almost everything presented in this guide is also available here while you’re in the game. No need to leave the program for this guide. Show that button some love! It’ll really help you out.
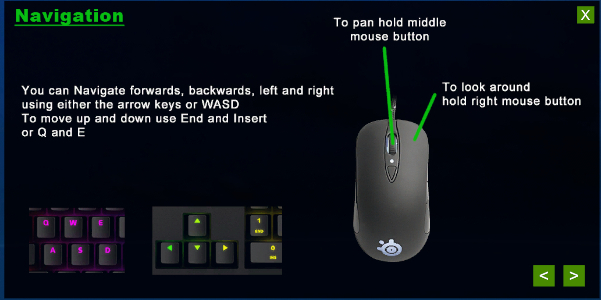
Use the < and > buttons in the bottom right to scroll through all of the help features.
Section 4: Top Toolbar - Camera Controls
Camera Controls

Camera Controls are located right next to the home button. Click this button to open the menu.
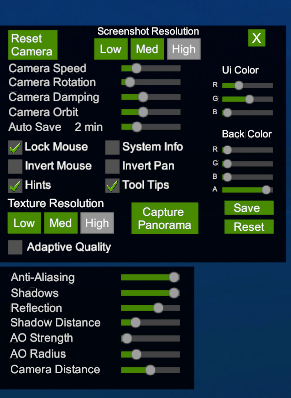
- Reset Camera – Use this button to reset your camera angle to its original position.
- Screenshot Resolution – Set the resolution of your images. Options are Low, Medium, and High.
- Texture Resolution – Set the resolution of your textures.
The following controls are all sliders and can be adjusted to suit your taste:
- Camera Speed
- Camera Rotation
- Camera Damping
- Camera Orbit
- Auto-save
- UI Color
- Background Color
The best way to learn these controls is just to experiment and play with them until you get a set up that you like.
Section 3: Top Toolbar - Home Menu

Will be working from left to right on the Top Toolbar to explain what each button and slider does. First we start with the Home Button.
Home Menu

It is positioned at the upper left side of your screen. It’s the same sort of thing that just about every program has with a few small differences. The following shows you how it looks.

- New will start a whole new scene as if you were just launching FlowScape fresh.
- Load will bring up your menu of saved games that can be loaded in and you can continue working right where you left off. Just don’t forget to Save before quitting! There is also now an autosave feature that you can enable in the camera controls. Make sure you have that turned on!
- Save will bring up your menu of save slots so you can pick an empty one and put your scene in there for safe keeping. There are currently 3 pages of slots to save games in.
- Credits will bring up a window of people who helped Pixel Forest bring FlowScape to life with links to finding them online. Give them a look.
- Map will bring up a menu of options for creating a maps for RPGs. There are options for both Grid and Hex style overlays for printing and a slider option for sizes from 1 square/hex up to 60 square/hex. This is also where you can decide on what size of image you’d like to export. Currently the options are 1X, 2X, and 4X which translates into 2k, 4k and 8k sized images. There is also an option for Arkenforge images.
- Import will bring up a menu of options for importing skyboxes and .OBJ items into your scene with options for scaling, rotating and placing the object as well as deleting. Two of the most common issues with Importing are as follows: .OBJ, .MTL and texture files all need to be located in the same folder. Secondly, the material and texture files can not have spaces in their names.
Many thanks go to Discord channel user JS who was good enough to share these import tips on #import-help and allow me to recreate them here. - Social - Brings up a menu of social media locations where you can find FlowScape communities and users. Click on a button to open an internet browser tab to the selected social media site.
- Quit will end the program.
Section 2: Keyboard and Mouse Controls
- Move Up – E or Number Pad 1 or press mouse wheel and move cursor upwards. For some, End key works as well. I couldn’t personally get End to work for me.
- Move Down – Q or Number Pad 0 or press mouse wheel and move cursor downwards. Also the Insert key is supposed to work as well. Again, my keyboard wouldn’t do it.
- Move Forward – W or up arrow key
- Move Backward – S or down arrow key
- Move Left – A or left arrow key or press mouse wheel and move cursor left
- Move Right – D or right arrow key or press mouse wheel and move cursor right
- Look Around – Hold right mouse button and move your cursor in the direction you want to look.
- Move Camera Faster - Hold Tab while using your mouse to move.
- Paint – Select object type and press left mouse button to start placing.
- Undo Paint – Backspace or left CTRL + Z
- Redo Paint - Left CTRL + Y
- Delete All of Certain Object – Hover pointer over menu image button and right click
- Delete All Contents of Scene – Right CTRL + DEL keys
- Save Camera Position - Pg Up
- Restore Camera Position - Pg Down
- First person View - R or Top toolbar toggle
- Hide/Show UI (User Interface) - Spacebar
- Lock/Unlock Object - Point cursor at object and press L
- New Random Terrain - P or press ? box in Terrain options menu
- Next Music Track - press > key
- Slow Motion - press right CTRL
- Rotate Sun - Number pad 2 4 6 8 or use controls in Photo options on side toolbar
Section 1: Main Menu
Getting In - First thing’s first. You gotta get in to play, right? Double click the FlowScape Icon on your desktop (or press Play in your Steam Client) and you’ll be greeted with the Main Menu. It should look something like this.
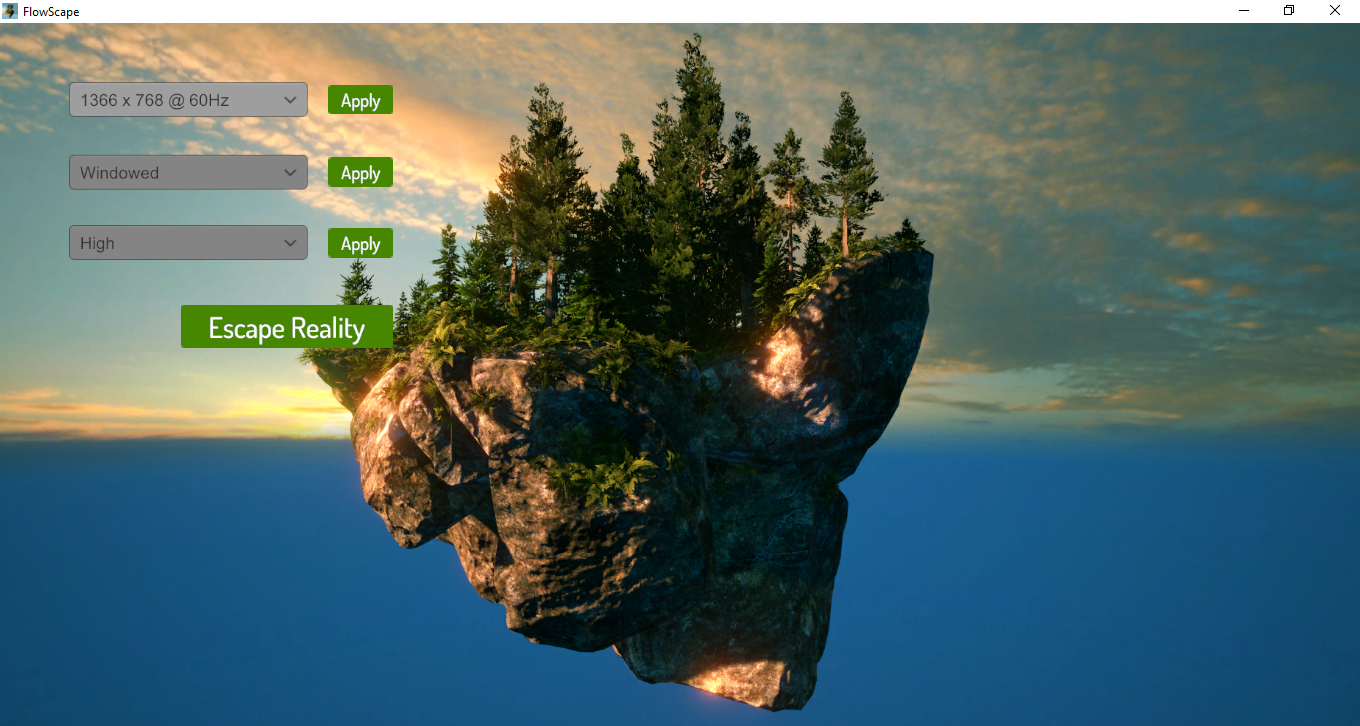
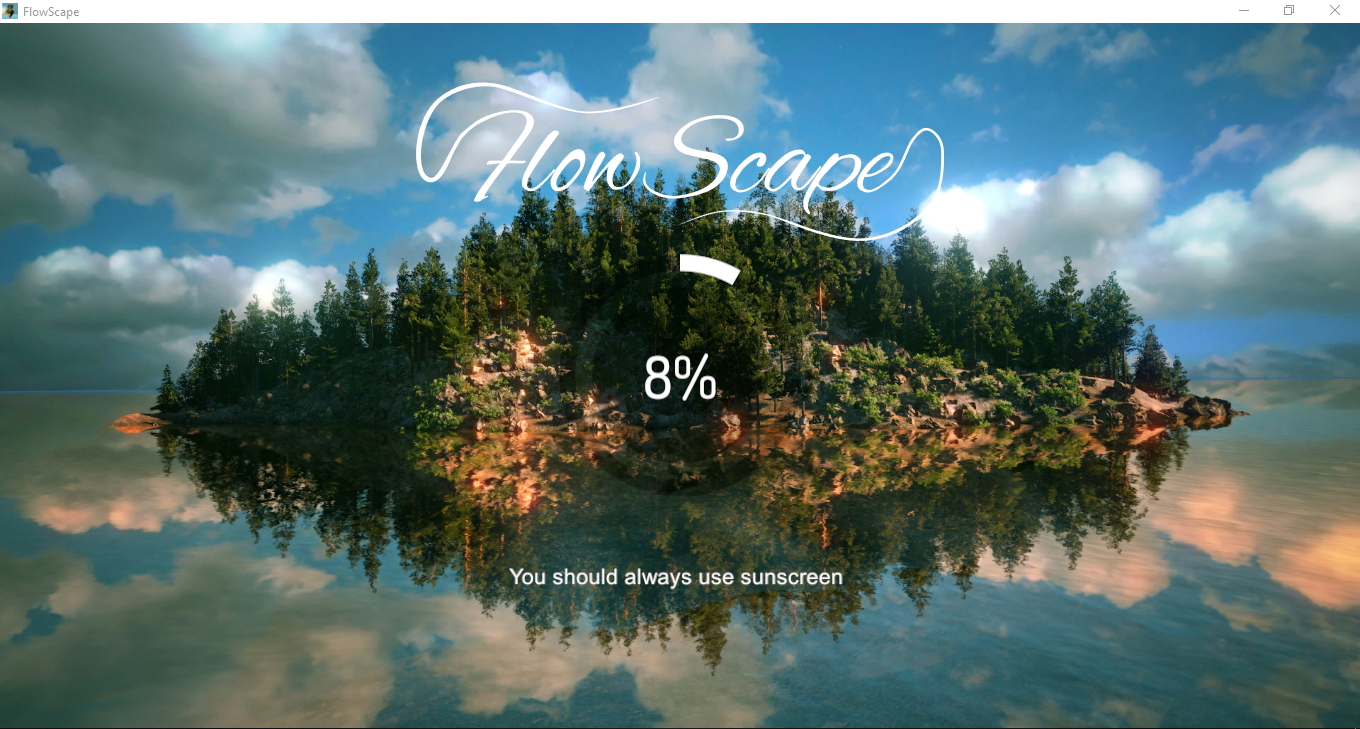
Making Choices - From here, you can decide your screen size, whether you want to play it Full Screen or Windowed and your resolution setting to start. Then all you need to do is click that nifty Escape Reality button. You’ll get a loading screen with helpful tips (some of which have nothing to do with the game but are good life advice).
Welcome to my Guide to FlowScape Controls. Sometimes figuring out controls on a new game can be tough and a little disheartening. Hopefully my guide will help you navigate through the FlowScape UI so that you can make fun scenes and maps. As a note, you can find all of this information in the Help Guide within FlowScape itself if you get stuck while in game.
The images in this guide are purposely devoid of the enchanting scenic works that can be found in FlowScape. I wanted people to focus on the controls more than the imagery. Through the next several posts in this Topic, I will be laying out each control and what they do.


